Eggplant Meatballs

Eggplant Meatballs

Eggplant Meatball Recipe

Add a healthy spin on your favorite Italian dish by using hearty eggplant in lieu of meat to make these delicious, flavorful “meatballs”. If you are not regularly eating eggplants, you should consider doing so. This is one vegetable that has no shortage of health benefits and this eggplant meatball recipe is the perfect place to start!
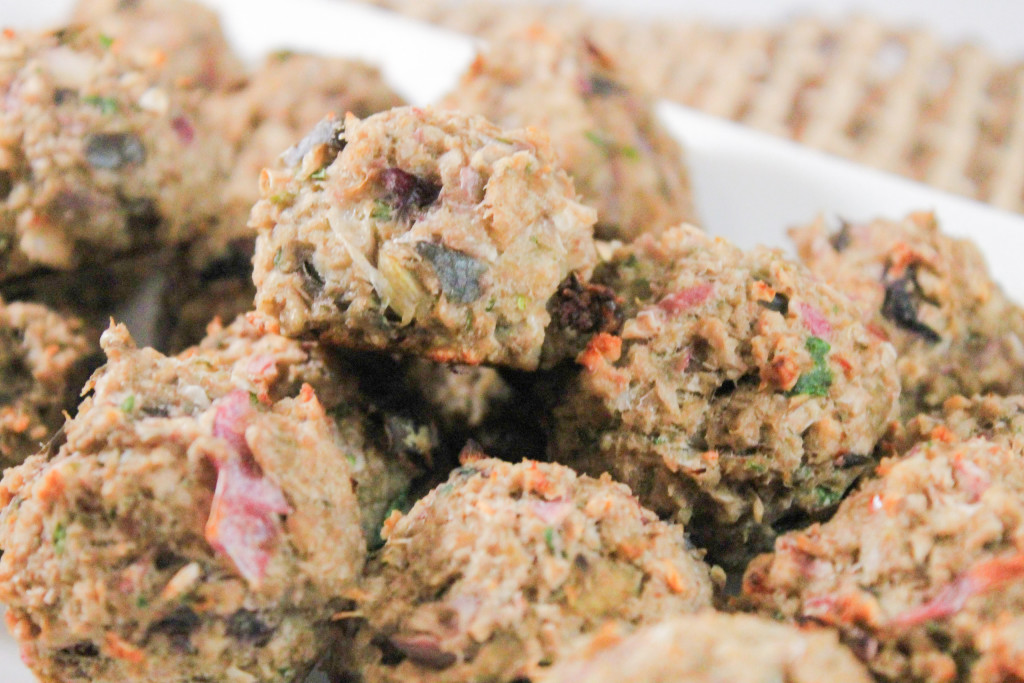
 

Eggplant Meatballs

Eggplants contain many different vitamins such as Vitamin C, Folate, B Vitamins, and Vitamin A, to name a few. These vitamins are important because they help improve your body’s overall health, boost your immune system, and can even help improve resistance to various diseases. You’ll also find Phosphorous, Calcium, Magnesium, and Potassium in eggplants. These minerals are known to help prevent arthritis, osteoporosis, and heart disease. Last but not least, eggplants are an excellent source of Dietary Fiber. Consuming foods with Dietary Fibers are good for you because they help you feel full after a meal, keep your digestive system working properly and protect against colon cancer. At 35 calories per cup, eggplants are one veggie you can’t help but love! 
 

Eggplant Meatballs

True story- when I first made these my husband walking into the kitchen and asked, “why are you making meatballs”. For those of you who are not aware, I do not eat meat. That being said, I do eat fish (there’s no way I could stay away from sushi) and I do cook meat, but only for others to enjoy.

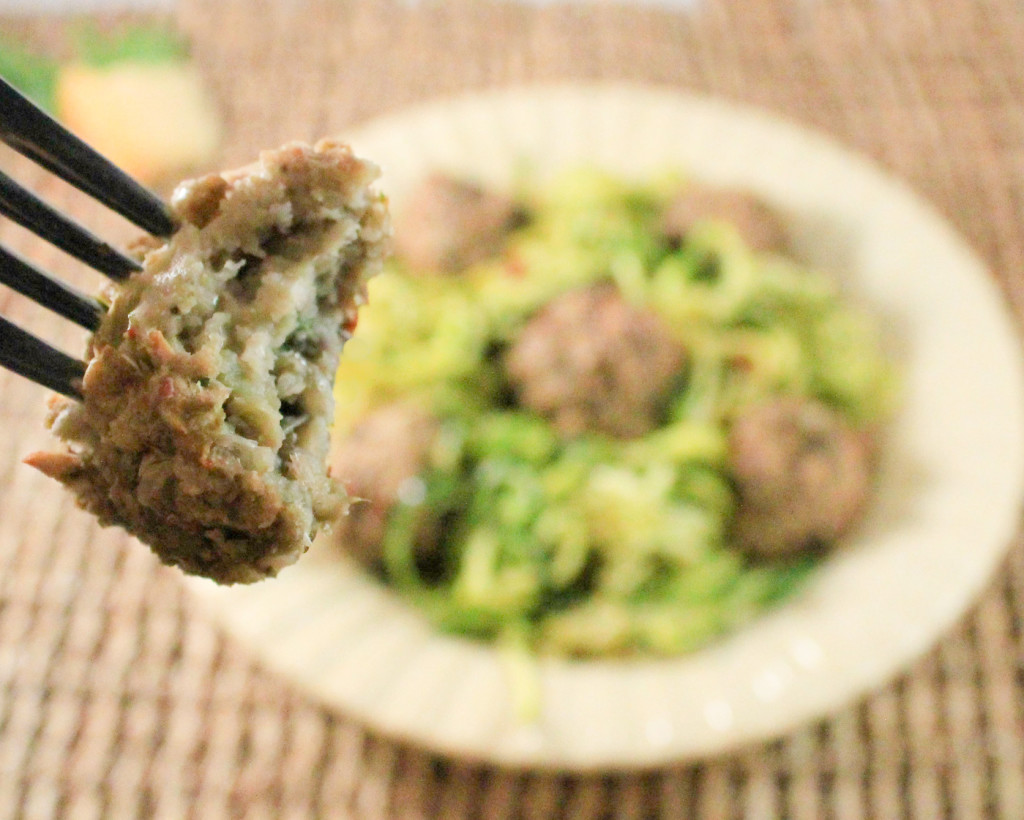
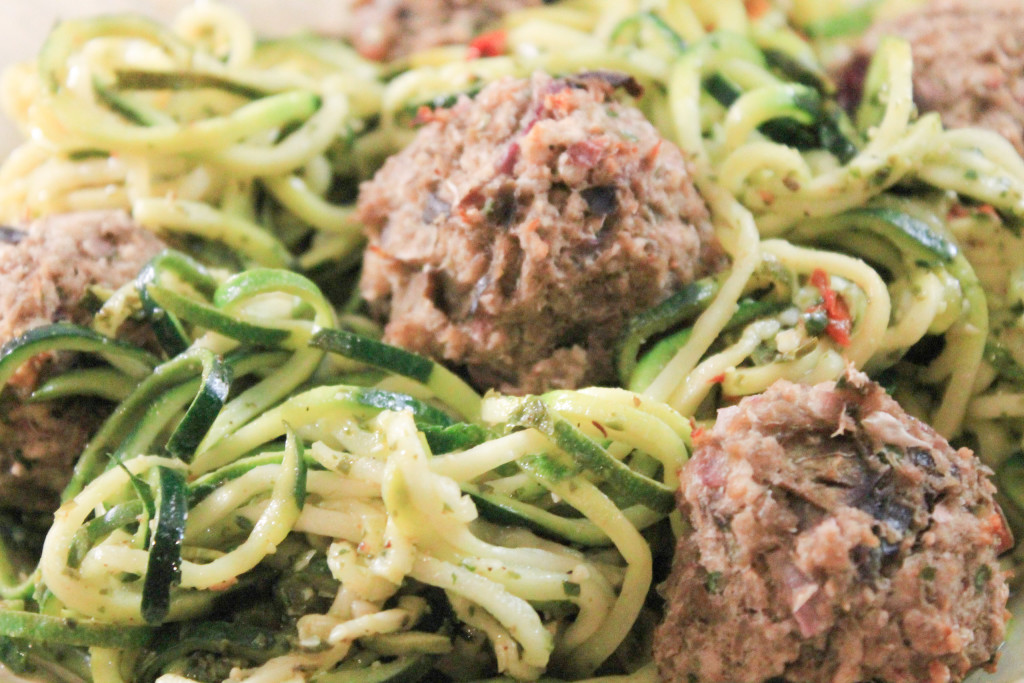
When I told him what I was making, eggplant meatballs over my favorite zucchini noodle recipehe seemed a little confused. He was taken aback by the fact that I was using eggplants to make “meatballs” and remained skeptical, wondering how a veggie-on-veggie dish was going to fill him up.  
Eggplant Meatballs

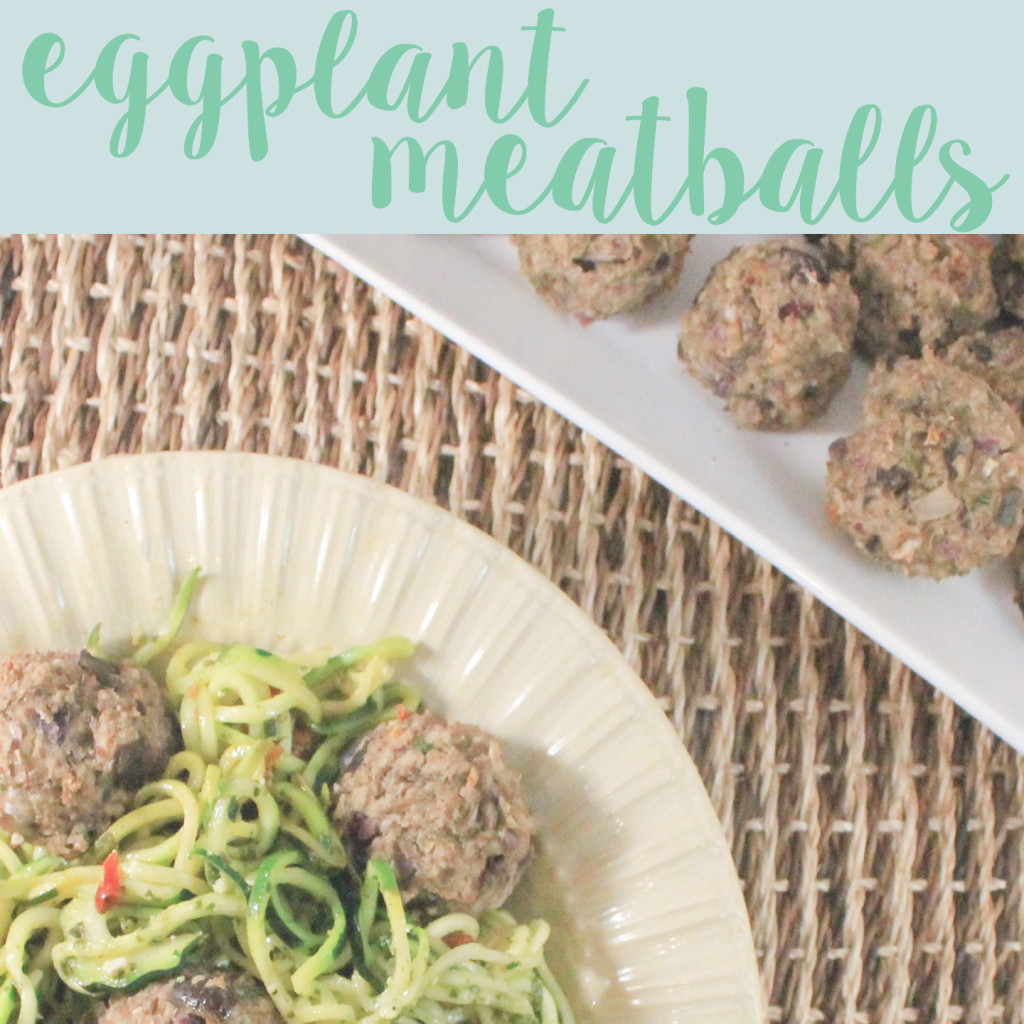
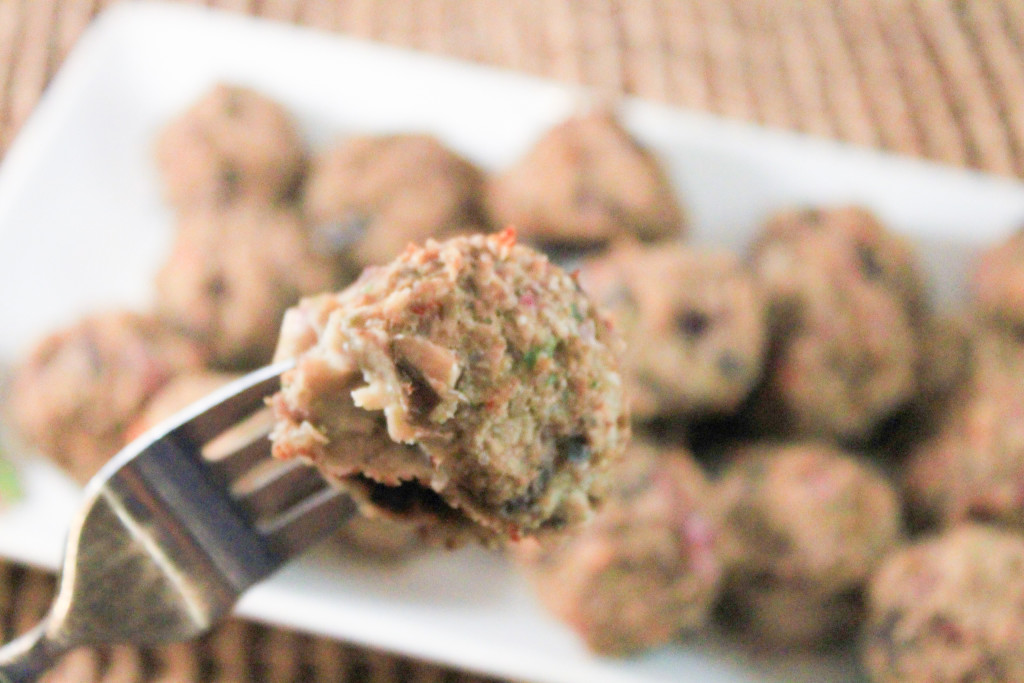
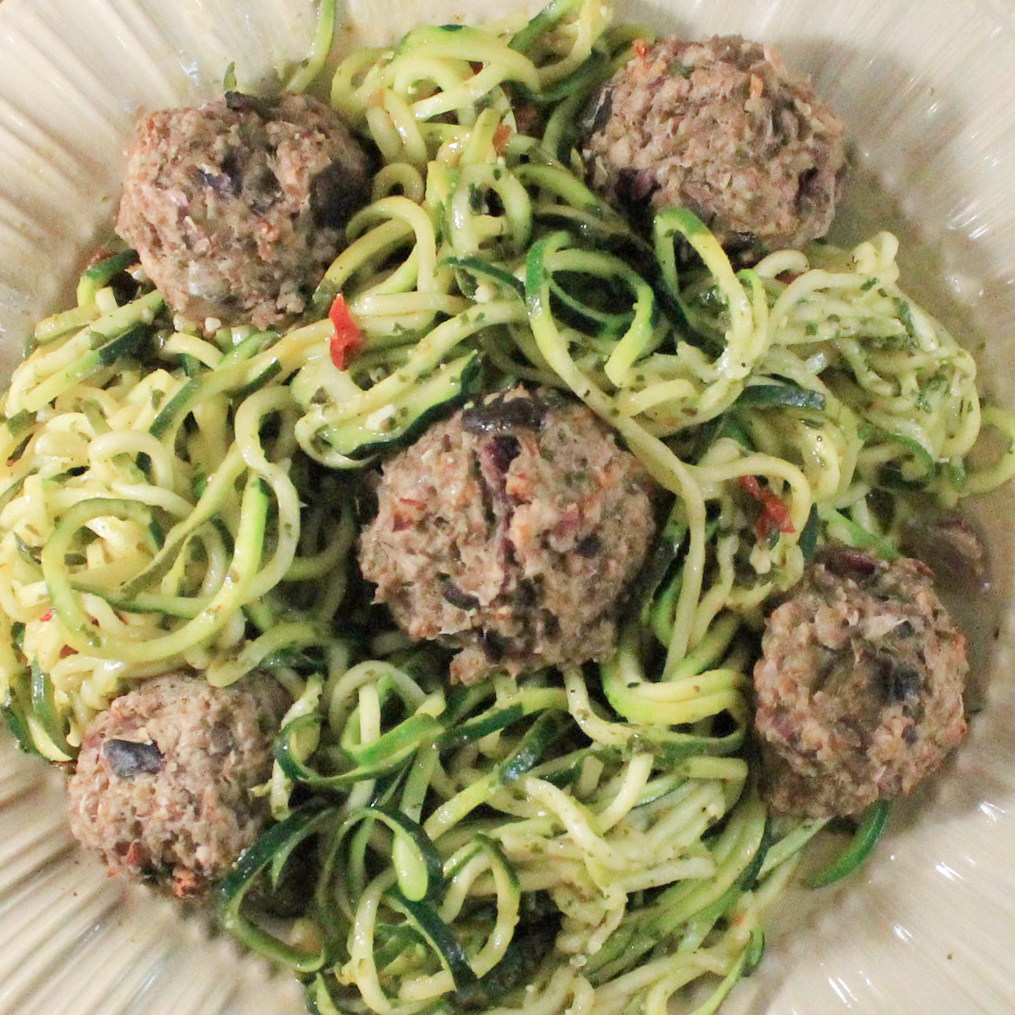
I have to be honest, it did take a little bit of convincing him that  “no, these will not taste like rubber”, “yes, you will like them”, and “no, I’m not making you eat tofu”. Whether he believed me or not, I guess I will never know. He was a trooper and helped me roll the steamy eggplant concoction sitting in my food processor into the delicious “meatballs” pictured below. 
Eggplant Meatballs

Once your “meatballs” are arranged on a cookie sheet, pop them in the oven for 20 – 30 minutes. As these cook, they should change color and turn a darker shade of brown and the outer shell should become firm, but not burned. If you can stick a fork through them while they’re still in the oven, let them cook a little bit longer. You should expect the very bottom of your meatballs to be darker and crispier than the tops. Don’t worry- this is perfectly normal! The non-stick cooking spray you sprayed on your foil lined cookie sheet is the culprit. 
Eggplant Meatballs

Personally, I love serving these over zucchini noodles. My Favorite Zucchini Noodle Recipe is perfectly timed with how long it will take these “meatballs” to cook in the oven. Start cooking your zoodles immediately after you put your “meatballs” in the oven to avoid waiting around or snacking before dinner. This recipe is posted on my blog.

If you want to mix it up a little and incorporate these “meatballs” into other dishes throughout the week, I also enjoy eating these with whole wheat pasta (any kind) or over a dark leafy green salad with fresh tomatoes and quinoa. I’d love to hear what types of dishes you paired your eggplant meatballs with!

[yumprint-recipe id=’36’]Fabulous recipes by Mandi at godsavethequinoa.com

My Favorite Zucchini Noodle Recipe

My Favorite Zucchini Noodle Recipe

My Favorite Zucchini Noodle Recipe

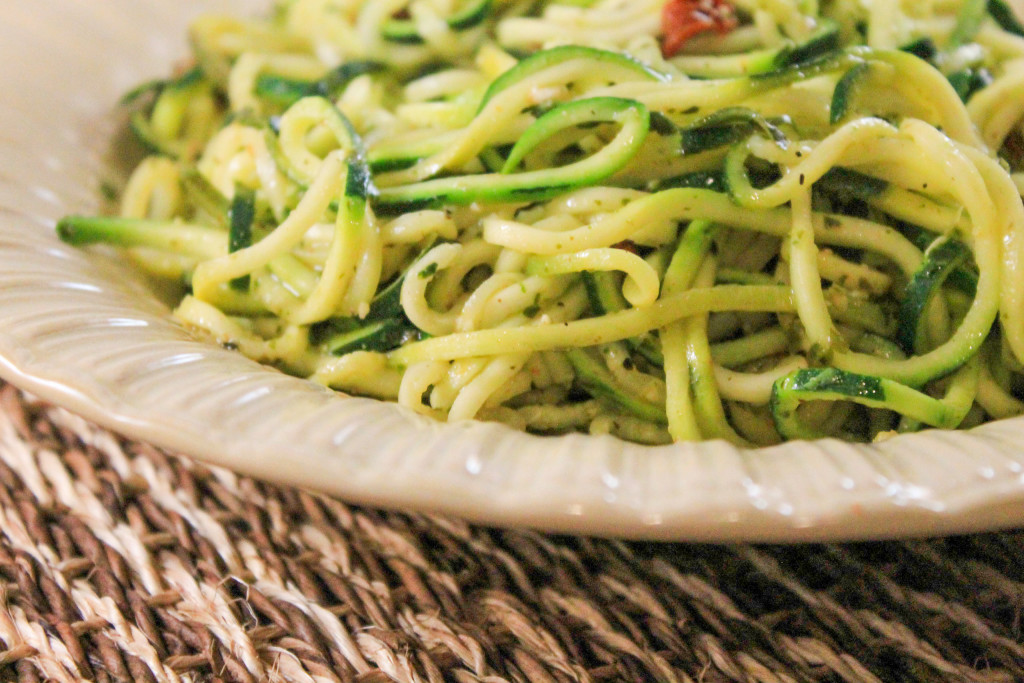
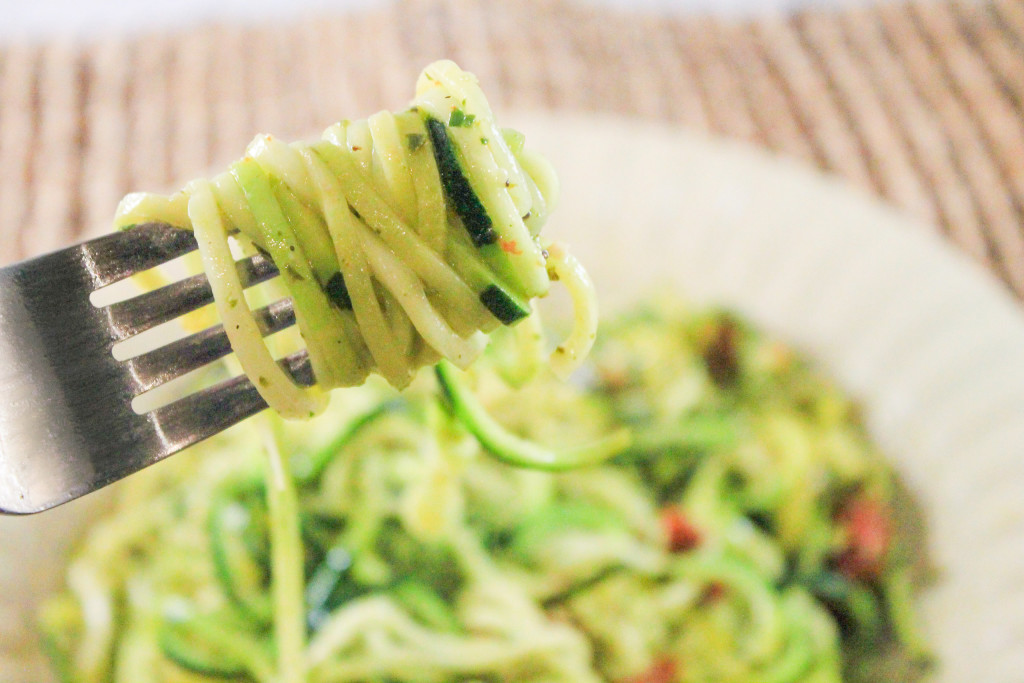
Everyone has their favorite “go-to” recipes when they’re not quite sure what to make. Today I’m going to share one of mine. My Favorite Zucchini Noodle Recipe can be made in less than 20 minutes and served with any kind of fish or meat. 

I feel like I say this a lot, but this recipe is SUPER easy to make. If you’re just starting to learn how to cook, this is the recipe for you! After making this a couple of times, you won’t even need to look at the recipe, I promise! 

If you don’t have a spiralizer, go and get one… NOW! A Spiralizer is an excellent tool to have in your kitchen… and an inexpensive one as well! If you do a little searching (gotta love Amazon Prime) you should be able to find a great spiralizer for about $40 or less. I absolutely LOVE using my spiralizer and can’t wait to share all of my spiraled creations with you! For those of you who were wondering, these Zucchini Noodles, or “zoodles”, were the first thing I made when I got mine! 

My Favorite Zucchini Noodle Recipe

I always keep the “key” ingredients of sun dried tomatoes, basil pesto, lemon juice, red pepper flakes, and salt and pepper fully stocked so I can whip this up when I’m not quite sure “what to make to go with XYZ”. These Zucchini Noodles are the perfect base for any type of fish, chicken, meatball, veggie meatball, etc. The options are endless, and this is why its one of my favorites! 

Simply spiralize your unpeeled zucchinis. NOTE: I like to bad the excess water out of mu zoodles by wrapping them in a paper towel before cooking. This will prevent excess water/juices from collecting in your skillet.  

Heat EVOO in a skillet and add in your zoodles. Season zoodles with salt, pepper, paprika, and lemon juice and cook for about 5-7 minutes on medium low heat. When zoodles begin to become soft and translucent add in your sun dried tomatoes and basil pesto. Stir on low heat for a few minutes until everything (especially basil pesto) is well combined. 

When ready, remove from heat, top with fish, meat, or veggie meatball of your choice and voila, dinner is served! Now sit back, relax, and enjoy! 

My Favorite Zucchini Noodle Recipe


[yumprint-recipe id=’35’] 
Fabulous recipes by Mandi at godsavethequinoa.com

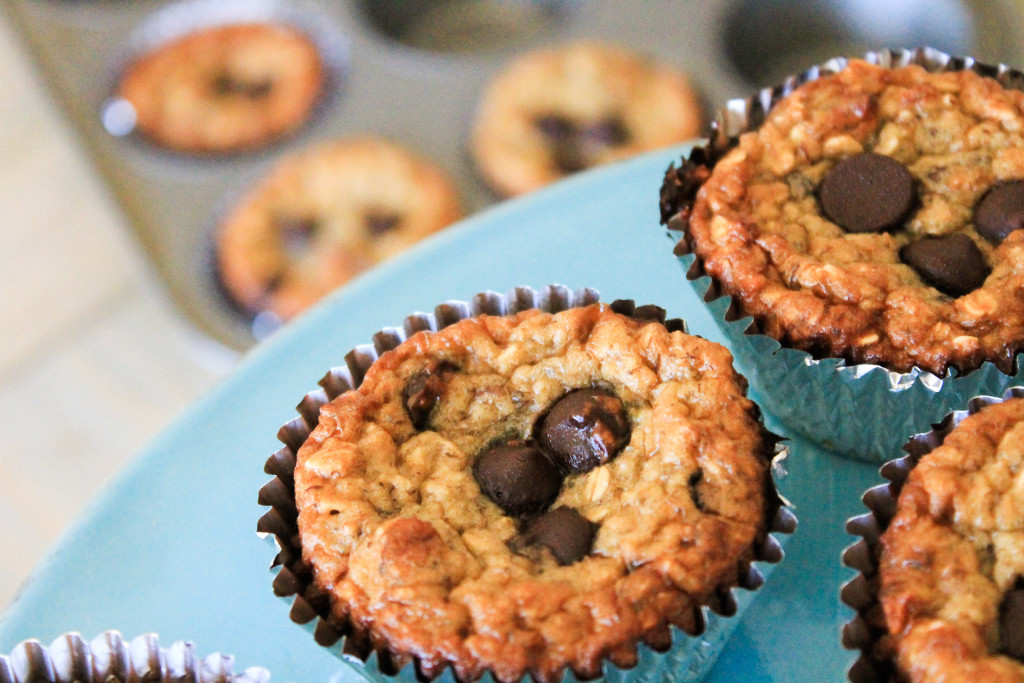
Skinny Greek Yogurt Banana Muffins

Skinny Greek Yogurt Banana Muffins

Greek Yogurt Banana Muffins Title Page_GSQ

Hello! I hope you’re excited about this Skinny Greek Yogurt Banana Muffin Recipe! I sure am!

I know it’s been FOREVER since I last posted! You see, I’ve been a little busy lately. Since my last post in April I’ve finished two half marathons, two triathlons, planned a wedding, bought a house, started a new job at work, went on my bachelorette party in Mexico, moved into the house we bought, GOT MARRIED, went on my honeymoon to Costa Rica, traveled all over Texas to celebrate our first holiday season as newly weds with friends and family, and finished moving into the house we bought. It feels good to FINALLY have free time again!

Don’t worry, during all of the madness I continued to cook and come up with new recipes. Let’s be honest, there was no way to keep me from using my big new kitchen! My recipe book is full of new creations and I cannot wait to share them with you! Before I share this delicious and very healthy Greek Yogurt Banana Muffin Recipe without, I would be remiss if I didn’t share some of my favorite wedding photos! THANK YOU to the wonderful Beth McElhannon Photography for capturing all of these perfect moments! 

[envira-gallery id=”1307″]
Such fun memories!

Ok, I’ll stop fantasizing about the best day ever and share this recipe with you! 

First of all, this recipe is SUPER easy to make. In fact, you probably have most of the ingredients laying around your house! I love this recipe because all of the ingredients are natural and wholesome. Because there is no oil, flour, or butter in these muffins you actually feel good after eating one of these bad boys! 

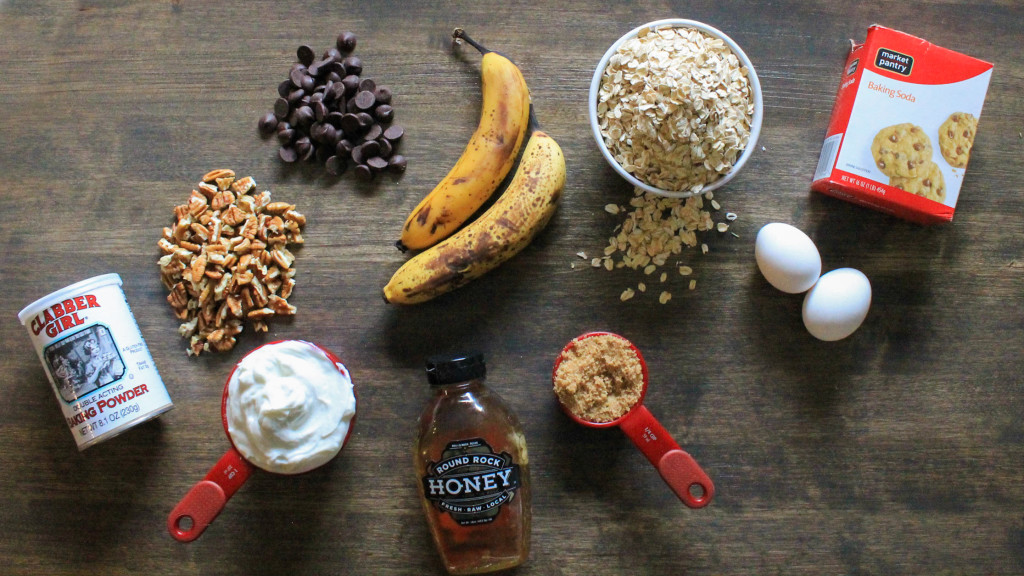
Skinny Greek Yogurt Banana Muffins- ingredients

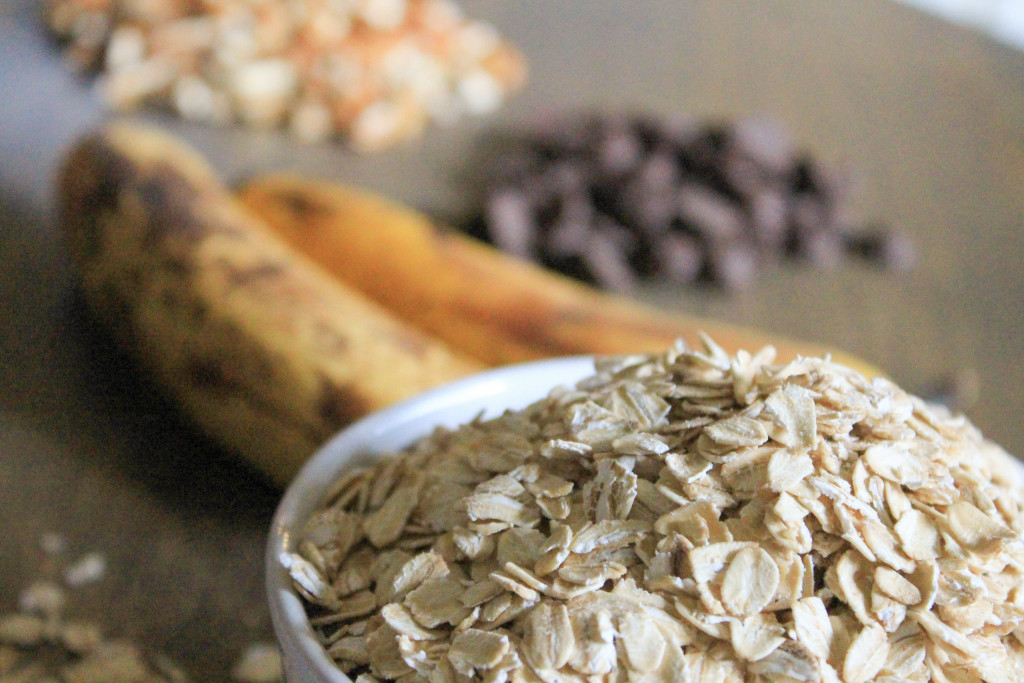
The batter is made from oats, greek yogurt, and “old” bananas. Just because a banana looks black, bruised, and feels extra soft does NOT mean you should throw it out! In fact, you should wait until your bananas show these characteristics before making this recipe. In my opinion, the older the banana, the better. While this isn’t 100% necessary, I highly recommend it (as long as your banana is not rotten). On a side note, you should not use green or unripened bananas to make this recipe. The batter just won’t be the same. 

Skinny Greek Yogurt Banana Muffins- Oats and Bananas

VERY IMPORTANT! If you don’t read anything else in this post, please read this paragraph. The lack of oil in these muffins WILL cause them to stick to paper muffin liners. I learned this the hard way after my first attempt making these. I basically had to perform surgery to remove the paper liners from the sides of the muffins before eating them. YOU MUST USE FOIL MUFFIN LINERS!!! I use the Reynolds Foil Baking Cups. YES- you should remove the paper liners! These are only used to prevent the liners from sticking together in their package. You should also grease the muffin pan, as well as the insides of the liners with non-stick cooking spray.

Skinny Greek Yogurt Banana Muffins Batter

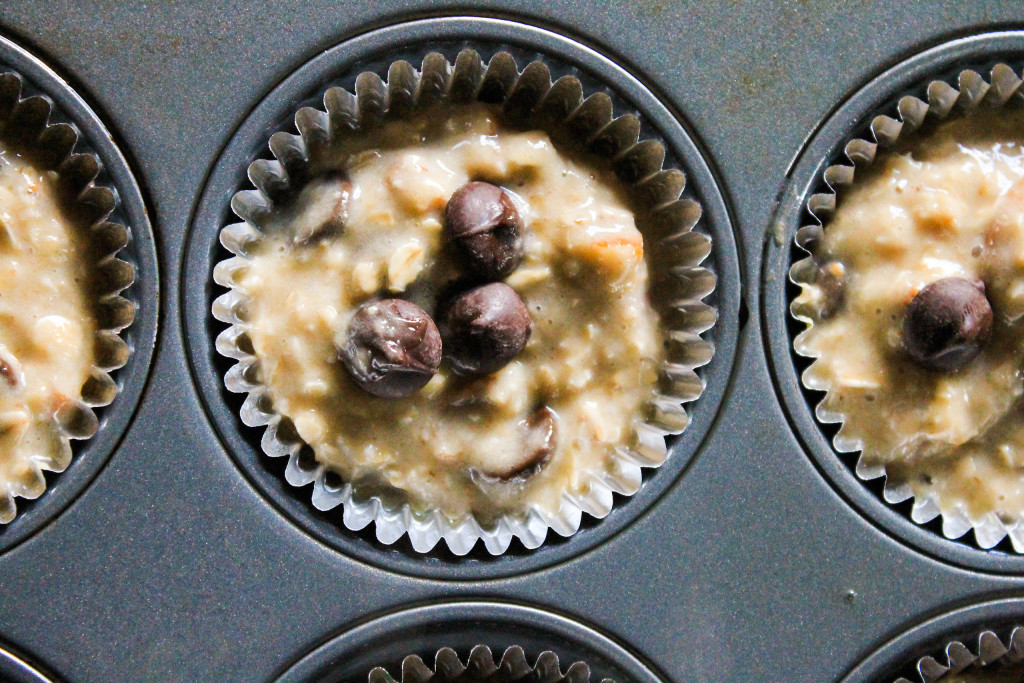
These muffins take a mere 10 minutes to prep. Simply pre-heat your oven to 400 degrees. Spray your muffin pan and the insides of your cupcake liners with non-stick cooking spray. In a large mixing bowl or kitchen aid combine oats, bananas, greek yogurt, brown sugar, baking soda, baking powder, and eggs. Mix until well combined then stir in in dark chocolate chips, pecan pieces, and honey. Mix on medium-high for a few seconds until well combined. Fun fact, my sweet grandmother picked and shelled these pecans herself! They are so tasty and I love having them around the house to use in my recipes!

Skinny Greek Yogurt Banana Muffins Batter

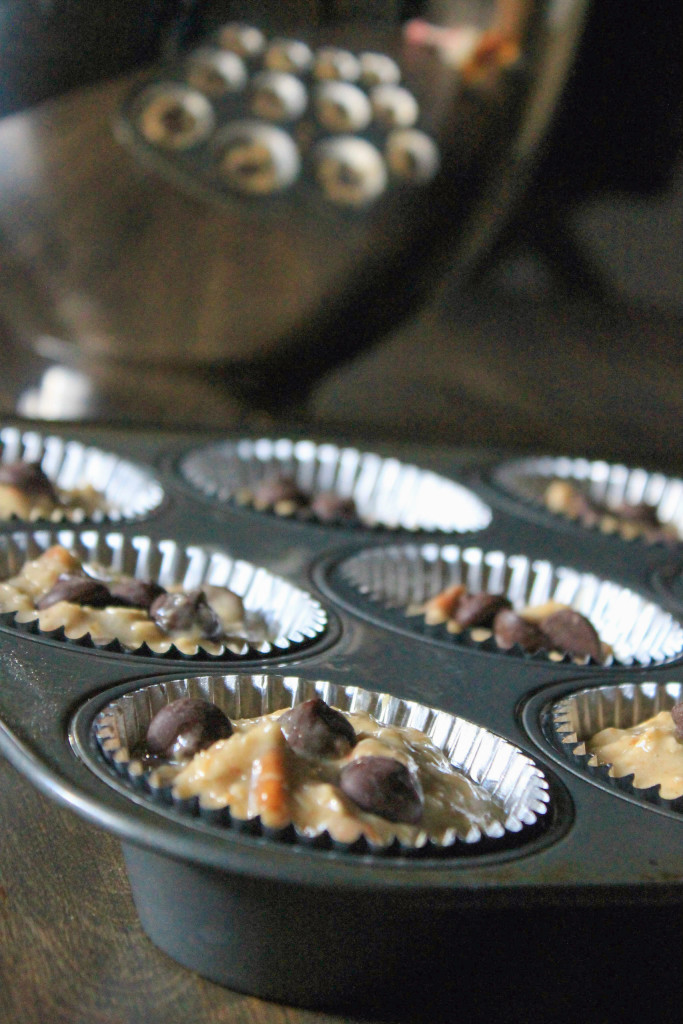
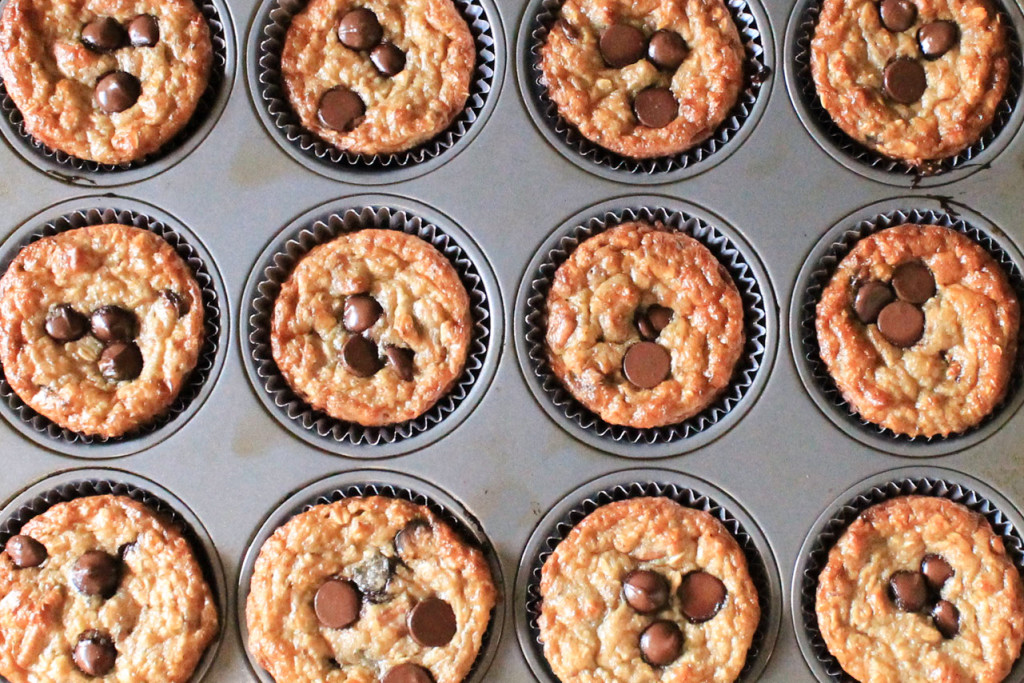
Use a large spoon (or my personal favorite, an ice cram scoop) to fill each foil lined muffin pan about 3/4 full. Top with a few dark chocolate chips (optional) and pop them in the oven. My best results came from baking these for 15-20 minutes on the middle rack. You should remove these delicious bites from the oven once a tooth-pick comes out clean and muffins are a dreamy golden brown.

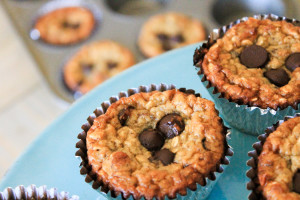
Skinny Greek Yogurt Banana Muffins

I know you will be DYING to dig in, but let them cool for about 10 minutes before taking that first bite. Let the countdown begin.

Skinny Greek Yogurt Banana Muffins

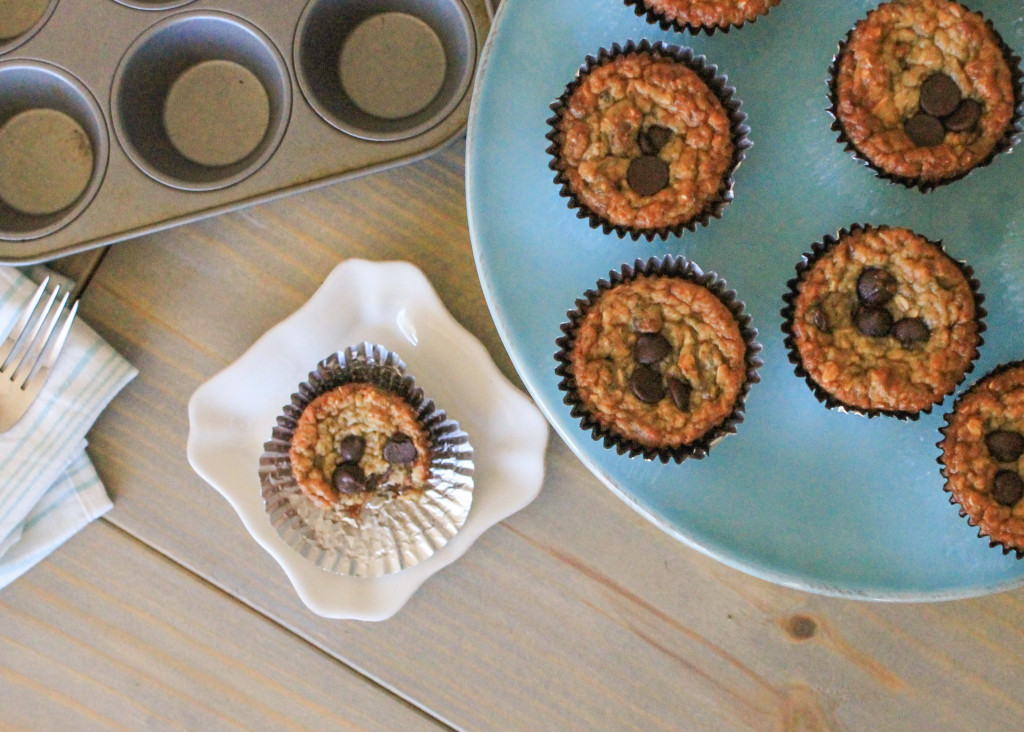
Congratulations! After the longest 10 minutes of your life has passed, you’re free to eat up!

Skinny Greek Yogurt Banana Muffins

You can eat these for dessert, a snack, or a quick on-the-go breakfast. My {new} husband, Greg, loves to eat these before long triathlon training sessions. Sometimes he spreads peanut butter across the top, which is delicious if I do say so myself.

[envira-gallery id=”1333″]

If you’re not a fan of dark chocolate or pecans, you can certainly use milk chocolate chips, walnuts, almond slivers, or cashews! The sky is the limit!

Skinny Greek Yogurt Banana Muffins

[yumprint-recipe id=’34’] 

 Fabulous recipes by Mandi at godsavethequinoa.com

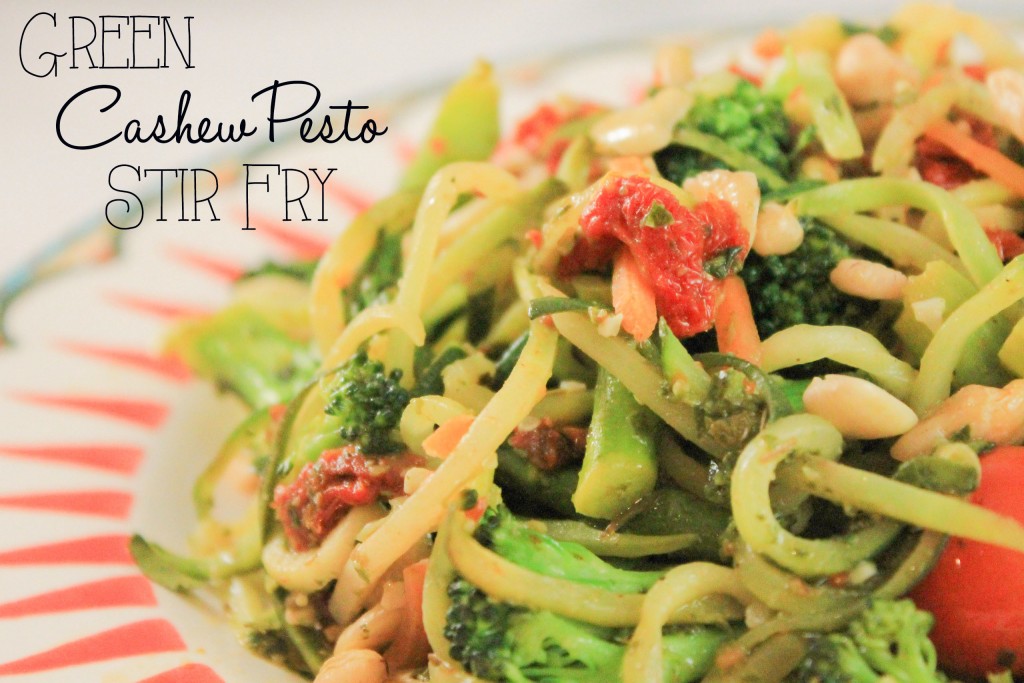
Green Cashew Pesto Stir Fry

Green Cashew Pesto Stir Fry Recipe- God Save the Quinoa

“It isn’t easy being green”- Kermit the frog. 

While it might not be easy being green, it can be easy eating green. I know, it sounds weird (maybe a little gross depending on how “in touch” with your inner child you are) but I promise its easy AND healthy! 

Green Cashew Pesto Stir Fry Recipe- God Save the Quinoa

 I recently purchased a spiralizer, which by the way was the BEST PURCHASE EVER!!! (Be expecting more spiralizer recipes to be posted soon). Anyways, my spiralizer enables me to make zucchini noodles in about 3 minutes tops, and I’ve been experimenting with TONS of different recipes. So far, I have yet to be disappointed.  

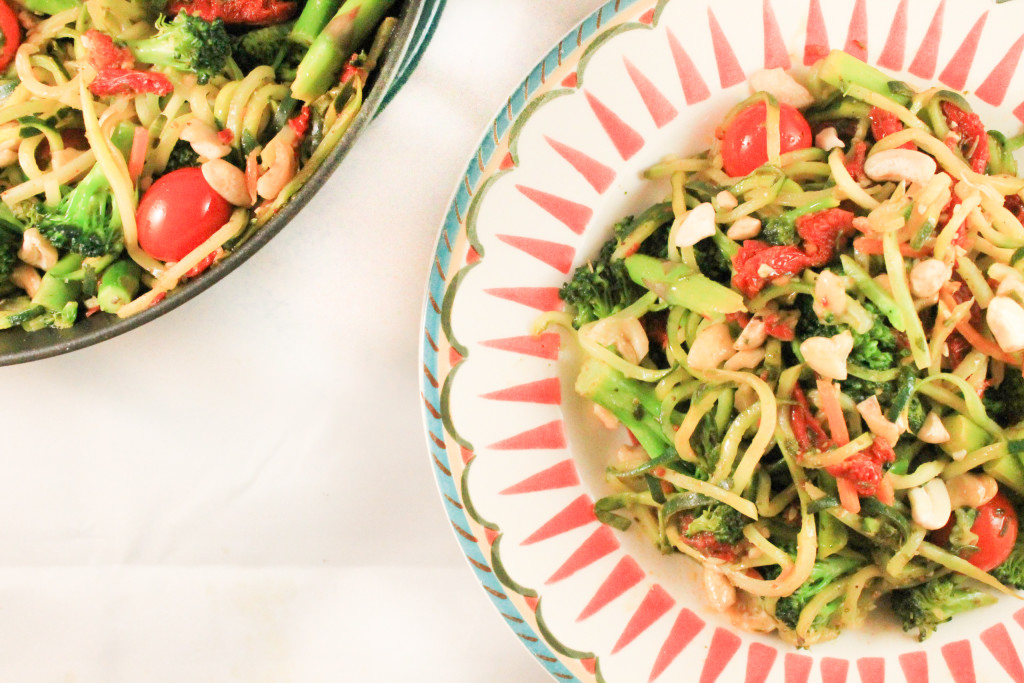
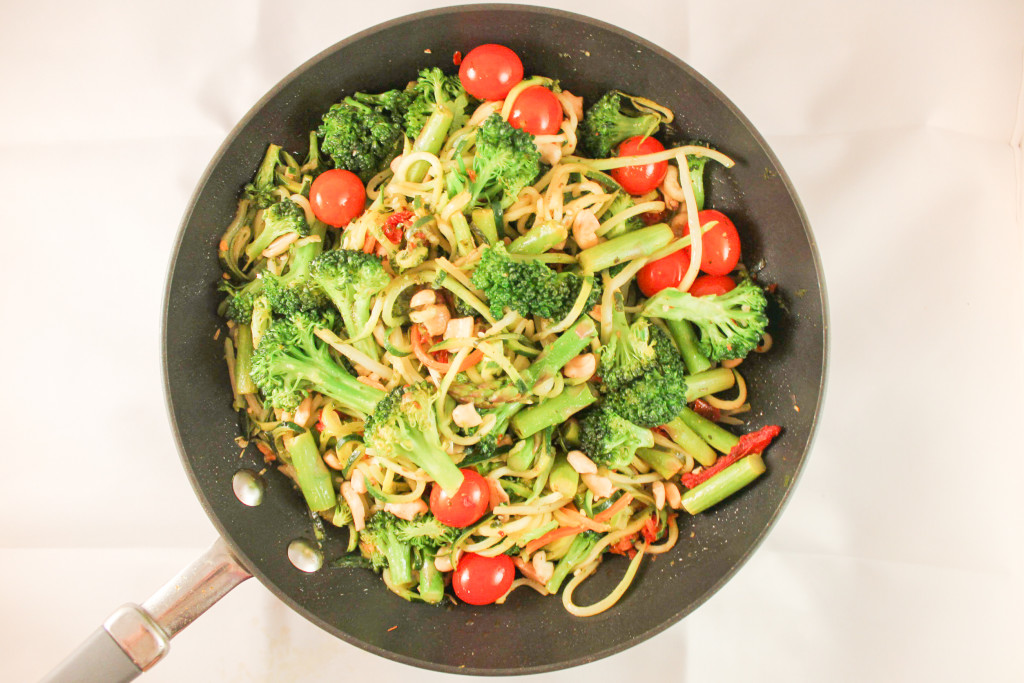
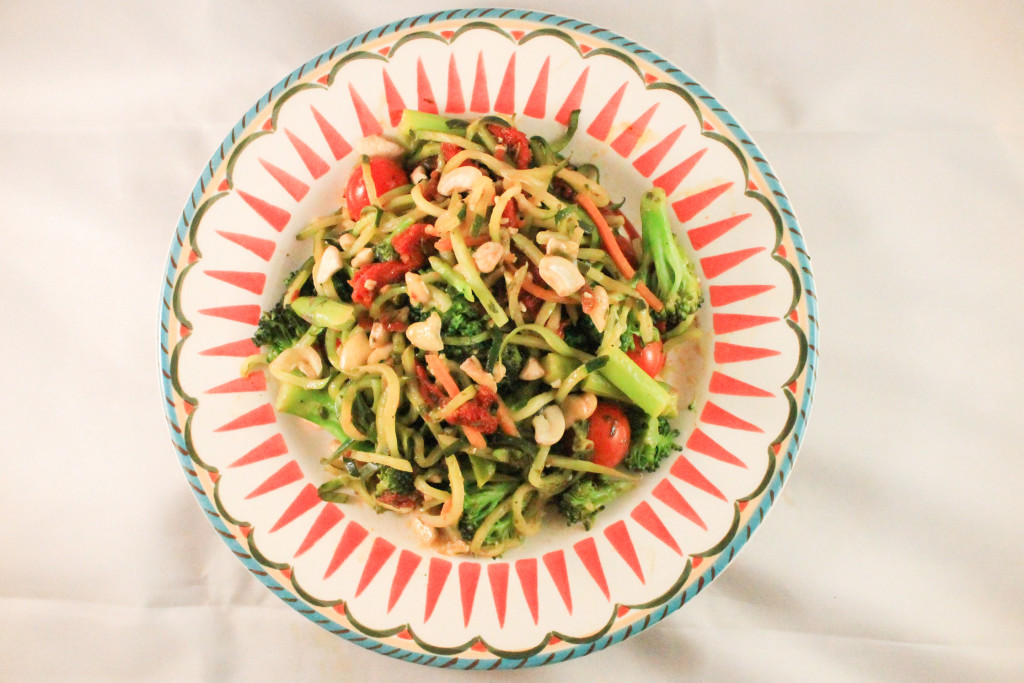
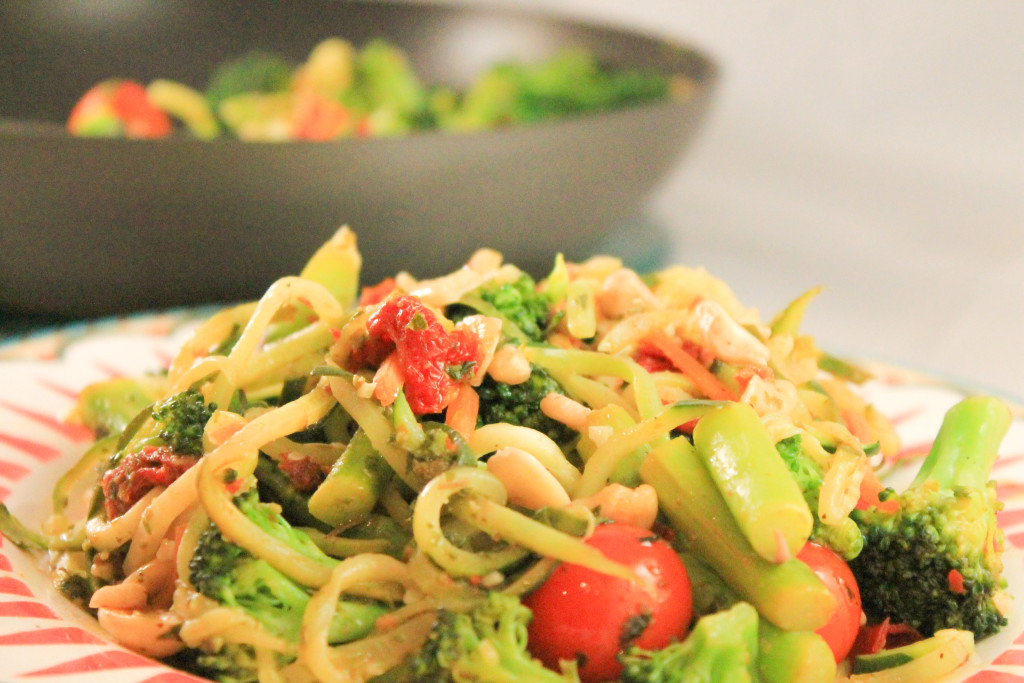
Green Cashew Pesto Stir Fry Recipe- God Save the QuinoaAlthough I threw in some tomatoes to add some color, this recipe is full of my favorite green foods; zucchini noodles, broccoli florets, asparagus, broccoli slaw, and fresh basil pesto. 

Start by spiraling 2 medium zucchinis to make your zucchini noodles. Chop your asparagus into 1.5 – 2 inch pieces and set aside. (Don’t forget to break off the bottom of the asparagus before chopping!)

Heat your Extra Virgin Olive Oil (EVOO) in a pan on medium-high heat. Stir in the minced garlic once EVOO starts to sizzle. Place your zucchini noodles, asparagus pieces, and broccoli florets into the pan. Toss veggies until they are coated in EVOO and let them sit. Stir once they begin to sizzle. 

Green Cashew Pesto Stir Fry recipe

Once everything is starting to sizzle add your broccoli slaw to the pan. If you’re wondering what broccoli slaw is, its basically shredded broccoli stalks and carrots. I purchased mine in a bag from Trader Joe’s. If you can’t find broccoli slaw at the store you shop at, you can sub for shredded carrots instead.

Spice up your life…er dinner by shaking salt and pepper to taste, cumin, rosemary, red pepper flakes, and lemon juice over your veggies. Leave your veggies on medium-high heat to absorb these flavors for a minute or two.

Green Cashew Pesto Stir Fry Recipe- God Save the QuinoaAdd your (WHOLE) cherry and sun-dried tomatoes before reducing the burner to a medium heat. Let veggies sit for 4-5 minutes, tossing every now and then so that the stuff on the bottom of the pan doesn’t burn. 

Once your veggies begin to soften and appear to be translucent, stir in basil pesto and raw cashews. I recommend using fresh basil pesto. Make this by combining 2 cups of fresh, chopped basil, 5 TBS EVOO, ¼ cup grated parmesan cheese, 2 TBS pine nuts, 2 tsp minced garlic, and ¼ tsp salt in a food processor and pulse until reaching desired consistency. Voila! You now have fresh homemade basil pesto!

That’s all folks! Serve and enjoy! 🙂 

[yumprint-recipe id=’33’]Fabulous recipes by Mandi at godsavethequinoa.com


Valentine’s Day Smores Cookies

Smores Cookie Recipe

Only 4 more days until Valentine’s Day! Tell someone “I love you (s)more” with the world’s easiest, and arguably tastiest cookie recipe. This is the EASIEST cookie you’ll make. EVER. (So get excited!)  

Yes, the last Valentine’s Cookie Recipe I posted (Valentine’s Day Cool Whip Cookies) is also very easy to make. But, believe it or not, this one is easier! As long as you’re able to stack your ingredients and turn on an oven (and have enough will power to not eat all of the ingredients while you’re preparing to cook) you should be fine! 

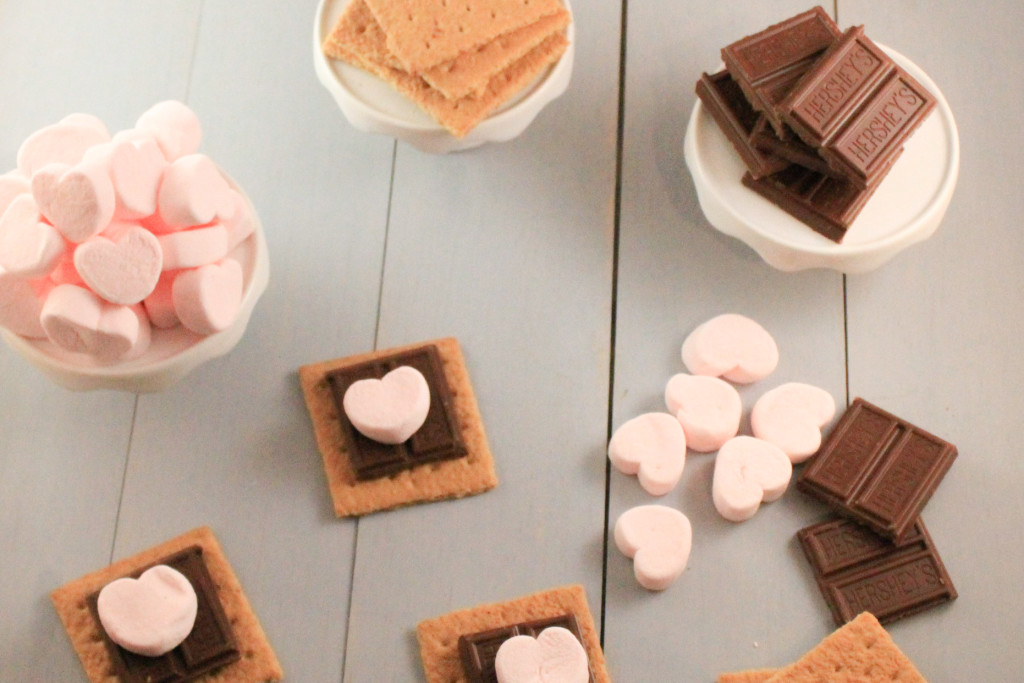
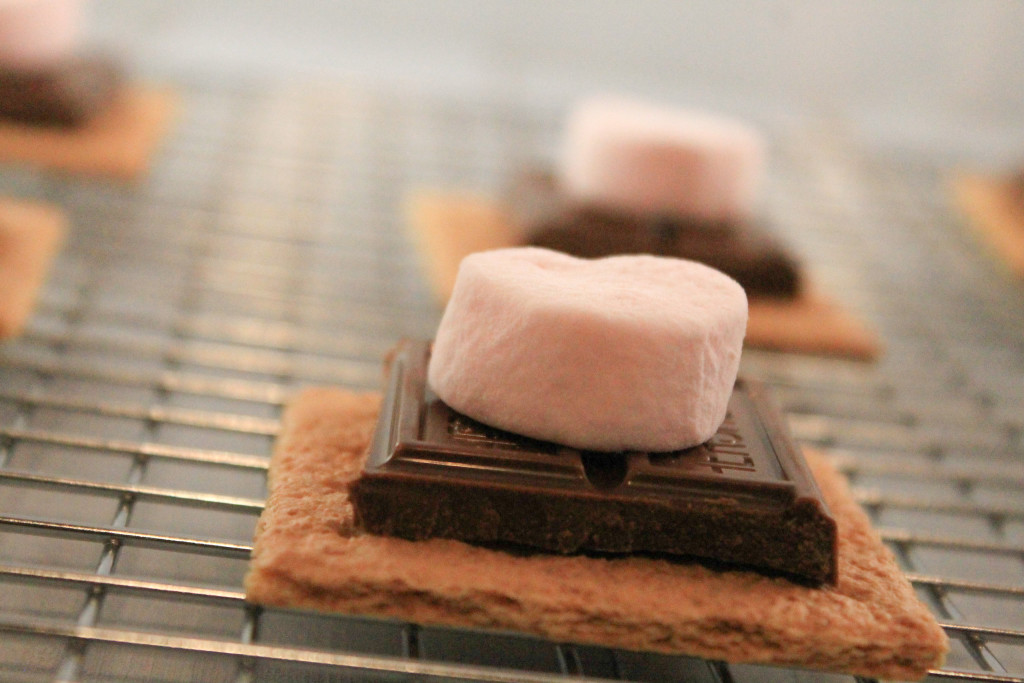
You only need 3 ingredients: marshmallow’s, graham crackers, and chocolate.

Smores Valentine Cookie recipe

If you’re wondering how I made the marshmallow’s heart shaped, I’ll let you in on a little secret- I bought them them this way! It’s true! Jet-Puffed makes the cutest baby pink heart shaped Marshmallow’s, which I found at Target

Smores Cookies recipe

I used Honey Maid Fresh Stacks graham crackers. These are AWESOME! They’re packaged as individual squares… you don’t even have to break the graham cracker in half! I told you this recipe was easy!!! 

Smores Cookie recipe

I’m an old fashioned gal, so I couldn’t resist using Hershey’s Milk Chocolate. Buy a King Size chocolate bar (or two or three) depending on how many Smore’s you’re planning on making. I broke the chocolate bar into squares made of two “pieces” each. I used one square per Smore. (If you really wanted to, I’m sure you could find a pre-packaged Hershey’s bar portioned out correctly for you). Anyways, one King Size Hershey’s Bar will make 8 Smores Cookies, so plan accordingly. 

To cook this masterpiece, all you have to do is assemble your Smore in this order: (from bottom to top) graham cracker, chocolate, marshmallow. 

Smores Cookie recipe

Arrange cookies on a cookie sheet or wire cooling rack.  

Smores Cookie Recipe

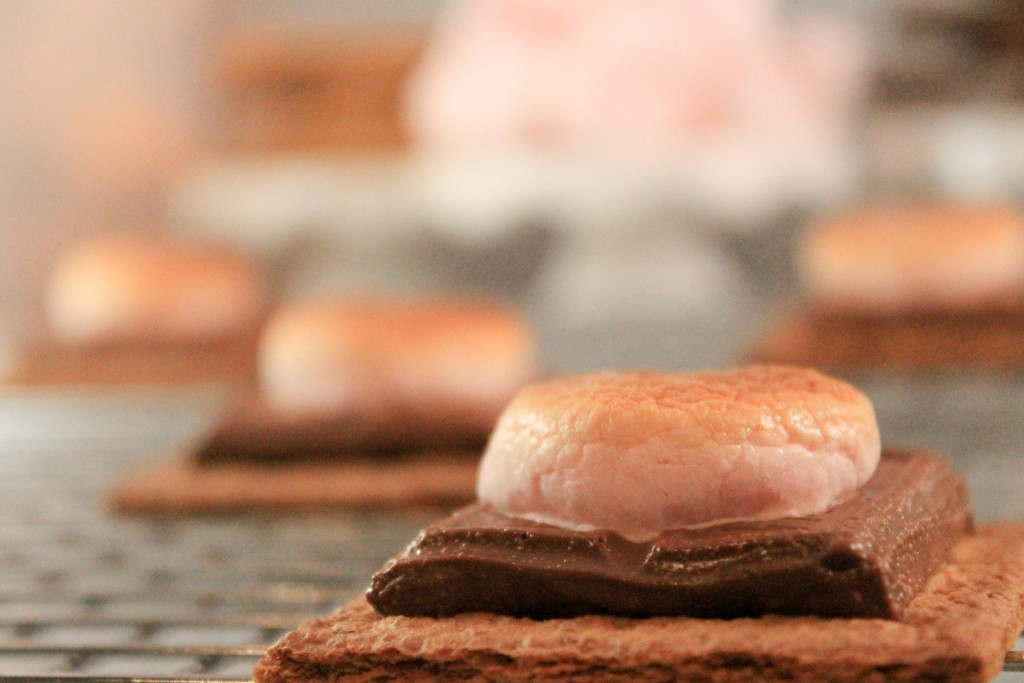
Turn the oven on broil. When warm, place cookies in oven for 2.5 – 3 minutes. This is just enough time to get them nice and brown without burning them or catching them on fire.

 [envira-gallery id=”1179″]

When finished, remove and enjoy! You can eat these cookies immediately, or store them in an airtight container to enjoy for a few days. The magic of this recipe is that they’re still just as delicious a few days later compared to when they’re fresh out of the oven!  

Smores Cookie RecipeSmores Cookie RecipeSmores Cookies RecipeYUM! I’m pretty sure it takes the oven longer to heat up than it does to make this Smore’s cookie recipe! How often does that happen?! 

[yumprint-recipe id=’32’]Fabulous recipes by Mandi at godsavethequinoa.com

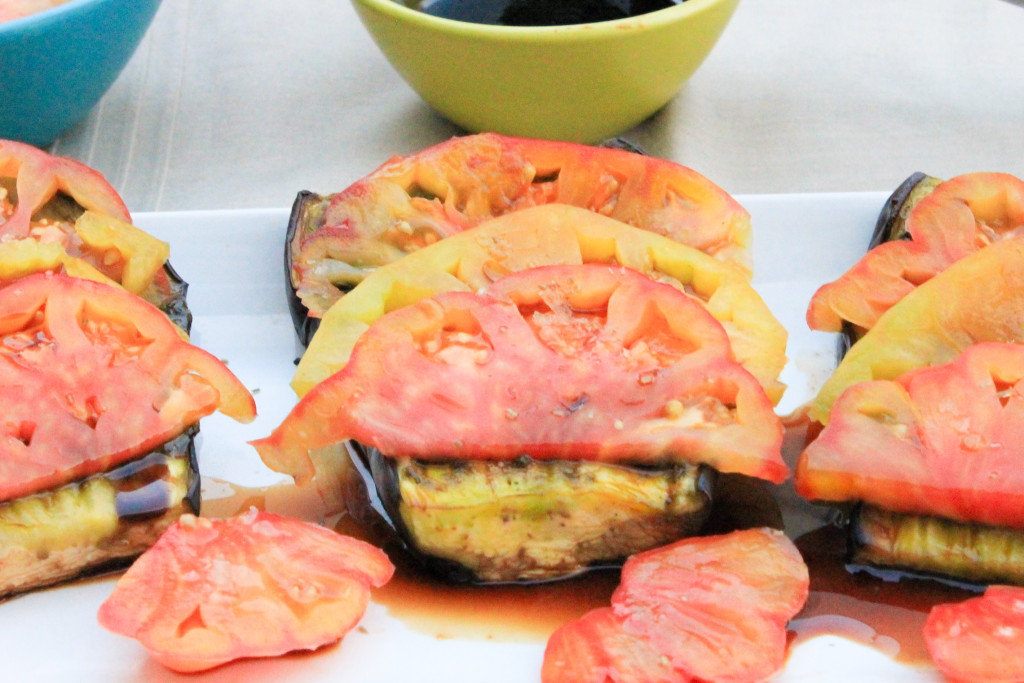
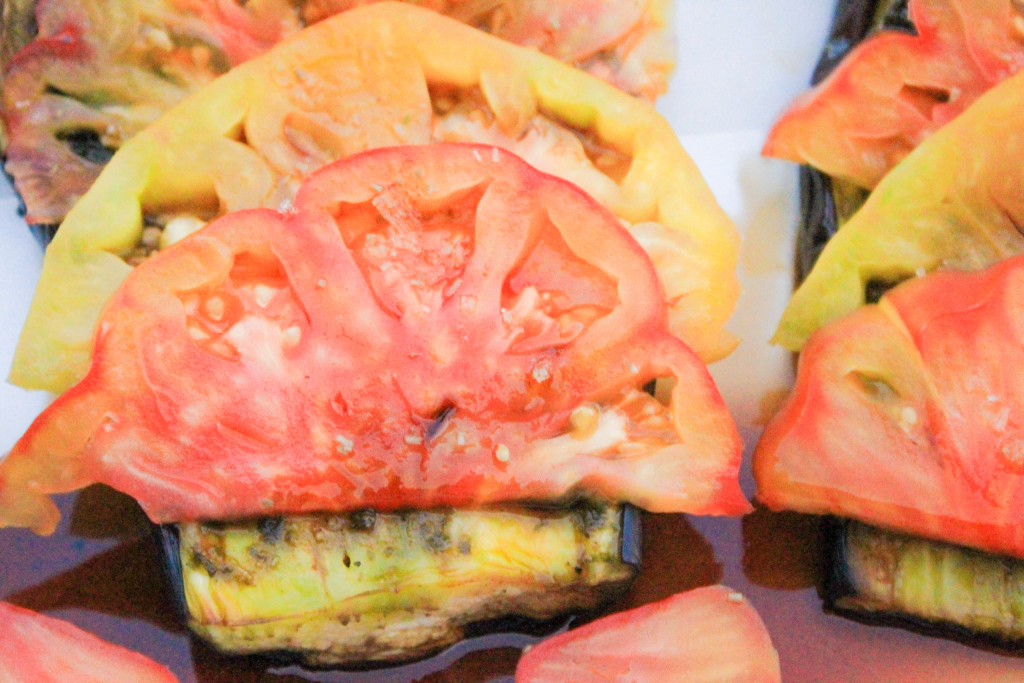
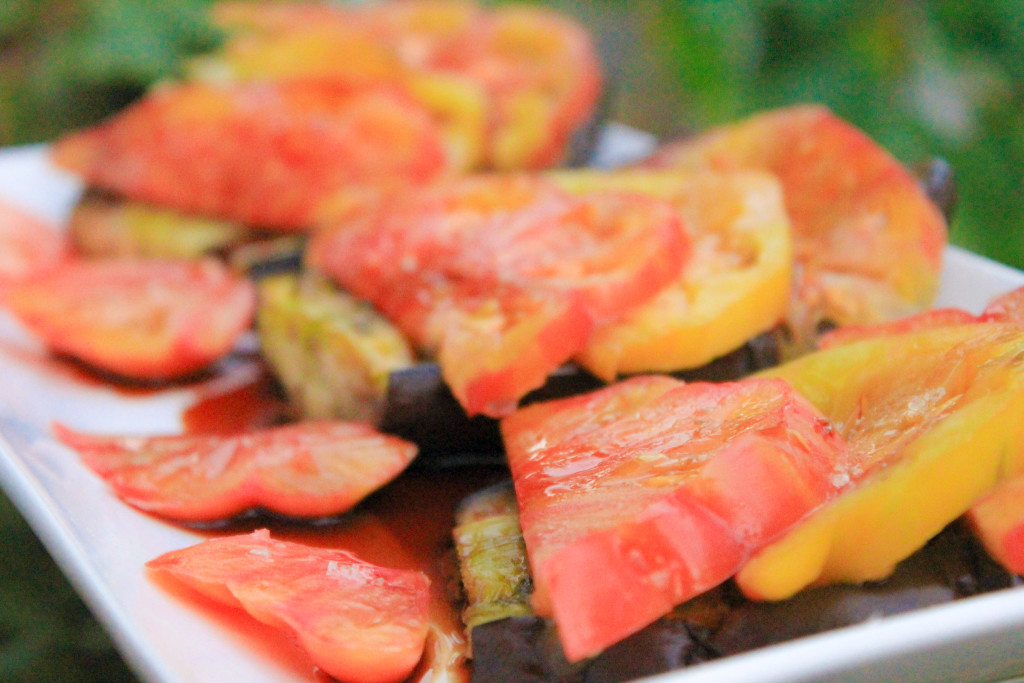
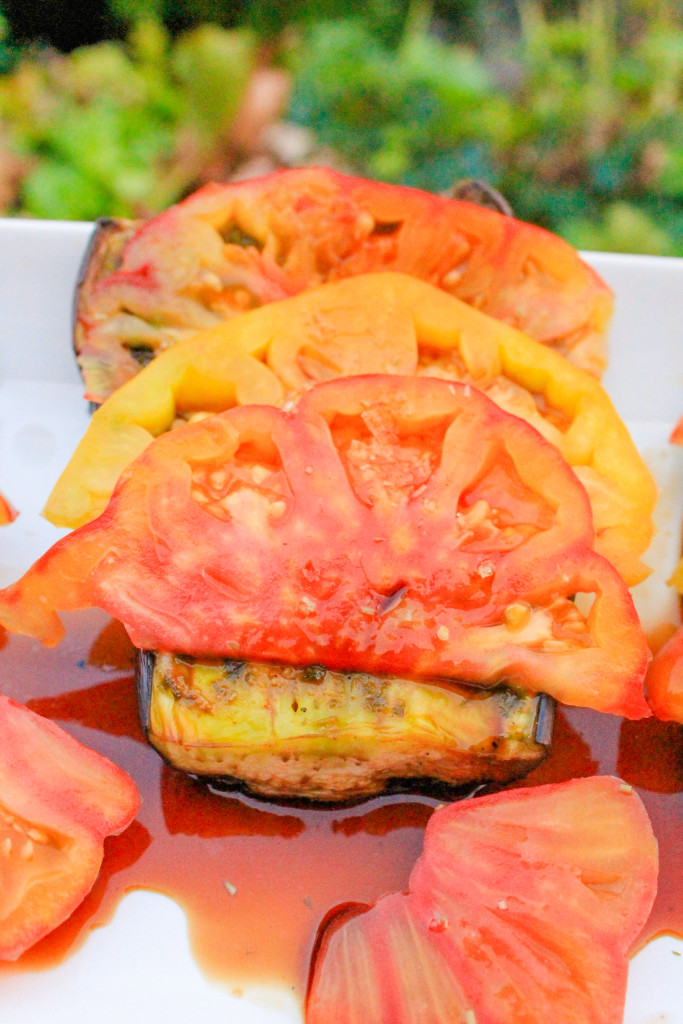
Basil Roasted Eggplant with Balsamic Drizzled Heirlooms

Basil Roasted Eggplant with Balsamic Drizzled Heirlooms Recipe

This Basil Roasted Eggplant with Balsamic Drizzled Heirlooms recipe is bursting with the fresh flavors (and colors) spring dreams are made of. Serve it as a main dish, snack, or appetizer during the cold winter months or while enjoying the refreshing spring air! Note: this dish pairs fabulously with the 70 degree weather we’re having in Dallas today! If you’re not in Dallas, and are snowed in or stuck in the cold, I’m sorry for bragging. Use this recipe to get you through the cold and into spring! 

 Don’t shy away from this dish because one of the main ingredients is eggplant. Eggplant can be tricky to cook. Believe me, I’ve had my fair share of eggplant disasters in the kitchen and have ended up throwing everything away and getting takeout instead. But luckily, this recipe is fairly simple and I think I’ve FINALLY figured out where I’ve been going wrong. It’s not me its the eggplant! At least that’s what I like to tell myself 😉 

Basil Roasted Eggplant with Balsamic Drizzled Heirlooms

But seriously, picking out the perfect eggplant is key to making any eggplant recipe. When picking out an eggplant, look for one with a smooth and shiny skin. An eggplant with a dull skin indicates that the eggplant is starting to turn bitter. Also, avoid purchasing an eggplant with streaking or blemishes on the skin. The perfect eggplant should have a deep dark purple-black color with no streaking or spots and should have a vibrant green stem. The flesh should be firm and should indent slightly when pressure is applied, but should spring back immediately. If a depression remains in the eggplant after poking, the eggplant is old.

Basil Roasted Eggplant with Balsamic Drizzled Heirlooms Recipe

This recipe is pretty easy and straightforward- which is why I love it! Wash and completely dry your eggplant before slicing. Place the eggplant on the table “hot-dog” style and cut off both the top and bottom  (each of the rounded ends) of your eggplant. Next, slice your eggplant lengthwise (still using the hot-dog style analogy here) into THREE 1 – 2 inch thick, skinless slices. NOTE: Your eggplant slices should have skin on the edges… just make sure neither of the “faces” has any of the purple-black skin on it. Dap each eggplant slice with a paper towel to remove all excess water. This is IMPORTANT to do!

When dry, brush the eggplant with EVOO and sprinkle with salt and pepper. Place in the oven  at 400 degrees to cook for about 10 minutes. 

Basil Roasted Eggplant with Balsamic Drizzled Heirlooms Recipe

What you can’t see pictured is the amazing basil spread, hiding between the eggplant and the heirloom tomatoes. Make this while the eggplant slices are roasting. Combine lemon juice, salt, pepper, 2 Tbs EVOO, 1 cup of fresh basil leaves, and garlic in a blender or food processor and blend until completely smooth. After 10 minutes, when your eggplant slices are finished roasting, remove them from oven and flip them over. Spread your basil mixture over the tops of the recently flipped eggplant slices and roast in the oven for about 10 more minutes, so they are brown and soft throughout.

Basil Roasted Eggplant with Balsamic Drizzled Heirlooms Recipe

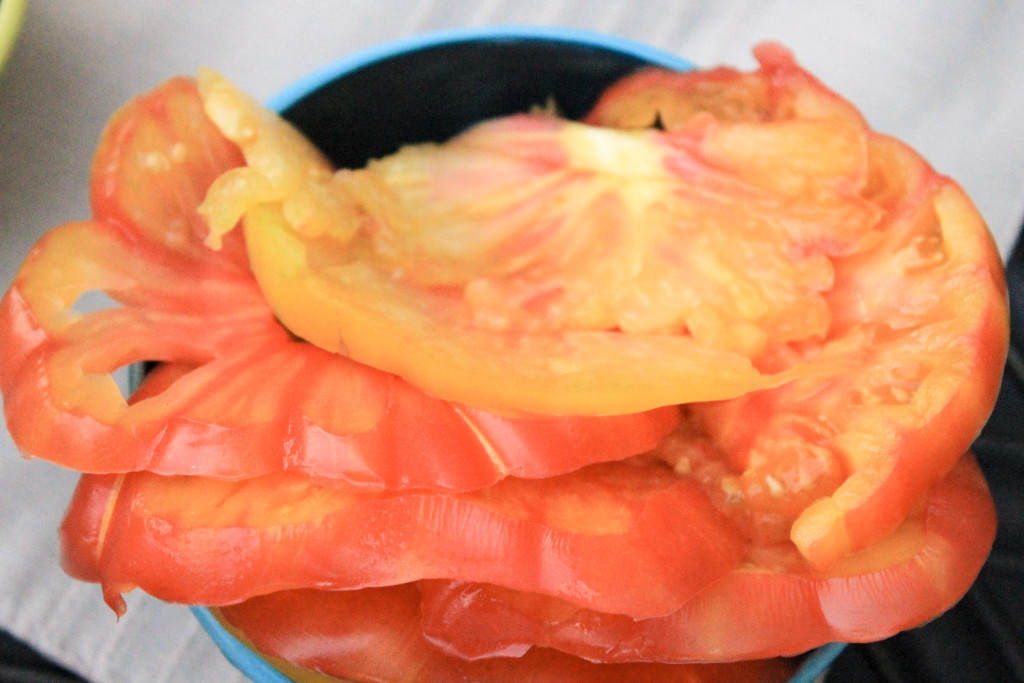
You will place sliced heirloom tomatoes on top of the roasted eggplant slices. Why heirlooms and not another type of tomato for this recipe? Well, I chose heirlooms for this recipe because of how flavorful they are! They really compliment the flavors in the eggplant and basil spread. 

How to pick out Heirloom Tomatoes, Basil Roasted Eggplant with Balsamic Drizzled Heirlooms

A few tips when picking out your heirlooms:

  1. Appearances don’t matter. Unlike standard tomatoes, heirlooms are often misshapen. This is a GOOD thing, and in case you’re wondering, the shape of an heirloom will not have an impact on how it tastes…so don’t be put off by cracked skins. It will be safe to east as long as it isn’t leaking juice or moldy. 
  2. Pick it up before you buy it. An heirloom tomato should feel heavy for its size. That heaviness belies a volume that should provide good flavor.
  3. Smell it. Ripe heirlooms should have an earthy, green scent. Avoid those that smell musty.
  4. Handle with care. Don’t pile heirloom tomatoes on top of each other. Heirlooms are delicate and the weight of too many tomatoes can result in squashed or bruised tomatoes.
  5. Room temperature is key. When you get home, do NOT refrigerate your tomatoes. A temperature lower than 50 degrees will destroy both flavor and texture

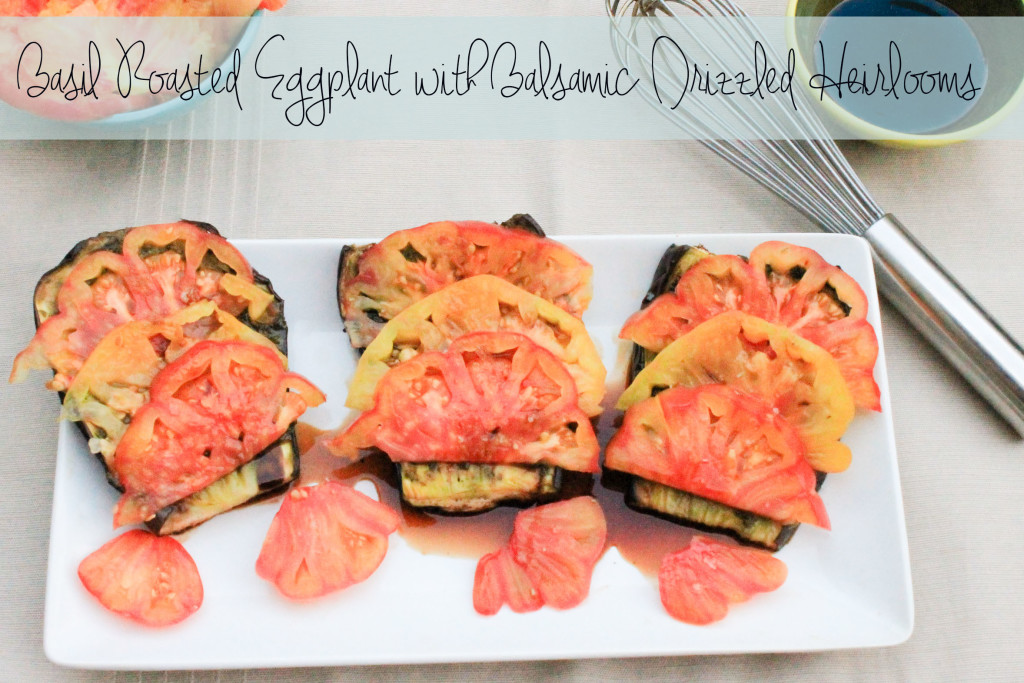
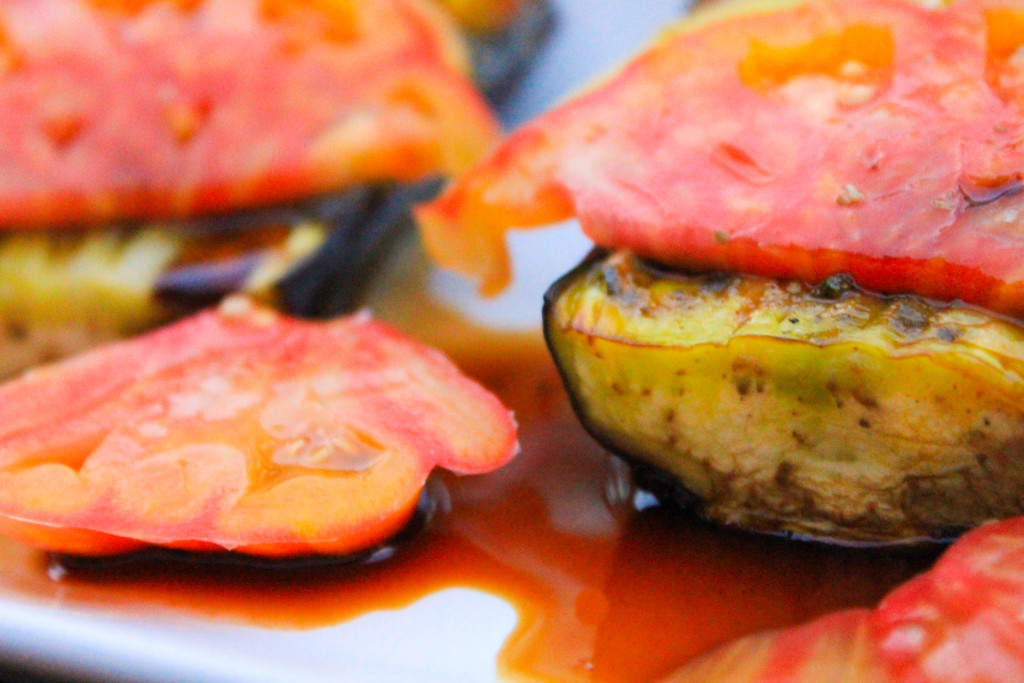
Now that you know how to pick out the perfect Heirlooms, wash and slice the heirlooms while eggplant and basil are roasting. When eggplants are finished roasting, you will arrange heirlooms on top (as pictured). To add the finishing touches, you’ll top off this dish with a sweet balsamic drizzle. This takes about 10 – 15 minutes to make, so I suggest making it towards the beginning of the recipe if you’re in a hurry to feast your eyes! 

Basil Roasted Eggplant with Balsamic Drizzled Heirlooms Recipe

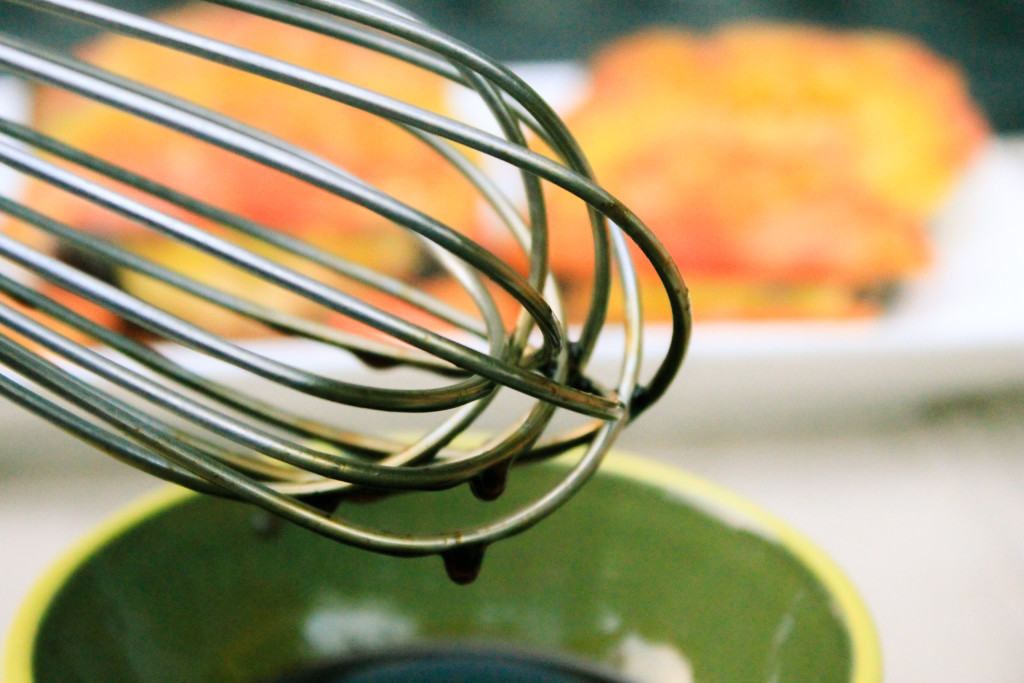
Whenever you decided to make the balsamic drizzle, do this by whisking together balsamic vinegar and honey in a saucepan over low-medium heat. When combined, slowly raise heat until contents come to a boil then reduce heat completely and let sit for 10 – 15 minutes.  This will allow mixture to thicken. 

Basil Roasted Eggplant with Balsamic Drizzled Heirlooms Recipe

When the oven timer finally goes off and your eggplants are done roasting, transfer slices to a plate or serving dish. Arrange sliced heirlooms on top of the roasted eggplant slices and generously drizzle balsamic glaze on top and enjoy! 


[yumprint-recipe id=’31’]
 
 Fabulous recipes by Mandi at godsavethequinoa.com


Valentine’s Day Cool Whip Cookies

Cool Whip Valentines Cookies

Hello, everyone! Its that time of the year again…Valentine’s Day! What holiday gives you a better excuse to make the most deliciously sappy girly recipe possible? I would hate for you NOT to take advantage of this holiday because you’re worried you’ll ruin your New Year’s diet and spoil all of your healthy resolutions, so I’m excited to share this 4 ingredient, 60 calorie cookie recipe with you! That’s right! All 4 ingredients (EASY) and 60 calories (YES PLEASE!) in these light and fluffy cookies will have you thinking you’re on cloud 9! 

Cool Whip Valentines Cookies (18 of 27)

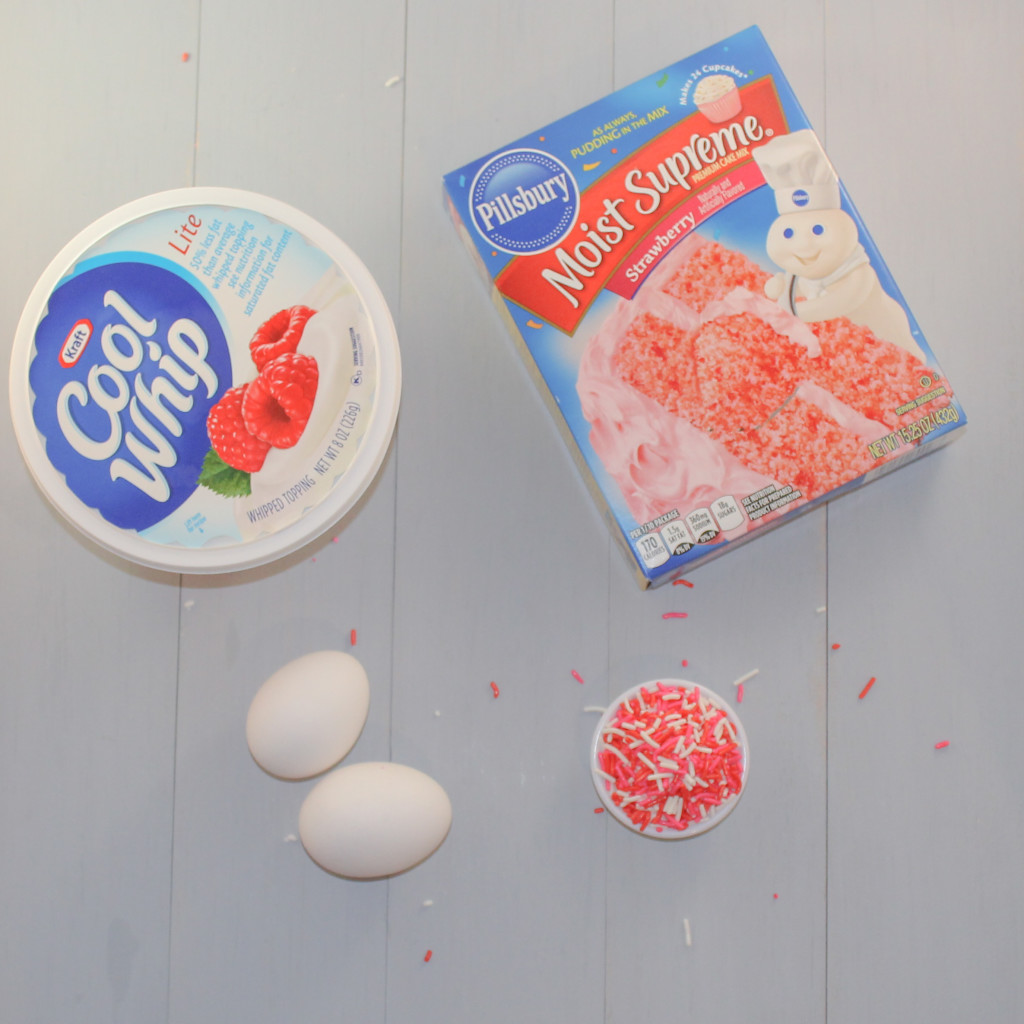
These cookies are so light and fluffy. You’ll know what I’m talking about when you pick one up and bite into it! Wanna know why? Well, these cookies are made with Cool Whip, strawberry cake mix, 2 eggs, and some festive holiday sprinkles. You don’t believe me? See ingredients pictured below: 

Cool Whip Valentines Cookies (1 of 27)

It’s true! All you have to do is combine the cool whip and the eggs. Once they’re completely combined add in one box of strawberry cake mix and as many sprinkles as your heart desires. 

The cookie batter should be thick and sticky once everything is mixed. Place it in the fridge to chill for at least 30 minutes before continuing on. This is a necessary step, so don’t skip it! 

Cool Whip Valentines Cookies (19 of 27)

After your batter is chilled pre-heat your oven to 350 degrees F, wrap a cookie sheet in foil, and and pour some powdered sugar in a small bowl. You will dip each cookie in the powdered sugar before placing it on the cookie sheet to bake. This is my favorite part of the recipe and gives each cookie just the right amount of sweetness it needs! 

Cool Whip Valentines Cookies (20 of 27)

Scoop the dough out with a spoon or scoop. As you can tell from the pictures below, I used an ice cream scoop. Roll the dough into balls and roll around in powdered sugar, completely covering the entire ball of dough. When covered, place on to your cookie sheet and repeat until the cookie sheet is full. Leave about 2 inches between each cookie, these sweets grow in the oven.

[envira-gallery id=”1139″]

 Let the cookies bake for about 10 – 12 minutes. Obviously, larger cookies will take longer to make, so scoop accordingly! When finished, set aside to cook an dig in!

Cool Whip Valentines Cookies (24 of 27)

[yumprint-recipe id=’30’]Fabulous recipes by Mandi at godsavethequinoa.com


Black-Eyed Pea Tomato and Vegetable Soup

Black-Eyed Pea Tomato and Vegetable Soup

HAPPY NEW YEAR!!! I hope everyone had a very happy holiday season! Mine was fabulous and I enjoyed celebrating the holidays and the New Year with the best of friends and family! 2014 will be hard to top but I have high expectations that 2015 will be even better! 

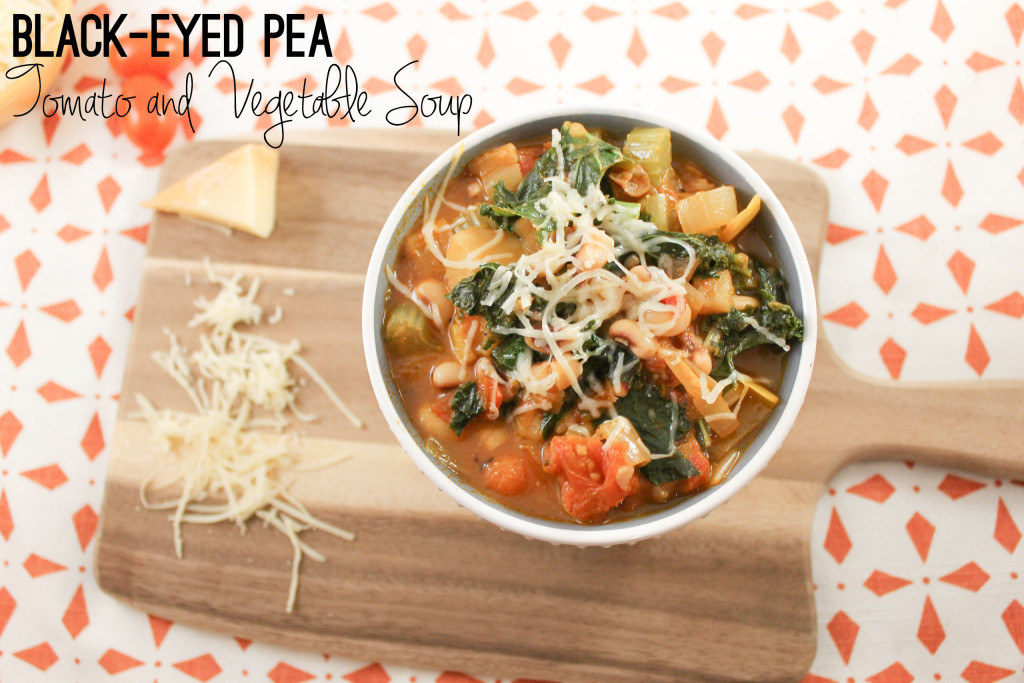
In the South, we believe that eating black-eyes peas on New Years day will bring you luck and prosperity throughout the year. This Black-Eyed Pea Tomato and Vegetable Soup recipe is healthy, full of hearty vegetables, and is the PERFECT good luck dish to enjoy on this chilly New Year’s Day! 

I wanted to create something tasty and filling that can be enjoyed as an appetizer or main dish, alone or with a group of friends or family members. This is a pretty simple recipe and involves minimal cooking, so its a great dish to make while entertaining company! 

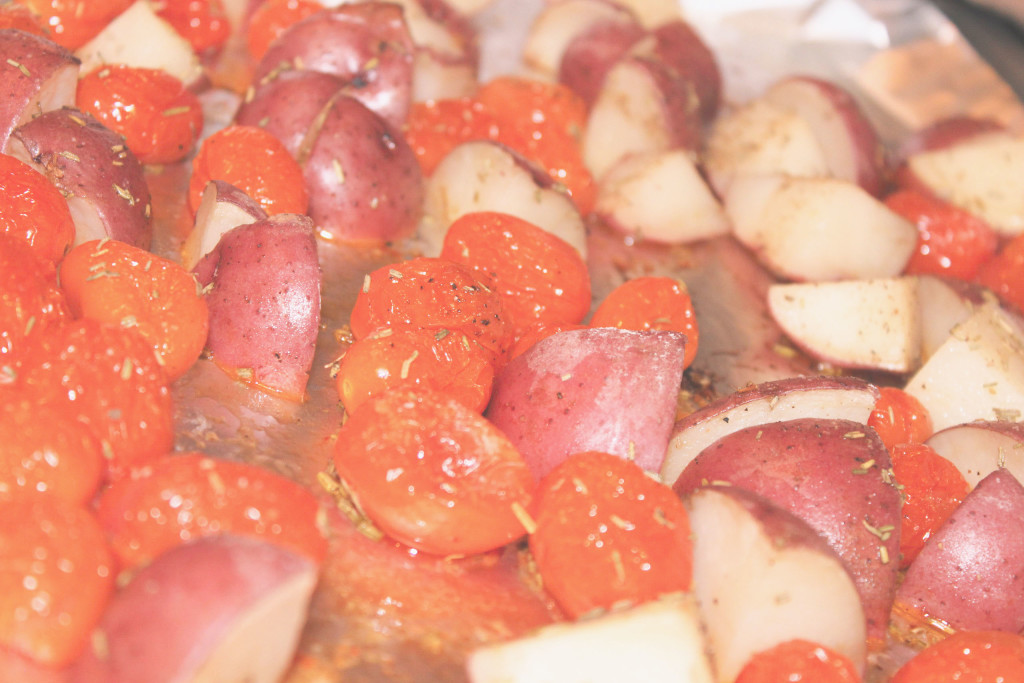
Before cooking, drizzle 2 Tablespoons of Olive Oil over 2 cups of whole cherry tomatoes and 6 baby red potatoes (cut into eighths) and sprinkle with salt, pepper, and dried rosemary. Roast in the oven at 400 degrees for 20 minutes. 

Black-Eyed Pea Tomato and Vegetable Soup- tomatoes and potatoes

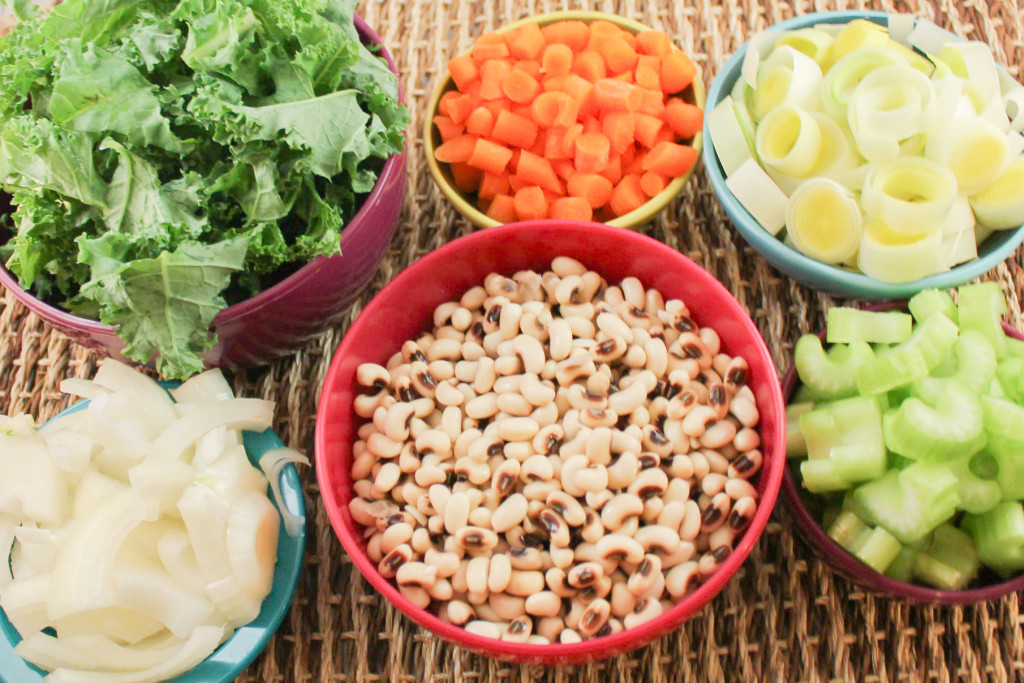
 While tomatoes and potatoes are roasting chop 1 sweet onion, 1 and half cups of baby carrots, 2 leeks, 4 celery sticks, and 5 cups of fresh kale. Set aside. Prepare 24 oz. of black-eyed peas. You can cook bulk black-eyed peas or use canned black-eyed peas. If using canned black-eyed peas, be sure to drain them. 

Black-Eyed Pea Tomato and Vegetable Soup: fresh veggies

Once everything is chopped, heat 2 tablespoons of olive oil in a large pot and add minced garlic, onions, and leeks. Sauté for about 5 minutes or until leeks and onions are translucent. Once your tomatoes and potatoes are done roasting add them to the pot along with a 15 oz. can of diced tomatoes, 4 cups of veggie broth, black-eyed peas, chopped celery, baby carrots, and one 4 oz. can of diced green chilies. Bring burner to high heat and stir 1 teaspoon of cayenne, 1 tablespoon of cumin, 1 tablespoon of dried rosemary and 1 teaspoon of salt and pepper into contents of pot. Mix well so all ingredients are combined. Cover with a lid and let sit for about 20 – 25 minutes. Contents in pot should come to a steady boil. Let ingredients boil for about 5 – 10 minutes, then reduce to medium heat for remainder of time.  

After 20 – 25 minutes, ingredients should look soupy and translucent. (Your house should be smelling pretty delicious at this point too!) Add your chopped kale to the pot, quickly stir, and cover for about 5 more minutes on medium-low heat. The steam in the pot will cause your kale to wilt to the perfect consistency. 

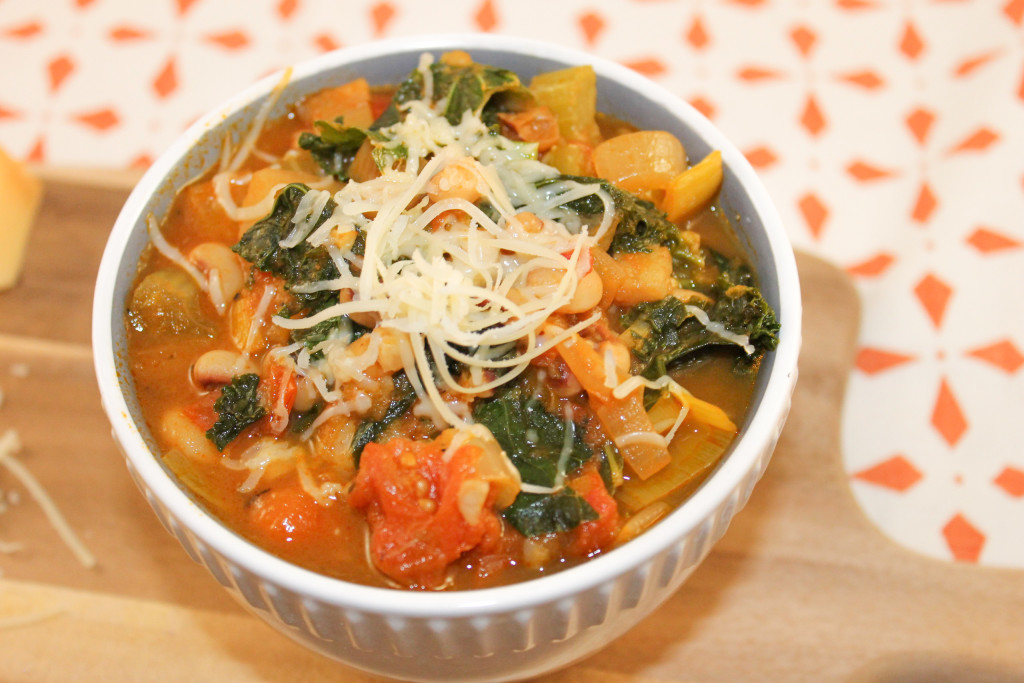
Black-Eyed Pea Tomato and Vegetable Soup (8 of 8)

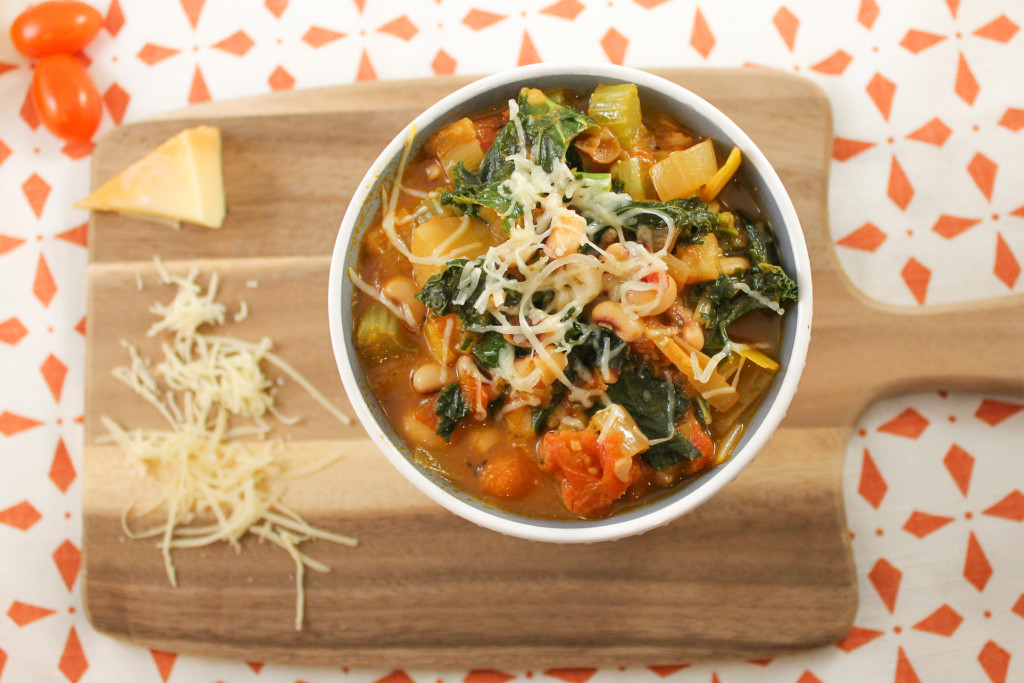
After about 5 minutes, give your soup a quick stir, reduce heat to low, and spoon into bowls, top with freshly shaved parmesan and serve! Leave soup coverd on low heat. This will keep it warm incase anyone wants seconds… or thirds! 

Black-Eyed Pea Tomato and Vegetable Soup (5 of 8)

You can store your leftovers in an airtight container in the refrigerator. Re-heat in the microwave to enjoy again and again! 

MEAT OPTION: If you want to add meat or make a meat-frendly version, I suggest adding 3 cups of chopped sausage and 1 cup of chopped bacon. Stir your cooked meat in when adding the veggie broth and chopped veggies. Again, be sure to cook the sausage and bacon before adding! 

[yumprint-recipe id=’29’]Fabulous recipes by Mandi at godsavethequinoa.com 

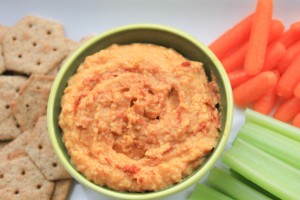
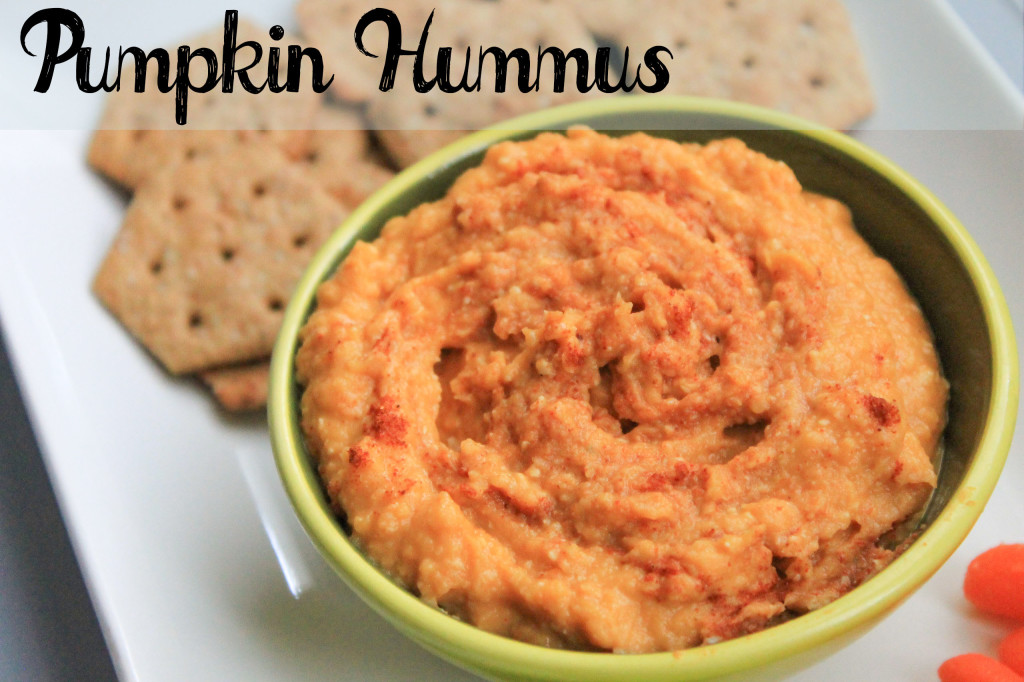
Pumpkin Hummus

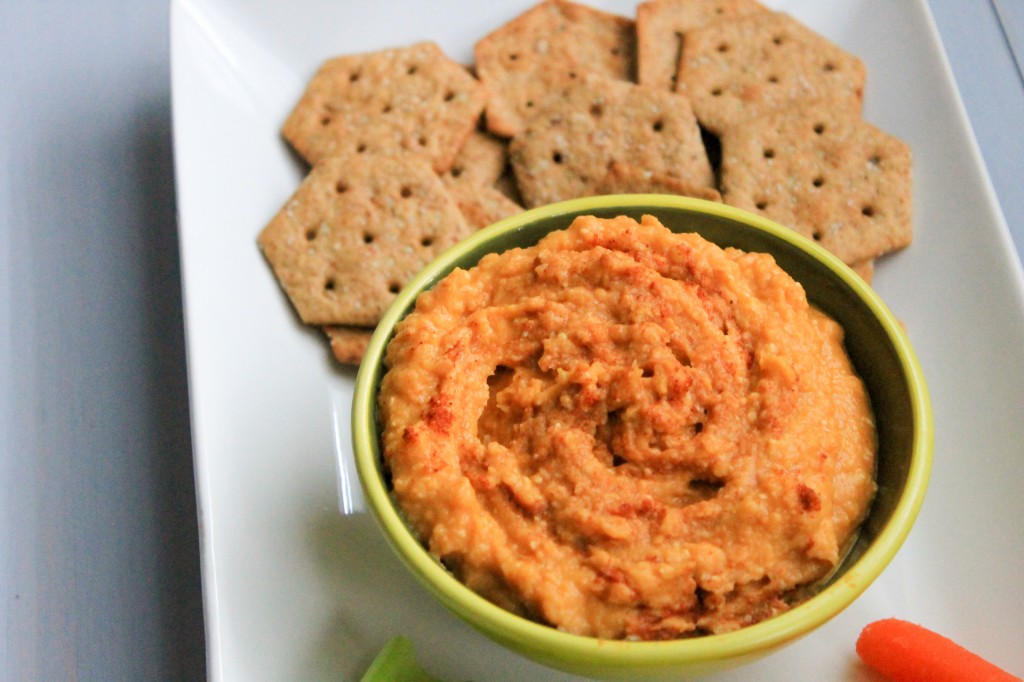
Pumpkin Hummus  (9 of 12)

Happy Fall yall! I don’t know about you, but Fall is most certainly my FAVORITE time of year! The weather is finally starting to cool off and its seasonally appropriate to cook and eat pumpkin inspired goodies! (Hence the pumpkin hummus recipe you’re looking at now). 

Pumpkin Hummus  Recipe

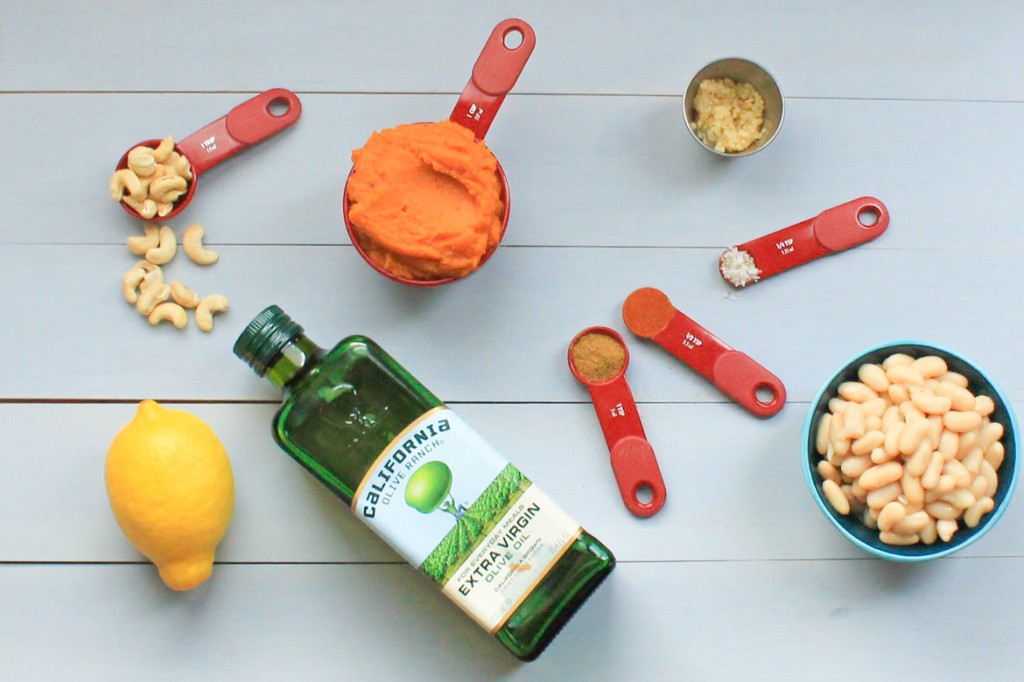
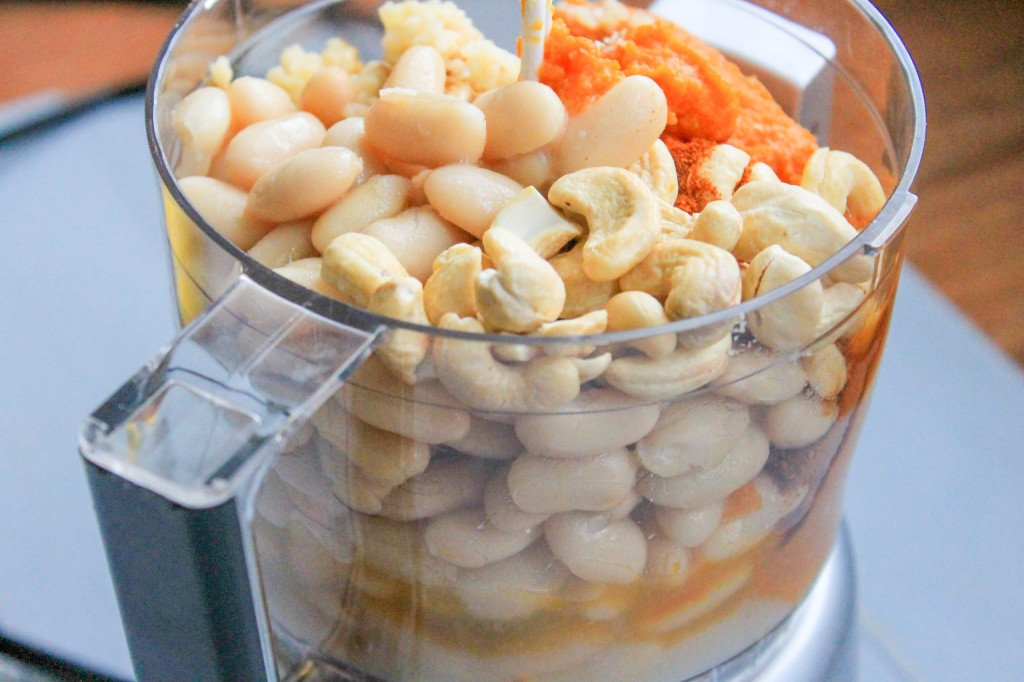
This recipe is probably one of the easiest things I’ve ever made. All it takes is 9 simple ingredients: raw cashews, pumpkin puree, minced garlic, salt, white cannellini beans, cumin, paprika, fresh lemon juice, and EVOO. 

Pumpkin Hummus  (4 of 12)

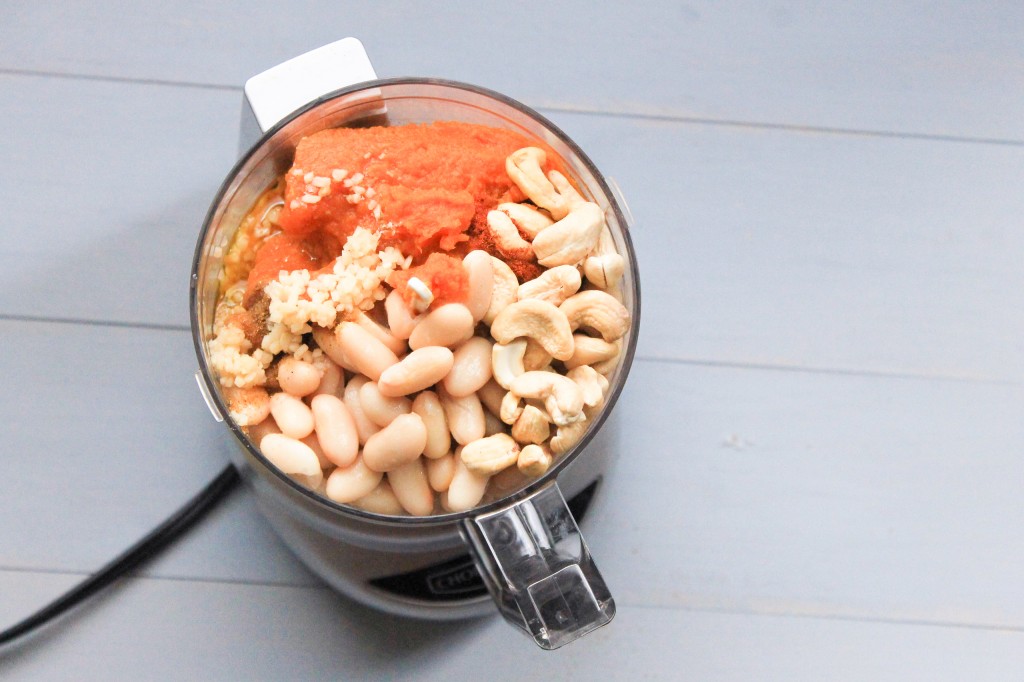
Simply place ingredients into a food processor.

Pumpkin Hummus  (6 of 12)

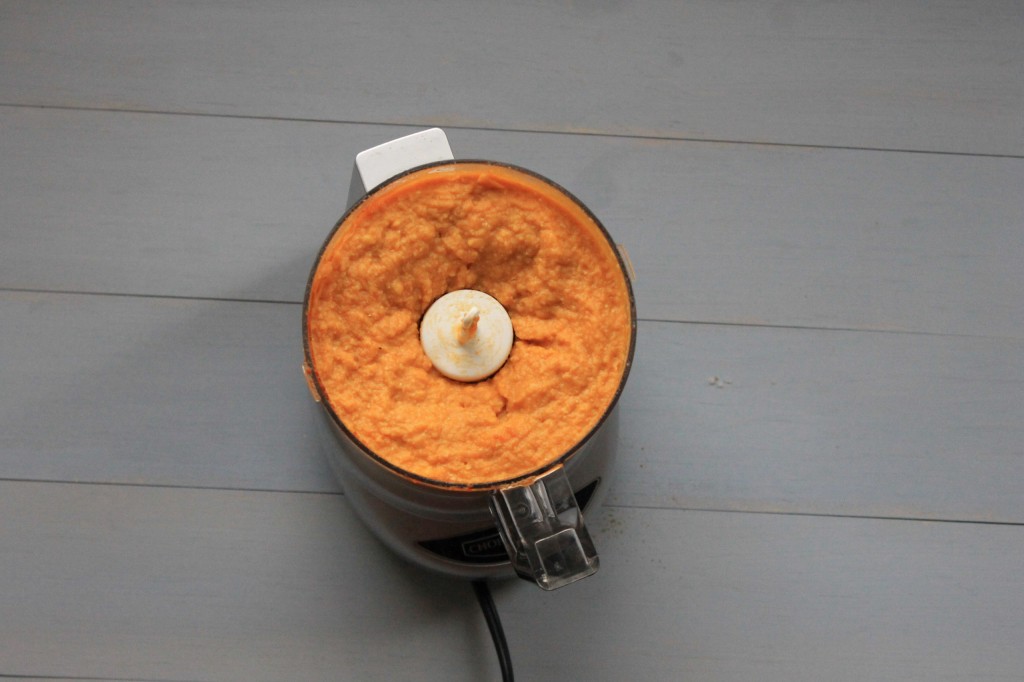
(Use a blender if you don’t have a food processor.) 

Pumpkin Hummus  (7 of 12)

Combine until ingredients reach desired consistency. 

Pumpkin Hummus  (8 of 12)

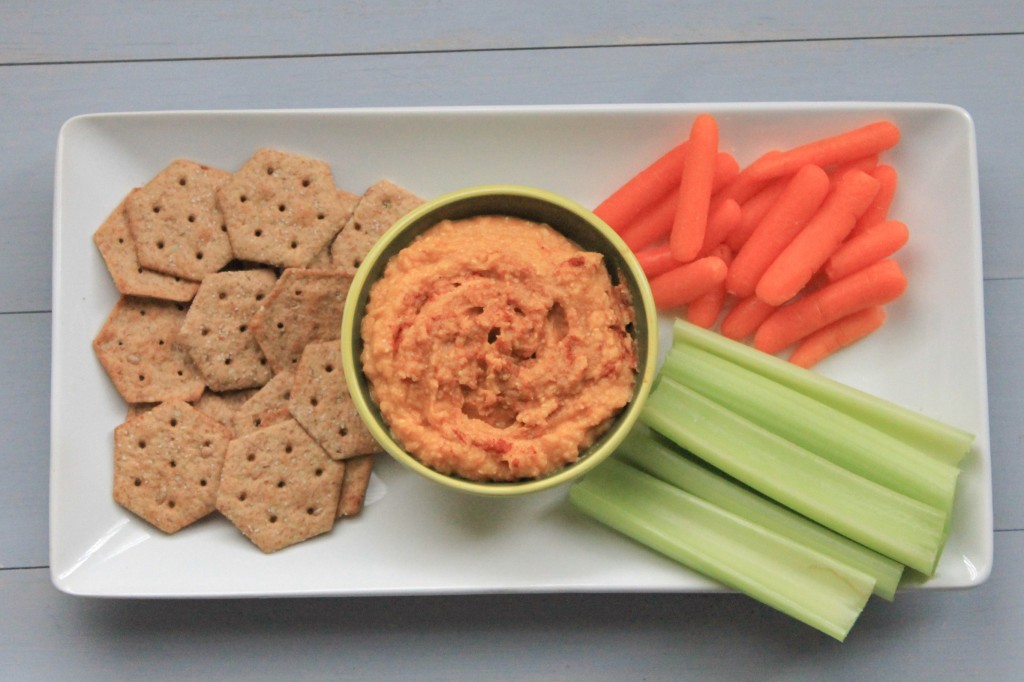
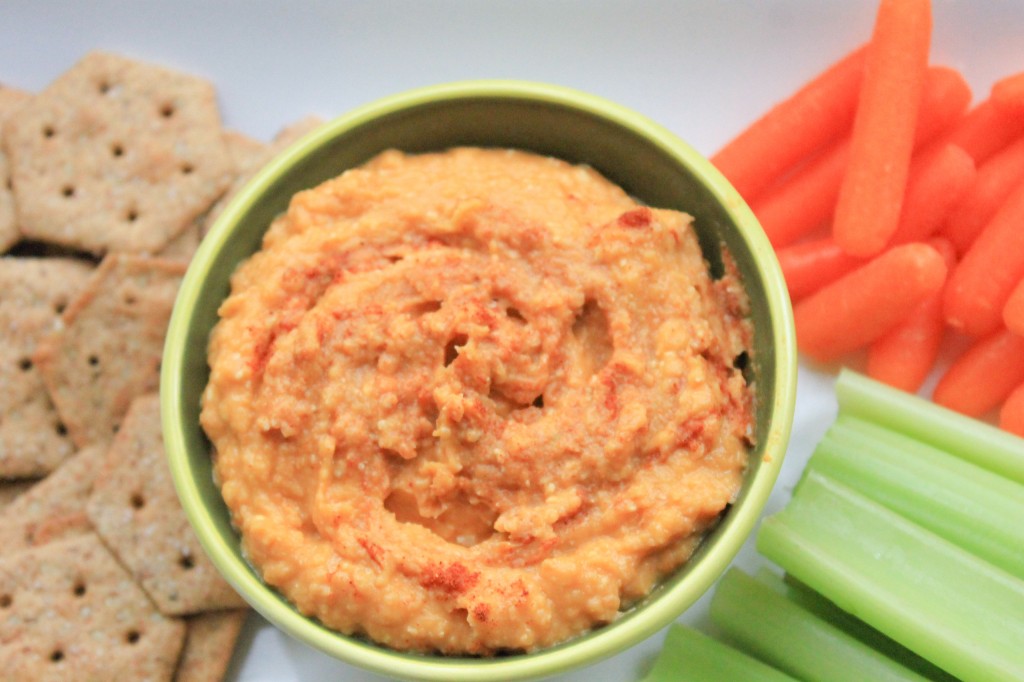
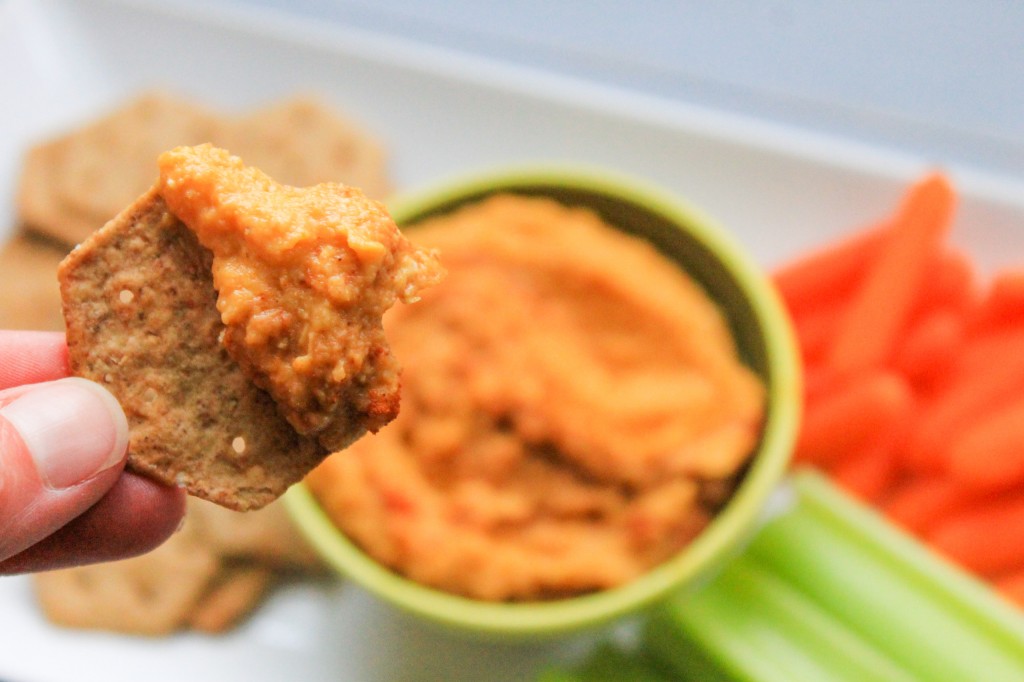
Pair with chips, bread, or veggies, serve, and enjoy! 

Pumpkin Hummus  (10 of 12) Pumpkin Hummus  (11 of 12) Pumpkin Hummus  (12 of 12)

Did I mention there’s only 82 calories per serving? That’s right! (PS- one serving is 4 Tablespoons!) So, if you eat too much your waistline will forgive you. If you want more, you can make some more in a matter of seconds. You can thank me later! 

[yumprint-recipe id=’28’]Fabulous recipes by Mandi at godsavethequinoa.com

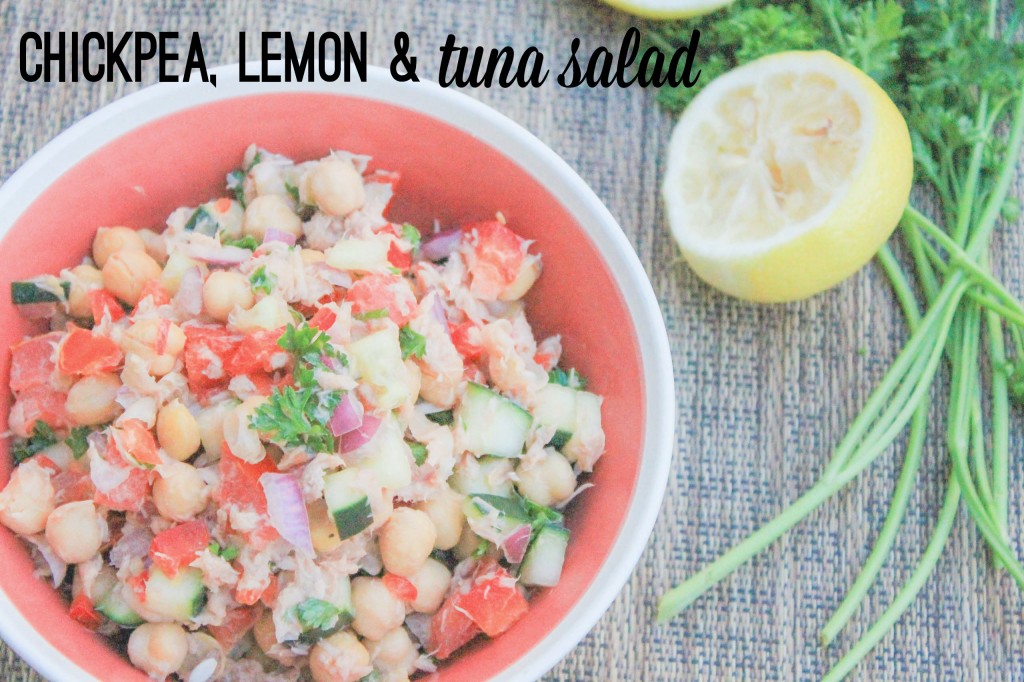
Chickpea, lemon, and tuna salad

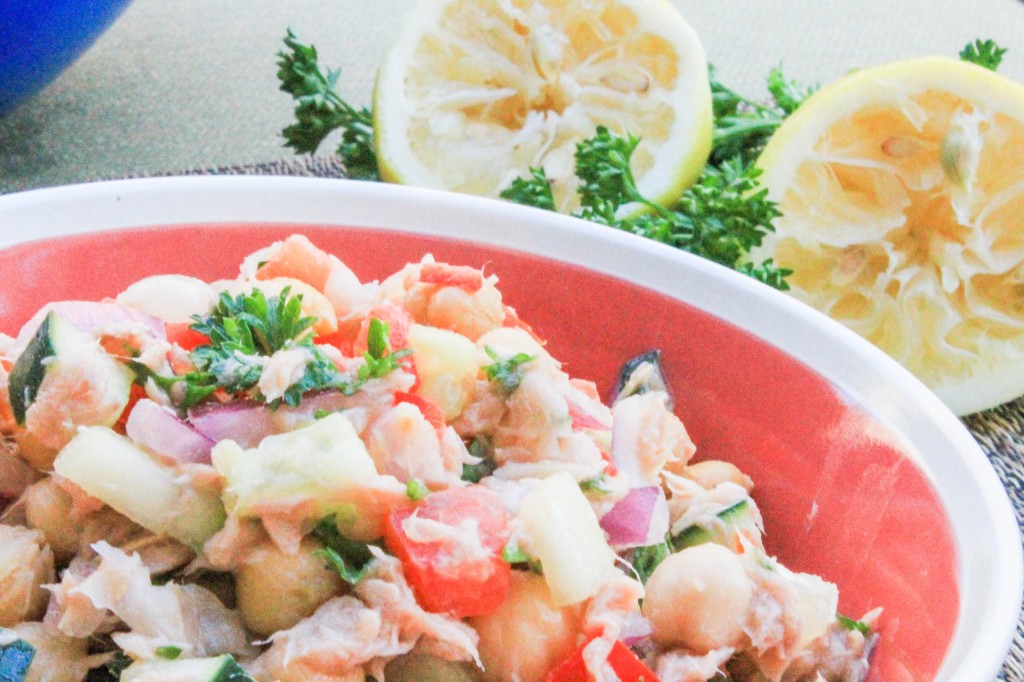
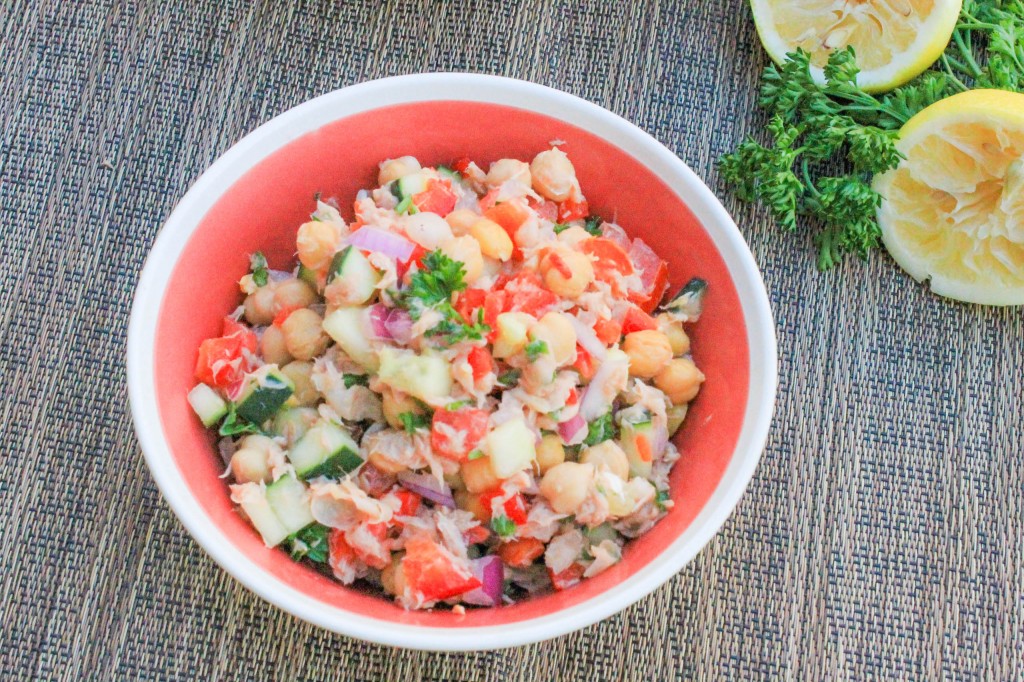
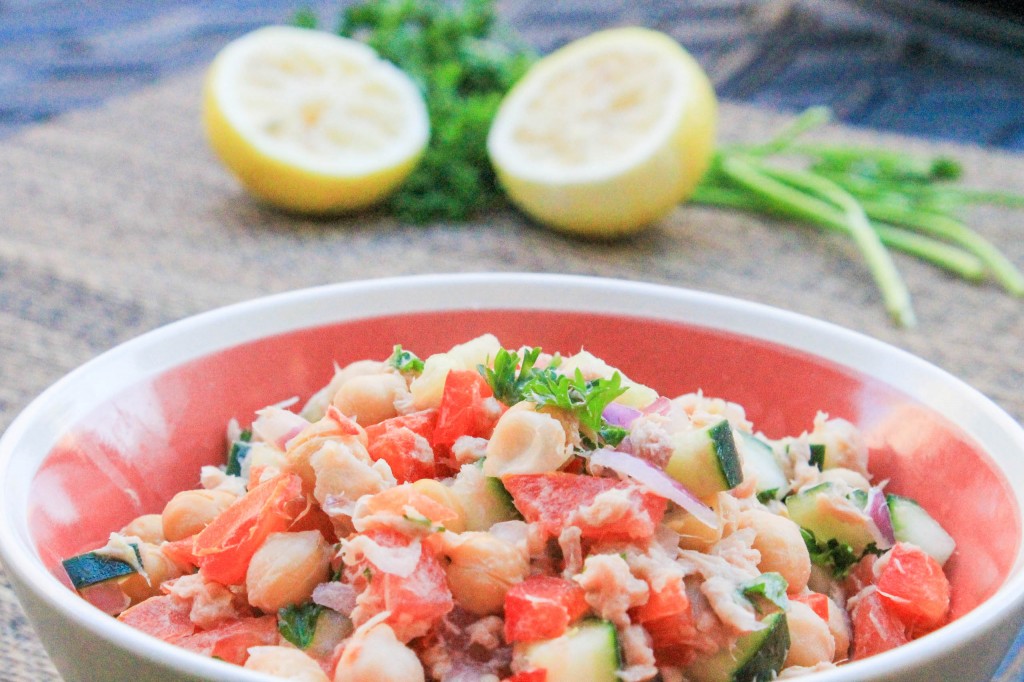
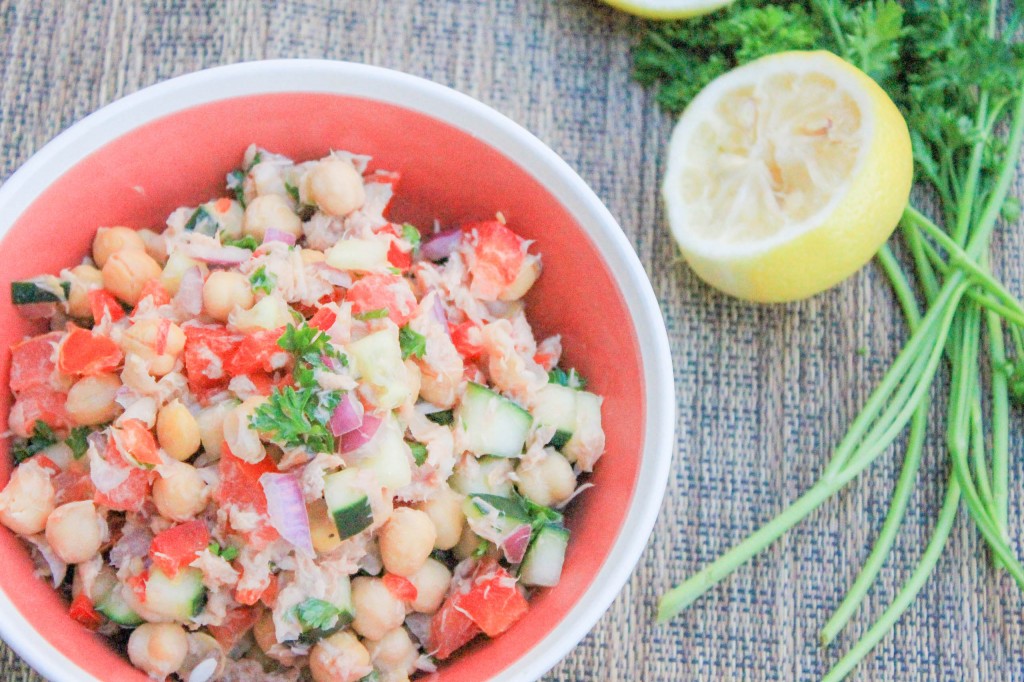
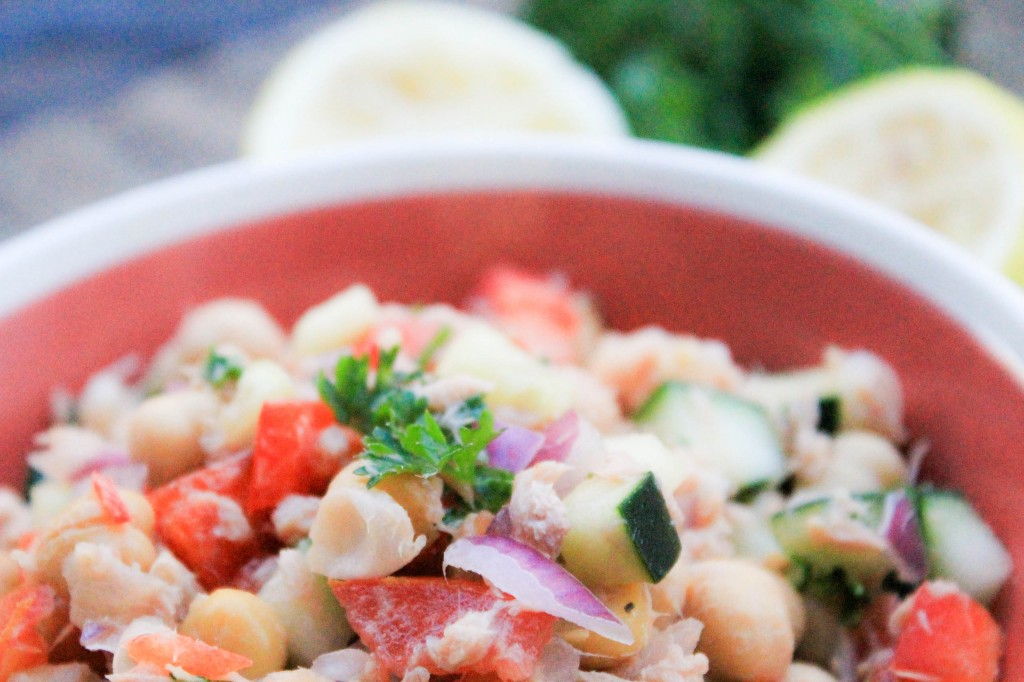
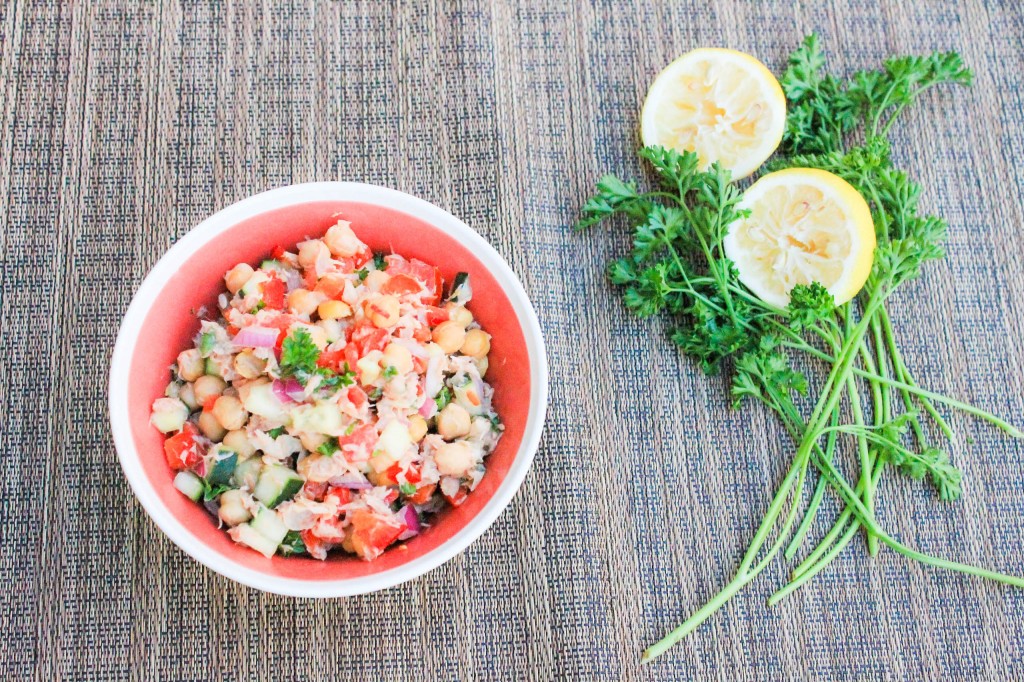
Lemon, chickpea, and tuna salad (14 of 16) copy

Lately I’ve been using chickpeas non-stop in my recipes. They’re so versatile and easy to cook with, not to mention they have great health benefits! They’re an excellent source of fiber, full of iron, and believe it or not, actually have a lot of protein! With all these pro’s, I couldn’t resist adding them to this tuna salad recipe!

Lemon, chickpea, and tuna salad (1 of 16)

One thing I love about this tuna salad recipe is it requires NO cooking, making it the perfect recipe for one of those “I’m too lazy to cook” nights. All you have to do is chop the ingredients and mix them together.

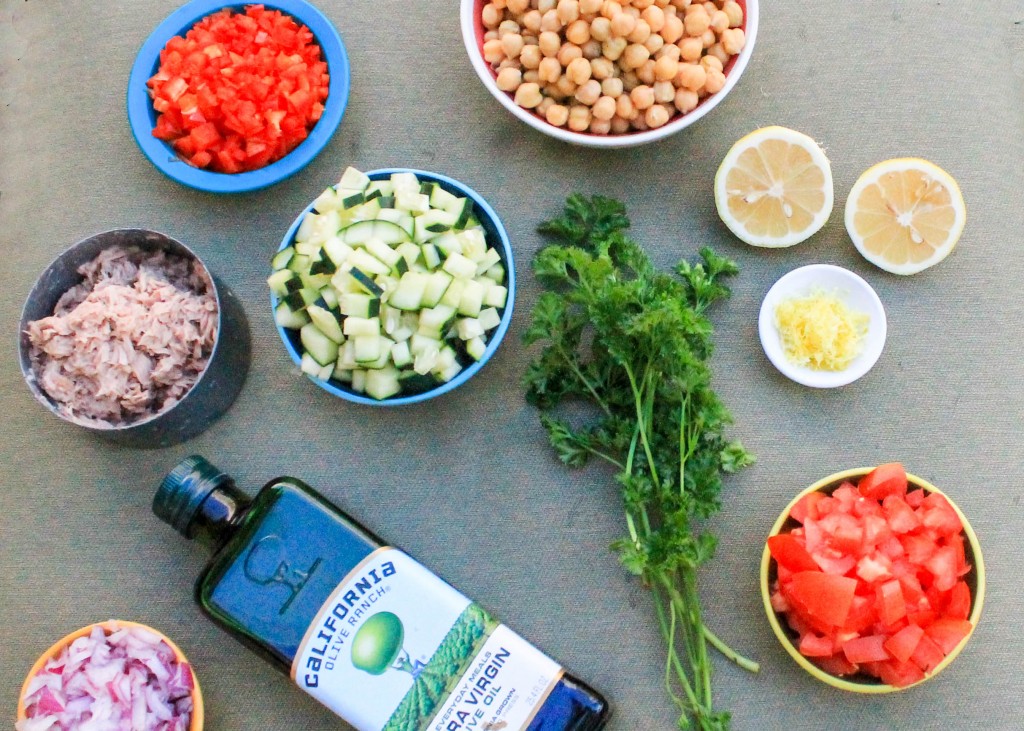
Chop and dice fresh cucumbers, onions, tomatoes, bell peppers, and parsley, then zest and juice your lemons.  

[envira-gallery id="970"] 
[envira-gallery slug="chickpea-lemon-tuna-salad"]

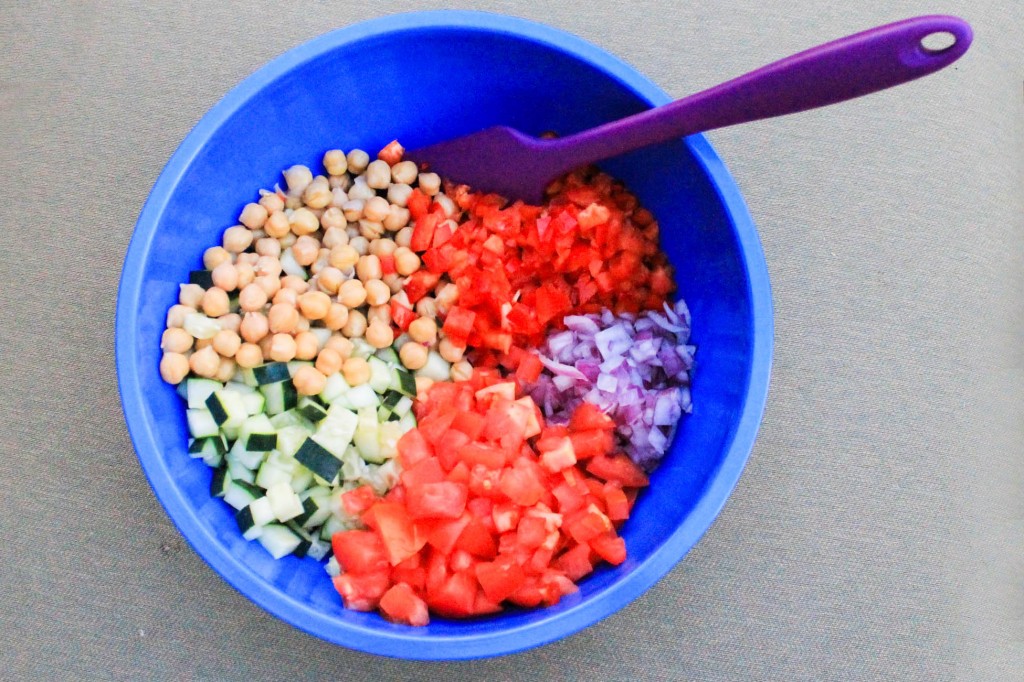
In a large bowl combine your veggies and add in your chickpeas, lemon zest, fresh lemon juice and mix.

Lemon, chickpea, and tuna salad (6 of 16)

[envira-gallery id="992"] 
[envira-gallery slug="lemon-chickpea-tuna-salad-ingredients"]

Lemon, chickpea, and tuna salad (9 of 16)

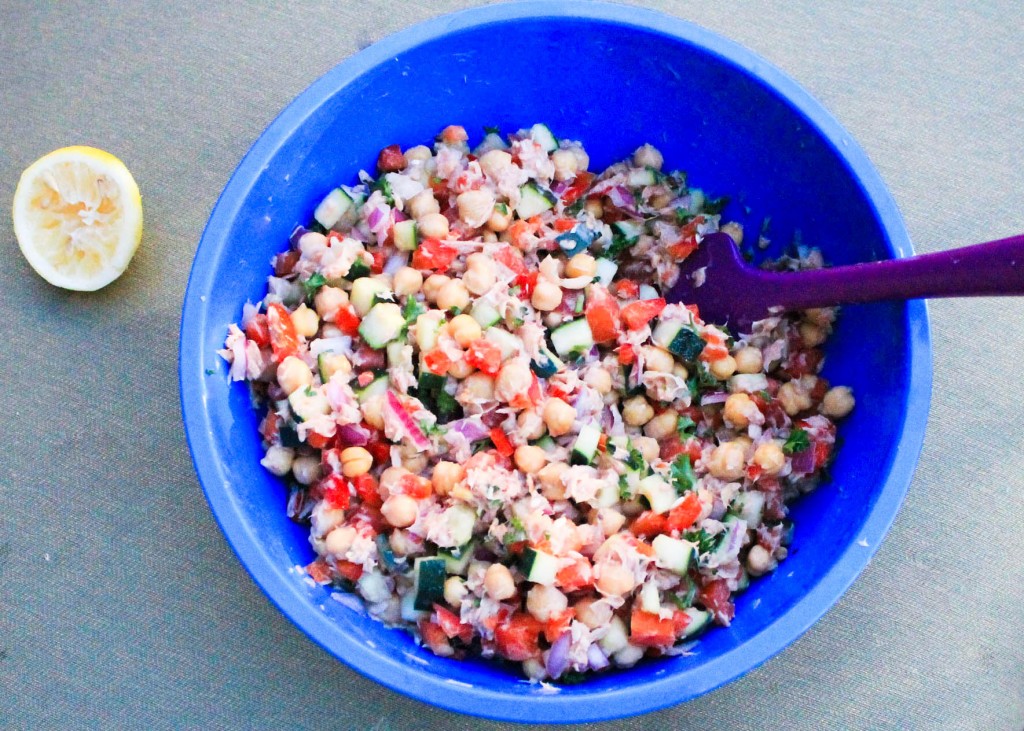
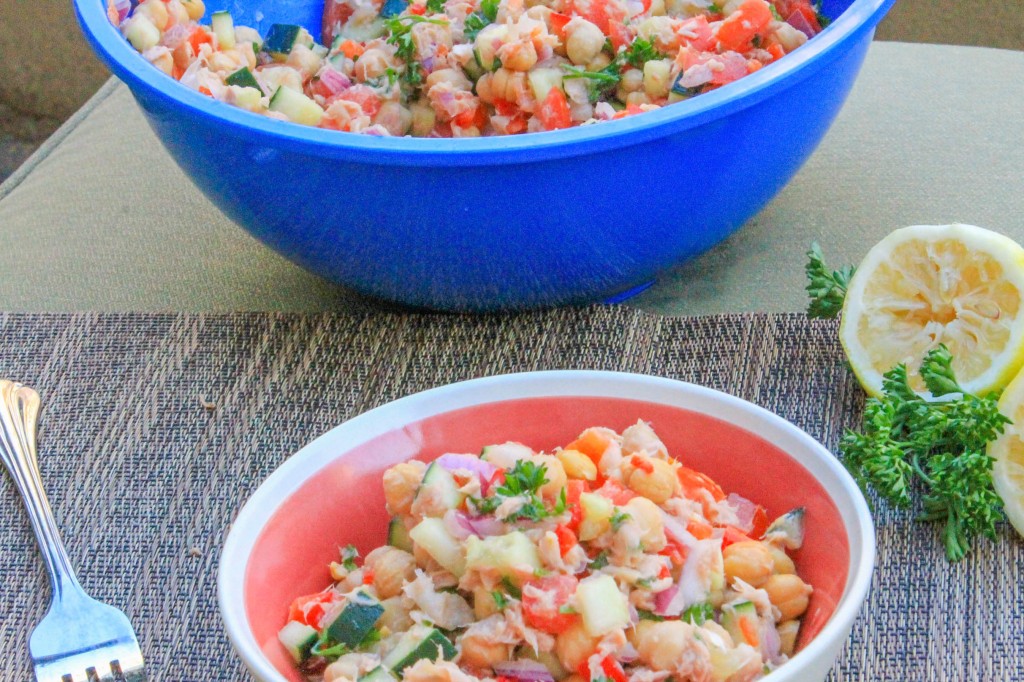
Fold in your tuna and a dash of EVOO, followed by salt, pepper, and spicy dijon mustard to taste. Fold and mix all ingredients together until everything is completely combined. Scoop into a bowl or onto pita bread and enjoy! 

Lemon, chickpea, and tuna salad (10 of 16)

Lemon, chickpea, and tuna salad (11 of 16) Lemon, chickpea, and tuna salad (12 of 16) Lemon, chickpea, and tuna salad (13 of 16) Lemon, chickpea, and tuna salad (14 of 16) Lemon, chickpea, and tuna salad (15 of 16) Lemon, chickpea, and tuna salad (16 of 16)

[yumprint-recipe id=’27’] Fabulous recipes by Mandi at godsavethequinoa.com