Category: Snacks

Loaded Blueberry Balsamic Avocados

Loaded Blueberry Balsamic Avocados Title Pic

Step up your guacamole game by making loaded blueberry balsamic avocados instead. Simply swap tomatoes, onions, and lime juice for fresh blueberries, shredded parmesan cheese, and balsamic vinegar, mix together and viola! Thirty seconds later, you have a delicious dish just waiting to be devoured!  

There are many, many things I love in life. With only four simple ingredients, this recipe is at the top of my list! What’s not to love about a super simple, no cook recipe that has some of my favorite food groups (avocados, blueberries, and cheese)? Not to mention, this is a fantastic post workout snack full of vitamins and nutrients to replenish your muscles and prepare your body for its next beating. 

Loaded Blueberry Balsamic Avocados Ingredients

Blueberries should be a staple in any endurance athlete’s diet. Thanks to the absence of cholesterol from blueberries, not only can the lower your risk of heart disease and cancer, they are also anti-inflammatory and are known to aid in muscle recovery and soreness. (AMEN!) 

Loaded Blueberry Balsamic Avocados - blueberries

How to pick out and store blueberries 

When scoping out which package of blueberries to add to your shopping cart, look for firm that are not soft or bruised with a deep blue or purplish color. Note: the waxy, whitish-grey coloring on the blueberry is referred to as the “bloom” and is considered a sign of freshness. The “bloom” is mother nature’s natural protection that helps to prevent the berry from spoiling. To prolong their life expectancy,  only wash the blueberries you’re going to eat right before eat them. Do not wash them all at once and store them in the fridge if you want them to last! I also suggest conducting periodic inspections to remove any berries that have turned soft or moldy. You don’t want one bad apple… er, blueberry to spoil the bunch!

When fresh blueberries are out of season frozen blueberries are a great alternative! When selecting frozen blueberries, shake the bag around to make sure the berries are rattling around, similar to a bag of peas. If a bag of blueberries appear to be in a big, frozen clump, keep looking. This is a sign the berries have already thawed and re-frozen. As always, make sure to avoid options with added sugars are sweeteners. Check the ingredients listed on the package. All you should see is “blueberries”. Plain and simple! To unthaw frozen blueberries, simply rinse them under cold running water and let thaw for a few minutes at room temperature. .

Loaded Blueberry Balsamic Avocados - parmesean

Do not, I repeat DO NOT skimp on the Parmesan cheese! Its rich in calcium, provides an excellent protein source and is easily digested. Trust me, your bones will thank you.

I prefer to serve this dish with nutrient rich endives(hello vitamin A, K, folate and fiber!) They also provide a nice crunch, you know the kind you get from a big bag of chips. At first bite, endives may taste a tad bitter. I personally did not have this problem but know some who think they take a little getting used to. Rest assured, be sure to thoroughly wash them before eating and store in the refrigerator- this should help eliminate some of the bitterness. If you’re looking for other recipes to enjoy endives with, check out my Avocado Tuna Salad recipe.

Loaded Blueberry Balsamic Avocados

I told you this recipe was SUPER simple to make, so here we go.

Step 1: Pick out a very large, soft, ready to eat avocado. Cut it in half lengthwise, otherwise known as “hot dog style”, remove the pit, and scoop the good stuff into a bowl with a large spoon and mash. If you’re looking for a way to impress your friends and up your food presentation game, be careful NOT to break the shell. I’ll tell you why in just a minute. 

Step 2: Rinse, dry, and add your fresh (or frozen and dethawed) blueberries to the bowl. Next, sprinkle in your freshly grated parmesan cheese and gently stir to combine. 

Step 3: Finally, in a slow, stead stream, carefully pour balsamic vinegar over the contents in the bowl. You should pour just enough so that the green color of the avocado becomes slightly darker, but not brown. I suggest starting slow and gradually adding more balsamic as needed. 

Loaded Blueberry Balsamic Avocados

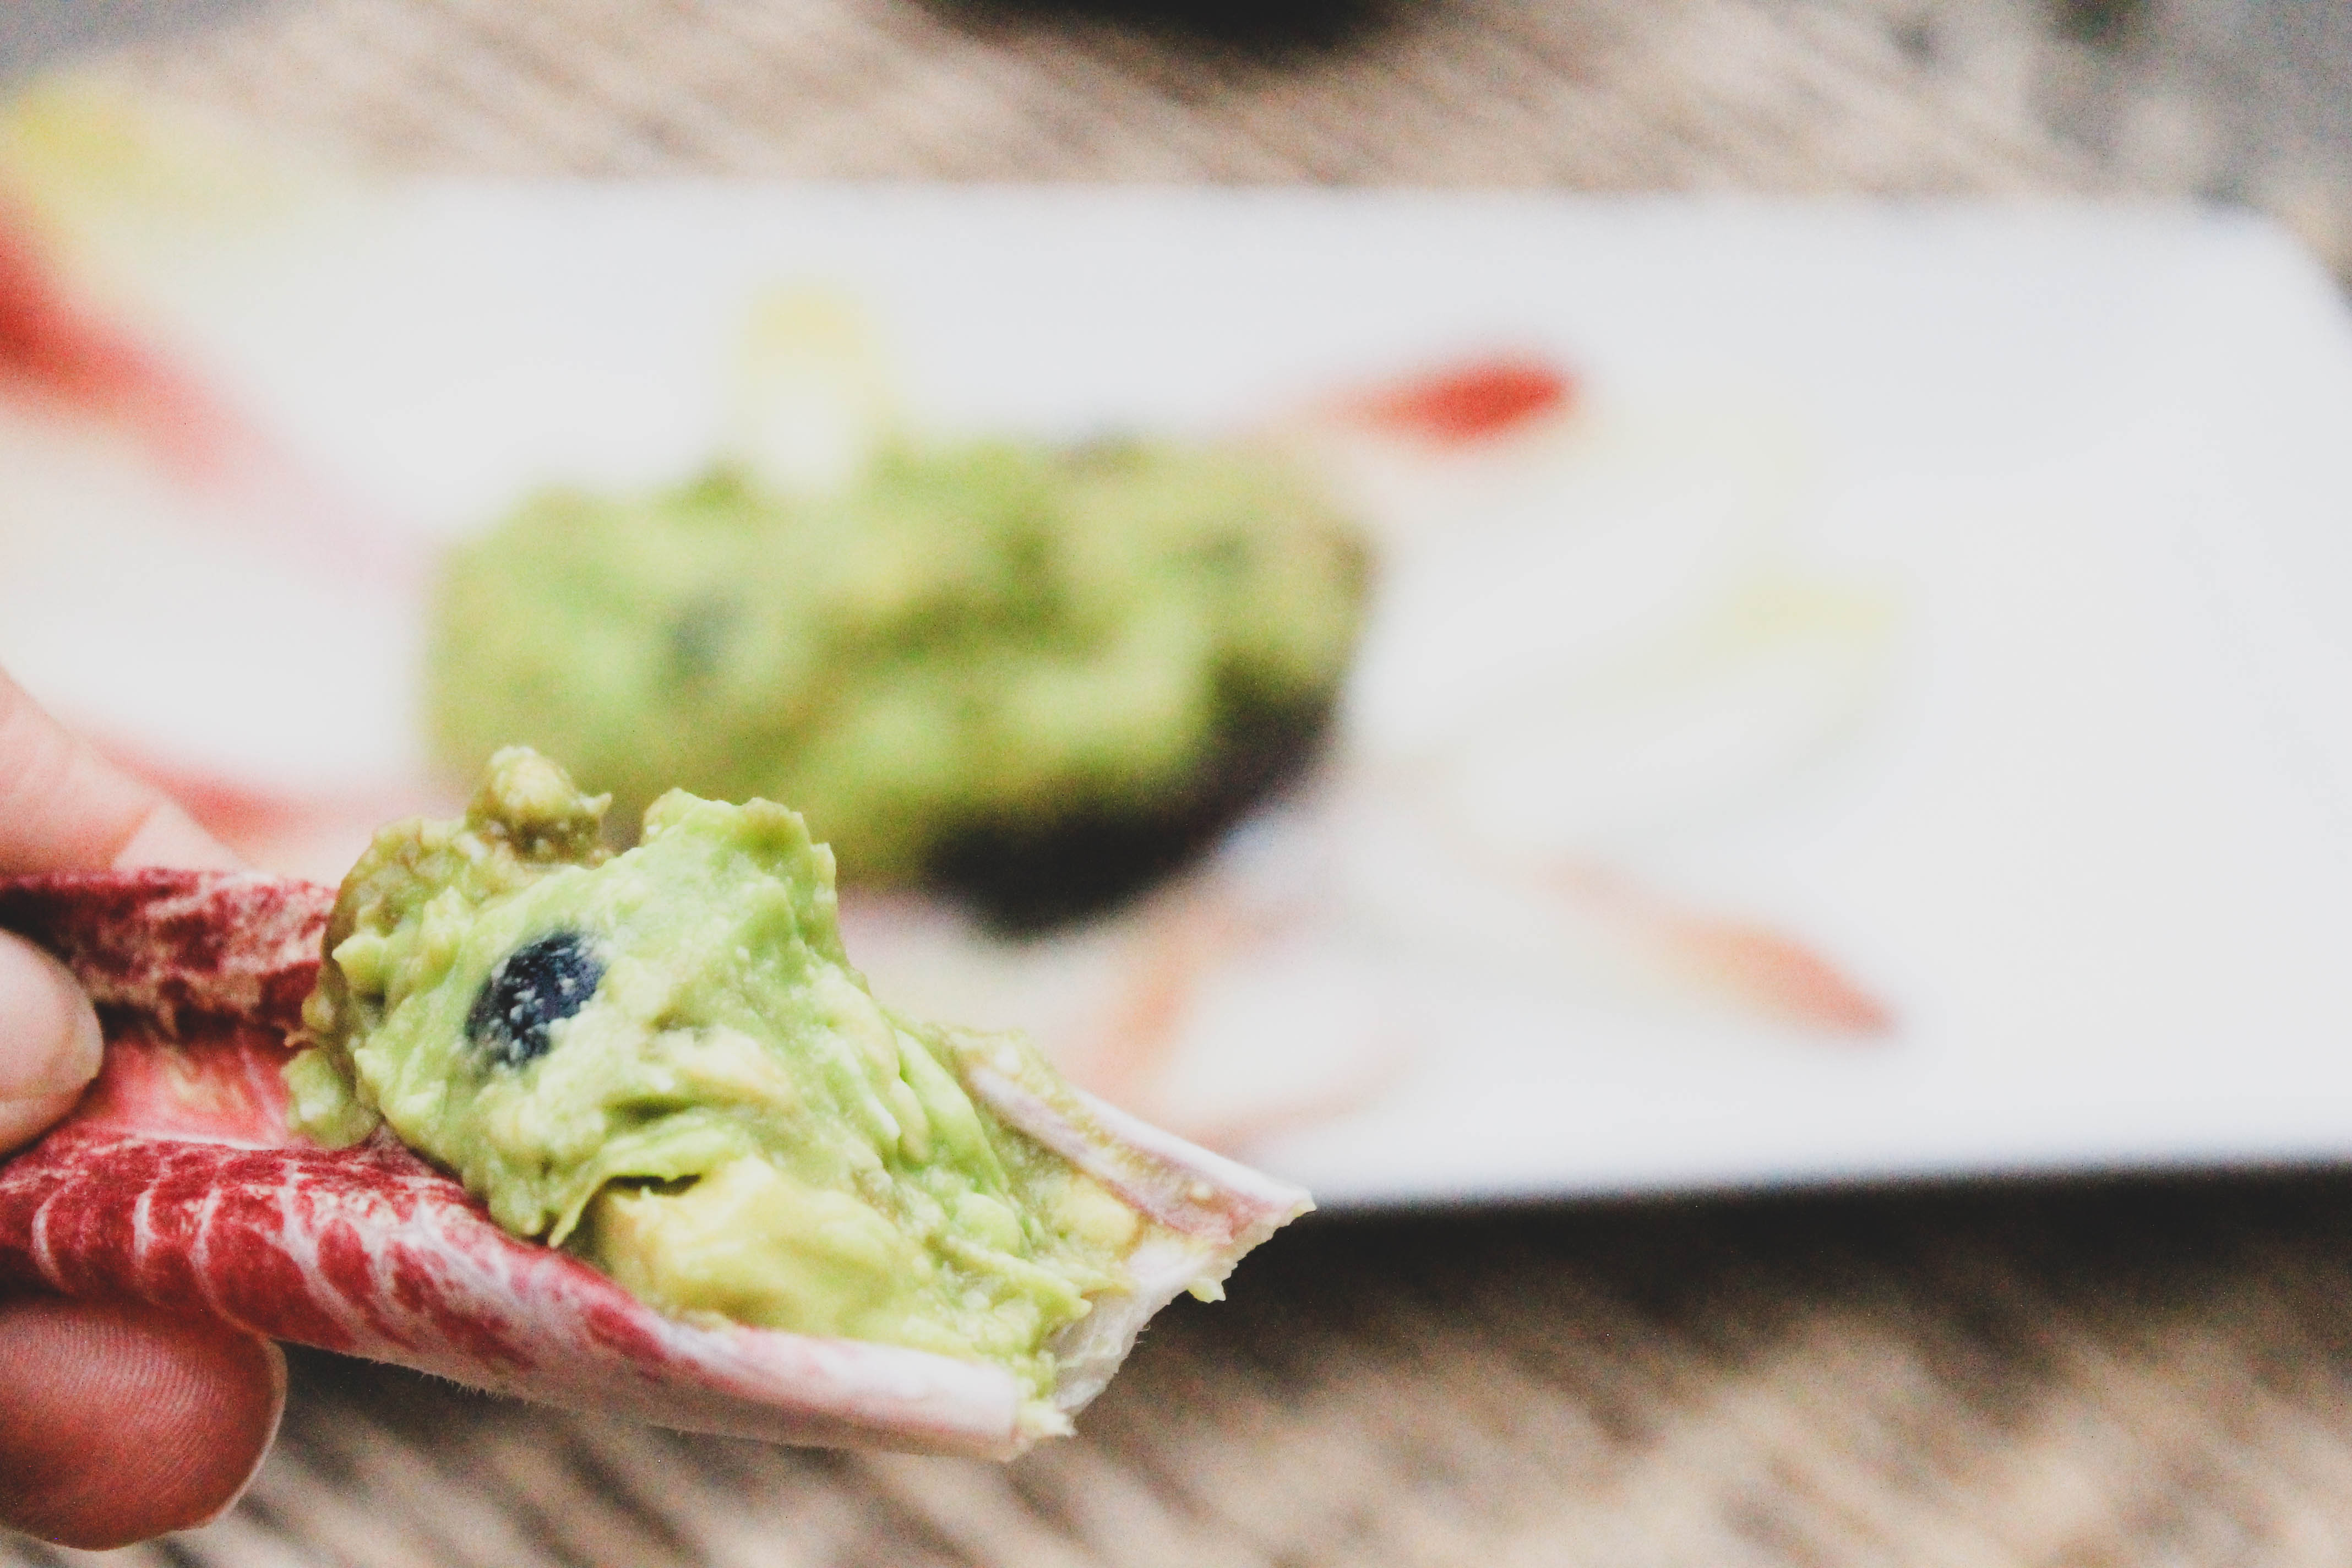
Serve by placing contents into a bowl (quick but B O R I N G) or by packing contents tightly back into the avocado shell. Place on a plate and arrange endives as pictured above. 

Use endives to scoop the avocado out of its shell and enjoy! 

Loaded Blueberry Balsamic Avocados


[yumprint-recipe id=’46’] 

I’d love to hear what your think! 


Recipes for endurance athletes

No Bake Blueberry Lemon Cheesecake Bites

No Bake Blueberry Lemon Cheesecake Bites cover page

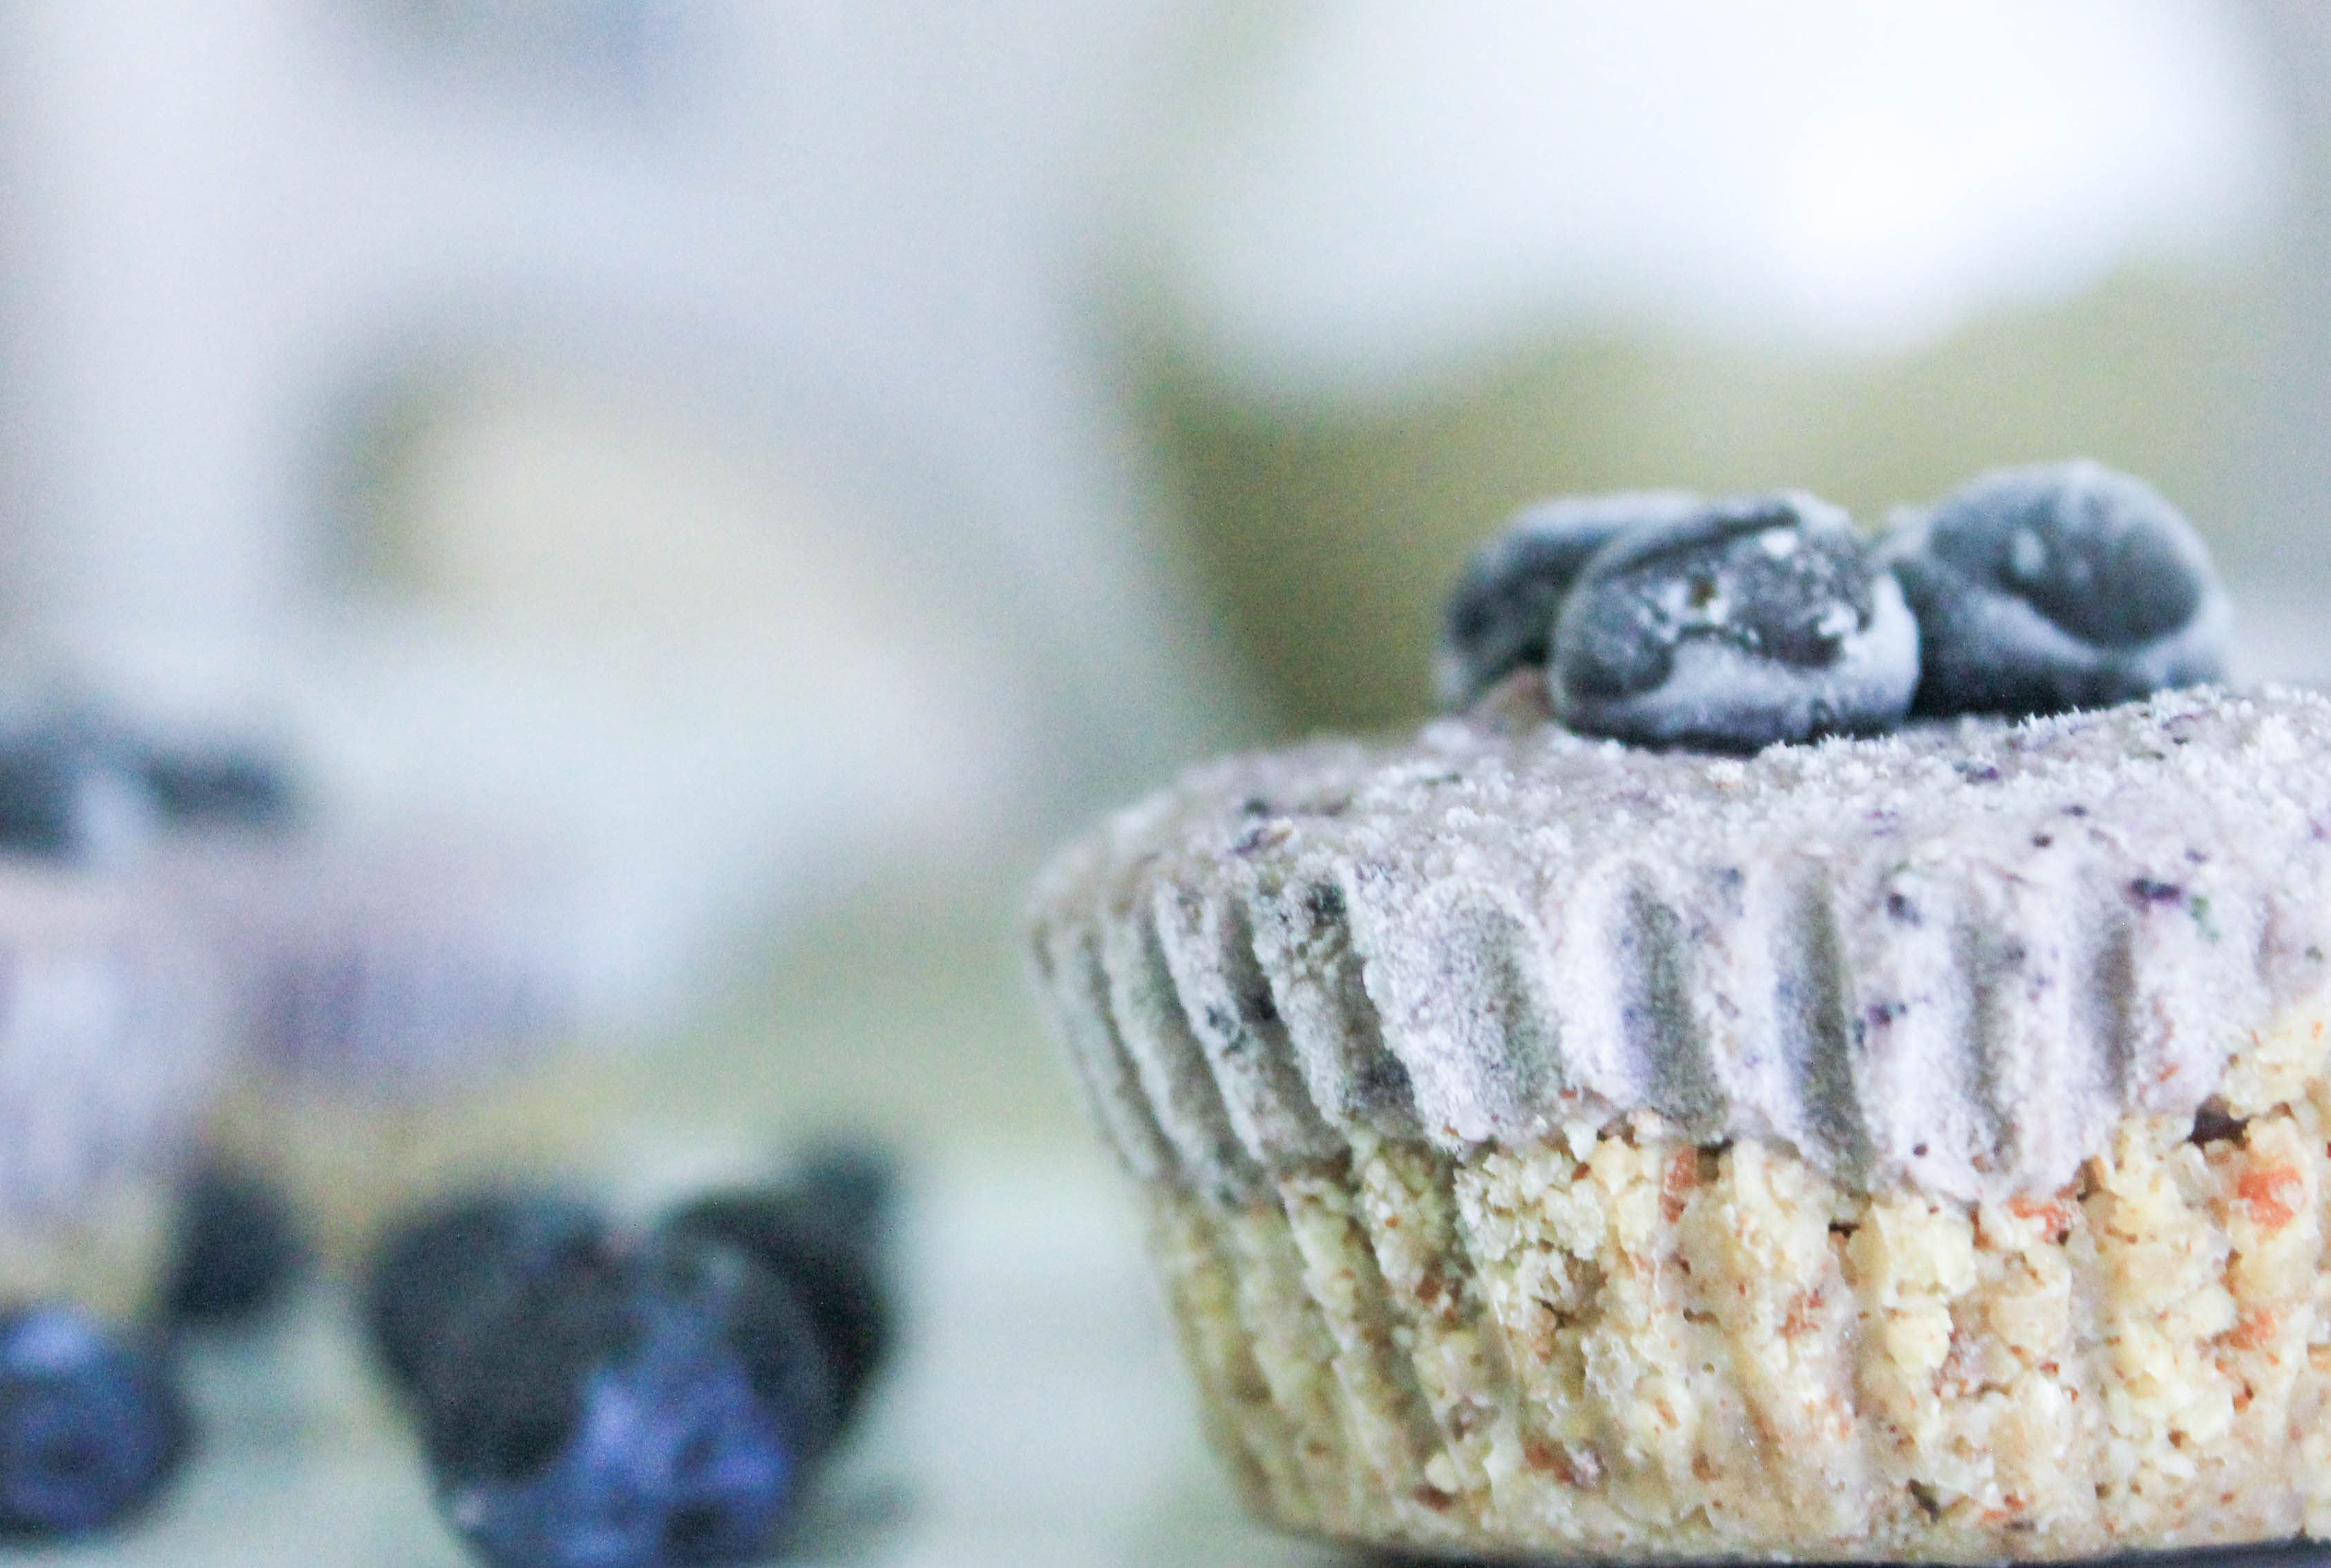
I LOVE desserts. I love them SO much that I sometimes I wonder if I was born with 32 sweet tooths instead of just one. Okay, bad dad joke- I couldn’t help myself! Anyways, you know what I love just as much as dessert? Making healthy food taste just. like. dessert. You read that right- healthy food. Meaning nuts, fruits, spices, no sugar. You get the gist. 

No Bake Blueberry Lemon Cheesecake Bites

Besides the fact that its for my favorite meal, there are a number of reasons why I love this recipe. I’ll give you my top three:

  • Healthy to the core- Made with raw, wholesome ingredients like cashews and dates, that actually help with the refuel and recovery process. 
  • NO BAKING- less mess to clean and no risk of burning these delicious treats. This also means no more excuses for those of you who “don’t know how to cook” 🙂 
  • Prep time takes all of about 10 minutes- As long as you can remember to soak your cashews, you can whip a batch together after your morning workout with minimal effort. Don’t worry if you forgot to soak your cashews. You can hack this by boiling them on low heat for about 15 minutes. 

No Bake Blueberry Lemon Cheesecake Bites3

Okay I lied, I’m giving you my top four. My absolute favorite thing about this recipe is how fresh all of the ingredients taste. There is just something about the combination of fresh blueberries, juice from a real lemon, and fresh mint leaves that has the power to fill any void imaginable!

The process to “no bake” these is simple. I prefer to take a blend-blend-freeze approach.

No Bake Blueberry Lemon Cheesecake Bites

Step 1: combine ingredients for your crust (the bottom layer) in a food processor or high powered blender. When combined pack tightly into the bottoms of a lined muffin tin. 

Step 2: combine ingredients for your filling (top layer) in a food processor or high powered blender. When combined, spoon mixture into muffin pans and top with fresh blueberries. 

Step 3: place muffin pan in the freezer for about four or so hours until “cheesecakes” are frozen. Once these babies are nice and solid, remove them from the freezer and transfer to an airtight, freezer safe container for safe keeping. This will help prevent freezer burn. 

No Bake Blueberry Lemon Cheesecake Bites

When you’re ready to enjoy, I suggest placing them on the counter to thaw for a few minutes before digging in. This will help make sure you’re able to bite through them and will really help the flavors stand out! 

No Bake Blueberry Lemon Cheesecake Bites

Bon Appetite! 

No Bake Blueberry Lemon Cheesecake Bites

[yumprint-recipe id=’45’] 

Recipes for endurance athletes


Honey Roasted Turmeric Pepitas

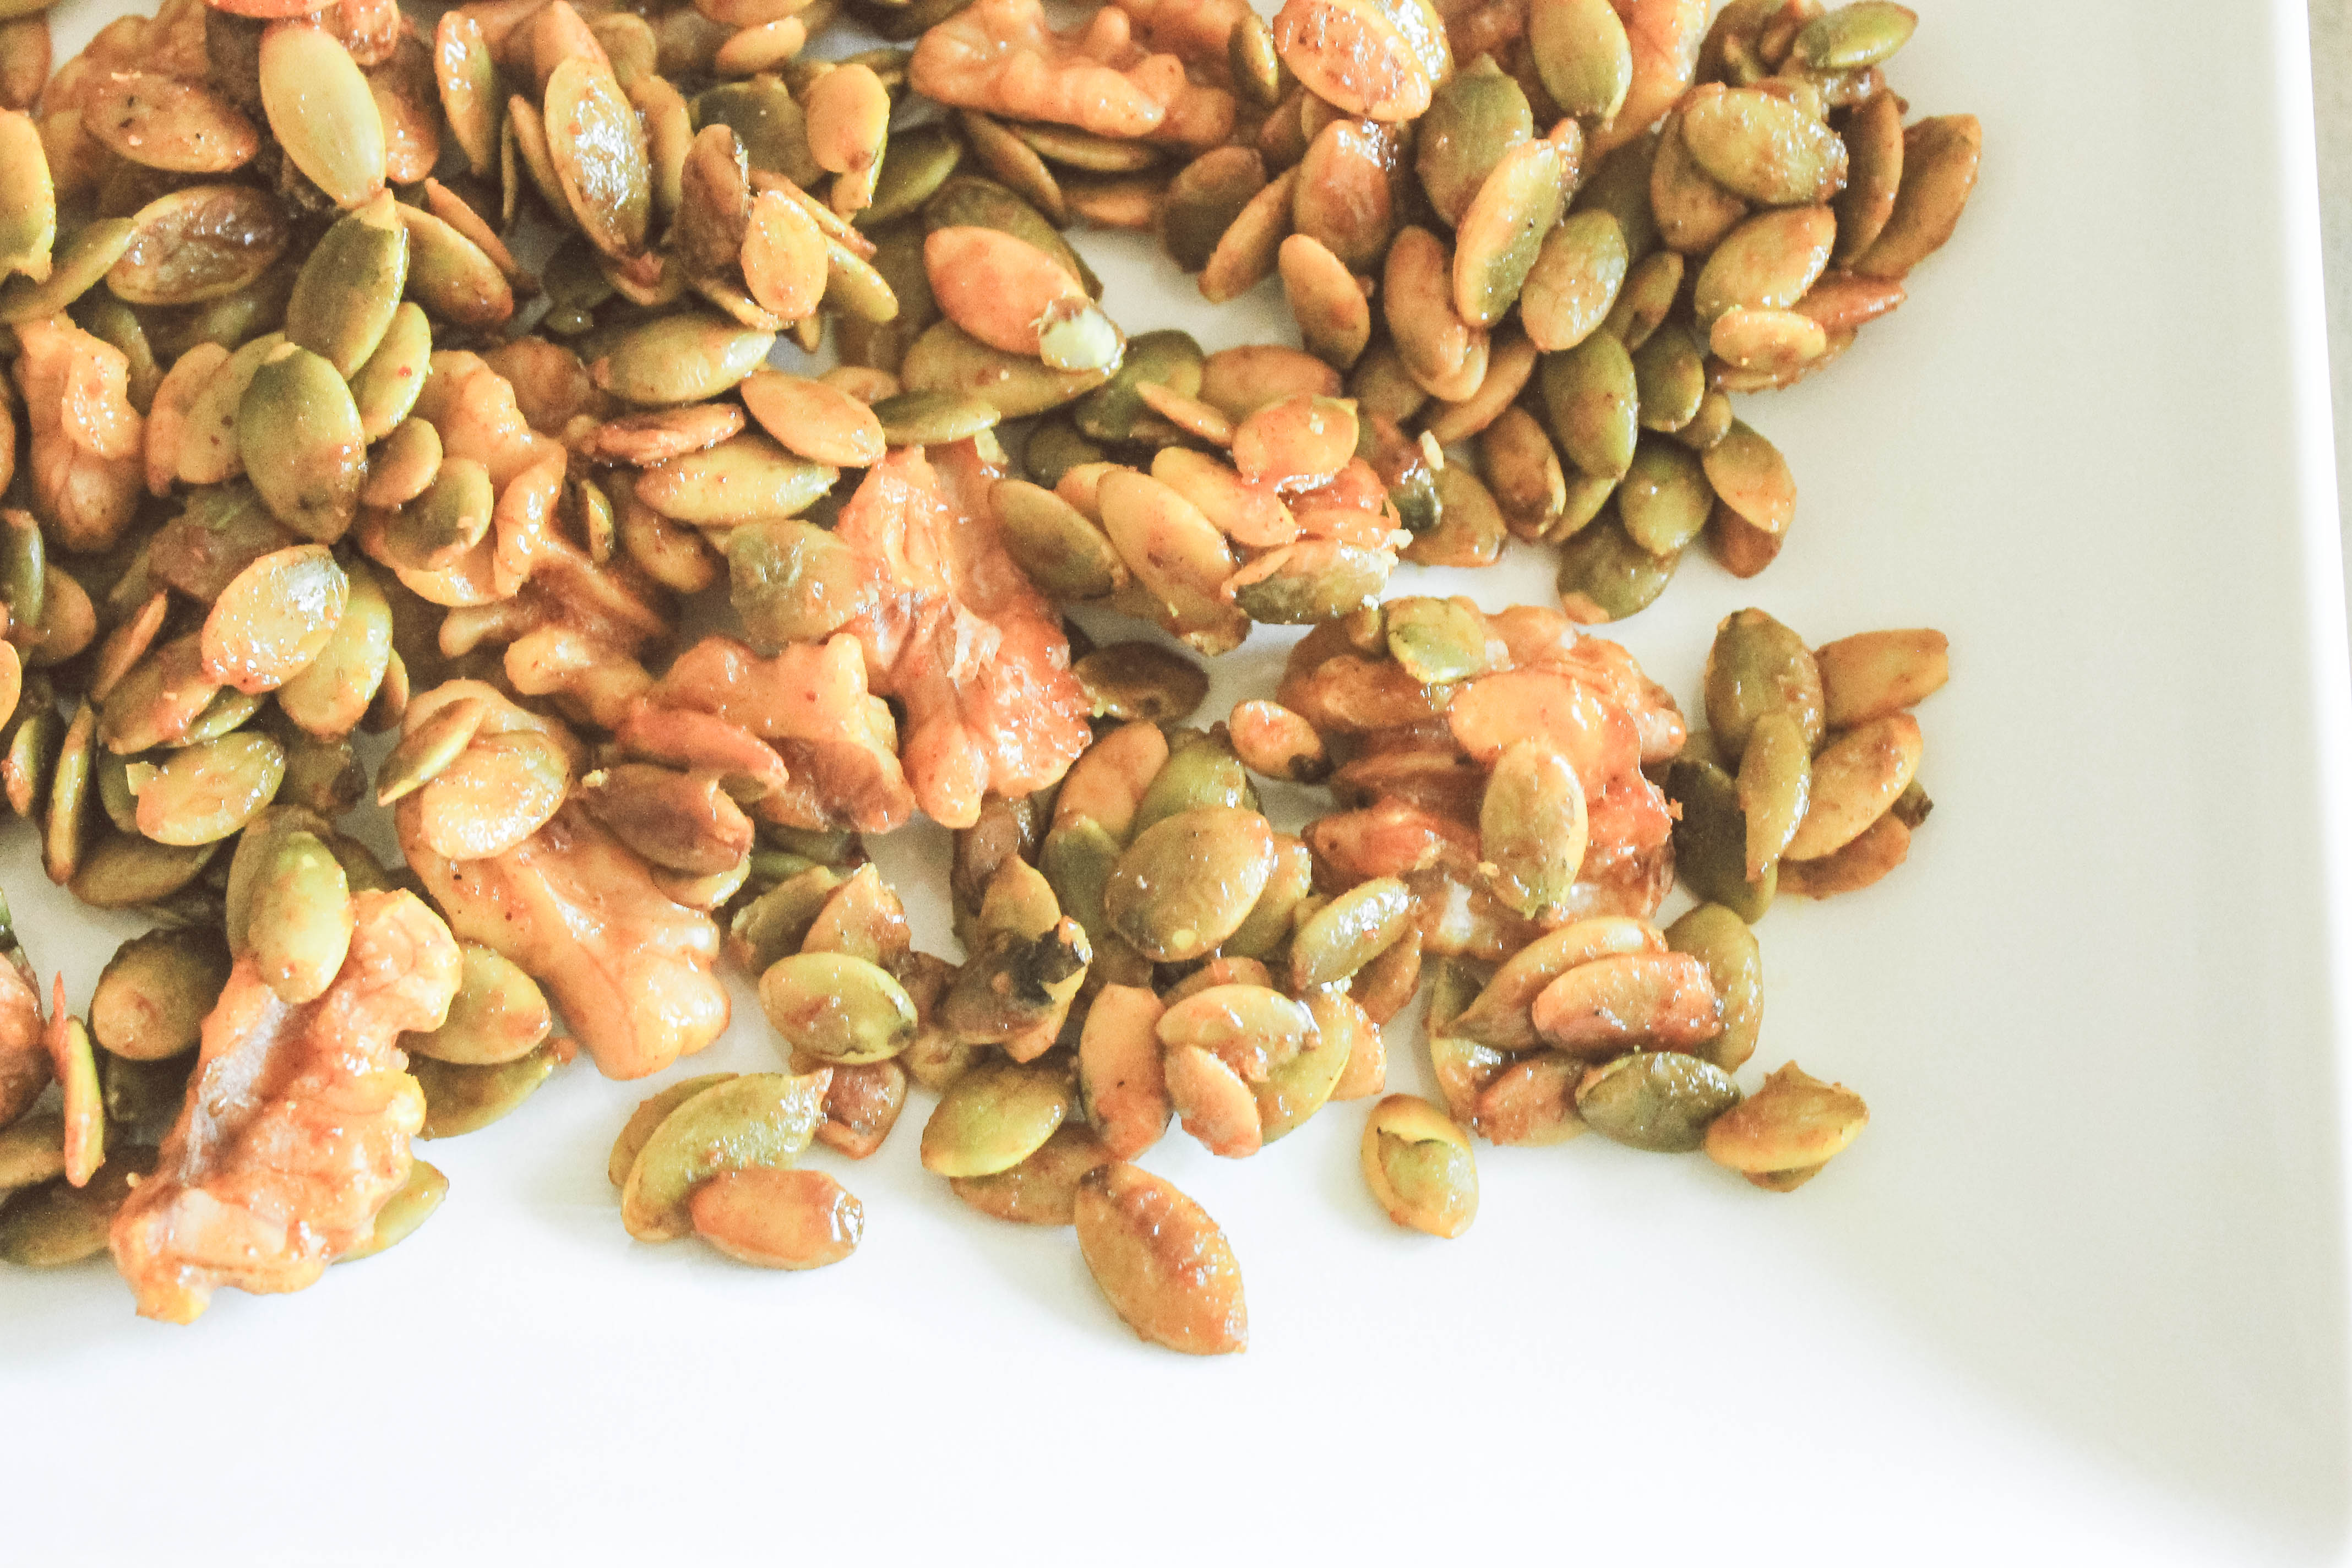
turmeric pepitas cover pageThese honey roasted turmeric pepitas are the perfect combination of sweet and spicy and are loaded with the essential nutrients every endurance athlete needs but never gets enough of. Enjoy them on top of salads, soups, or by the handful when you’re on the go! 

Nuts and seeds are an excellent snack to nosh on thanks to their high contents of omega-3 fatty acids and vitamins. Omega-3 is an “essential” fatty acid, meaning your body requires it for good health but isn’t capable of producing it on its own. Our only choice is to ingest it- by consuming lots of foods with Omega 3’s like these honey roasted turmeric pepitas!

In addition to being “essential” for your health, consuming plenty of omega 3 (also known as polyunsaturated fatty acid) is essential to the performance of endurance athletes. Here’s why:

IMG_4962

For starters, the body has a limited ability to store carbs. The average person can deplete their body’s carb reserves within two hours of moderate exercise. If you’re training for an Ironman, two hours is nothing! Luckily,  your body has a much greater capacity to store fats. These fat stores, which are often stored in your muscles and liver, can contain over 50 times more energy compared carbohydrates.

Fat tends to be the predominant choice of fuel during lower intensity workouts. When you ramp up the intensity, carbohydrates become, and remain, you body’s main fuel source until you finish your workout. Of course, the level of intensity and heart rate in which this switch happens is different for everyone. The best way to determine this is to complete a lactate threshold or VO2 max test. If you’re wondering why your coach spends SO much time telling you to stick to your nutrition plan and keep your heart rate low the first half of your race, this is precisely why. 

The moral of the story, make sure you’re eating healthy fats to fuel your 3 hour long bike ride this weekend and make this recipe! 

Turmeric Pepitas

The main ingredient in this snack mix, pepitas (AKA pumpkin seeds), are guaranteed to pull you out of any nut-rut you may find yourself stuck in.

Before you get to cooking, there are two things you need to know:

1. You need more pepitas in your life.

Pepitas are the richest natural source of magnesium. Why does this matter? Well, magnesium is a critical but often overlooked electrolyte. If your calves never fail cramp a few miles in or the bottom of your foot ALWAYS cramps while swimming, despite the gallons of electrolytes you’re consuming, chances are you’re not getting enough magnesium.

IMG_4975

Magnesium imbalances are caused by drinking too much caffeine, alcohol, and surprisingly enough, too much water. That’s right- it is possible to drink so much water (especially the day before a big race) that you flush out all of your electrolytes! (This is why you should always alternate between H2O and an electrolyte drink.)  Because sweat loss, as well as high intensity and endurance exercises also deplete magnesium levels, its important to incorporate magnesium into your everyday diet. What better way to start than with these honey roasted turmeric pepitas! 

2. You can never have too much turmeric.

Well, I’m sure its possible to consume too much turmeric (disclosure: I’m not a doctor) but as far as I’m concerned you can never cook with too much turmeric! I love adding this inflammation fighting powerhouse to just about everything I cook. Its benefits include helping the body to fight inflammation and acting as an antioxidant. As an endurance athlete I’ll take all of the help fighting fatigue and sickness I can get!

IMG_4991

I know you’re dying to make these, so I’ll keep the remaining commentary brief.

Please note that the recipe calls for a “heaping teaspoon” of both turmeric and curry powder. If you’re not sure what a “heaping teaspoon” is, look at the picture above. This is my way of saying a rounded teaspoon with lots of spices- don’t measure exactly. Add a little extra. I believe this is a trait I inherited from my Granny! 

I personally love making a big batch of these on Sunday night to enjoy throughout the week… assuming they last that long! I’m a Trader Joe’s die hard and have found that one bag of their raw, unsalted pumpkin seeds will get me through about two batches of these bad boys. If you haven’t checked out Trader Joe’s bulk nut aisle, stop what you’re doing and do it now! You’ll never buy bulk nuts and sees anywhere else ever again.

Turmeric Pepitas

I hope you enjoy these as much as I do! Comment below and let me know!

[yumprint-recipe id=’44’] 

Recipes for endurance athletes

Skinny Pumpkin Spice Granola

skinny-pumpkin-spice-granola-title

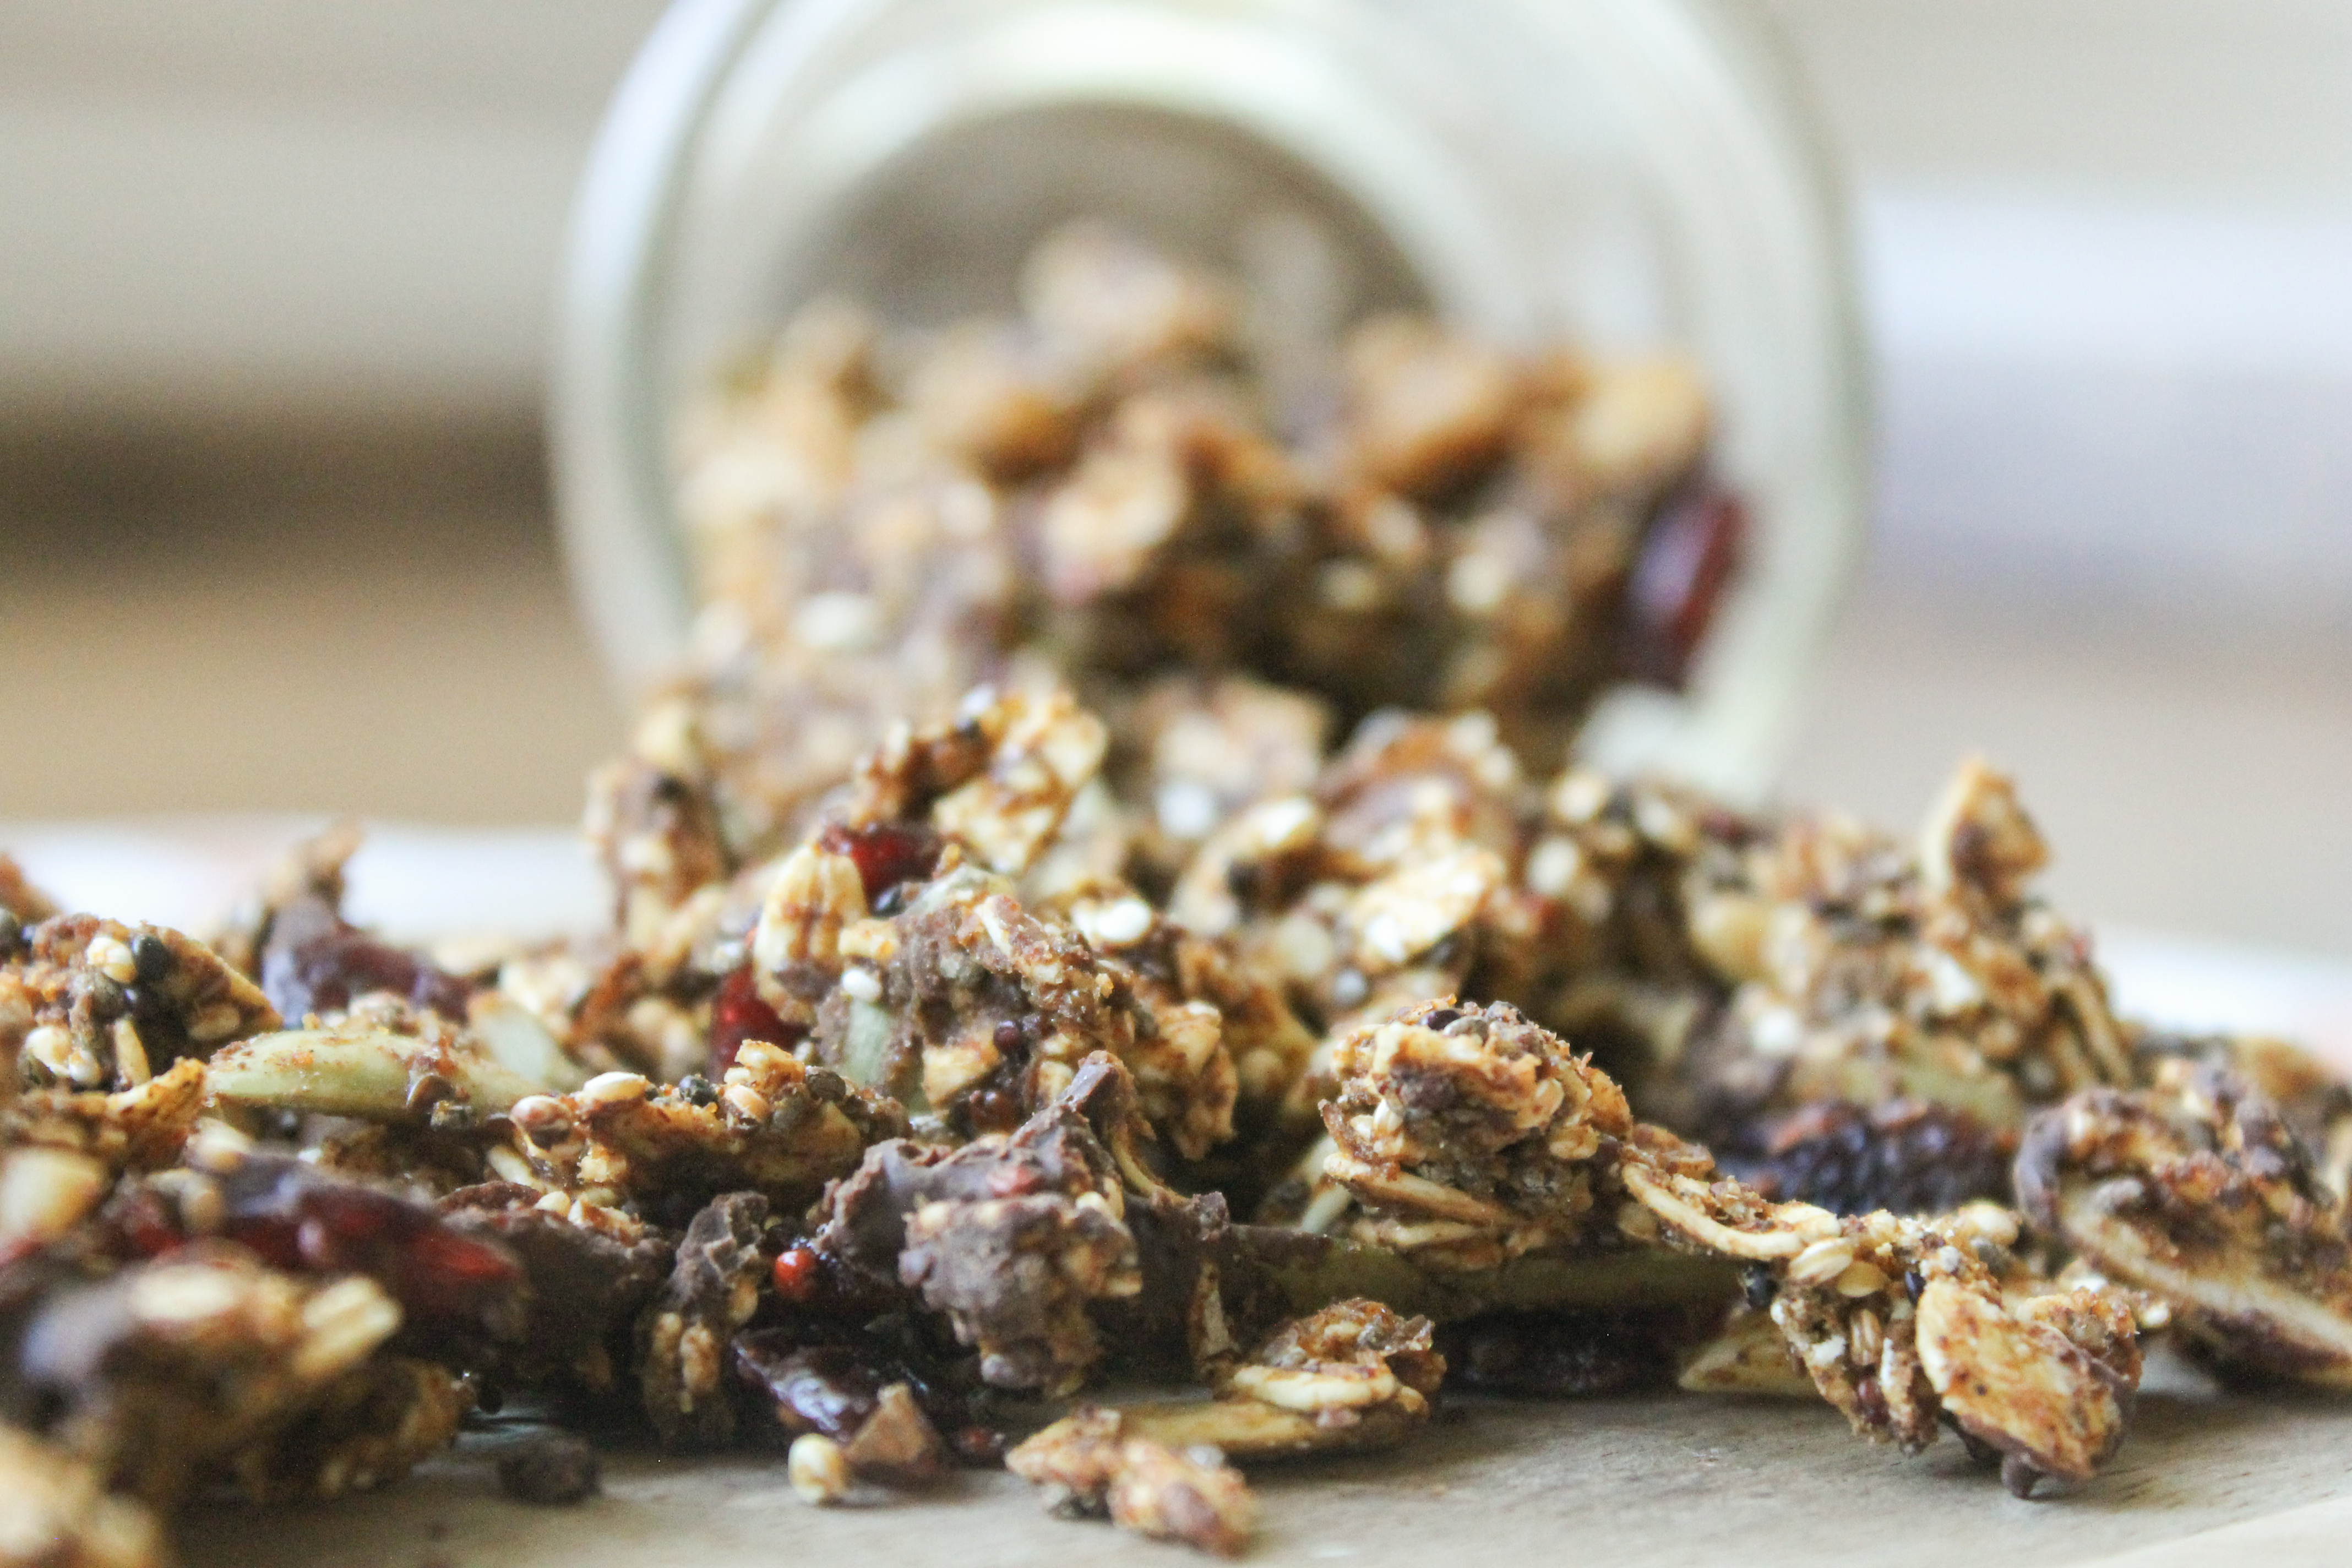
This skinny pumpkin spice granola tastes like fall and is a perfect addition to any dish! I promise this recipe will quickly become one of your go-to “pumpkin spice” favorites. I love adding this to greek yogurt, ice cream, cereal, or eating it alone as a snack. The options are endless! 

I prefer making homemade granola as opposed to buying the store bought stuff. Not only do you get alot more bang for your buck but you can also control the ingredients (especially the sugars) you’re putting into it.

skinny pumpkin spice granola

If you’ve ever read the ingredients list on the package of your favorite store bought granola you’ll likely see a list of various items such as cane syrup, brown rice syrup, corn syrup, cane sugar, canola oil, vegetable oil, fructose, natural and articfical flavoring, and soy lecithin to name a few. To translate… sugar, sugar, and more sugar! Ingredients on food labels are listed by quantity from highest to lowest. Anytime you see sugary ingredients like the ones listed above ahead of “real” ingredients you should think twice before buying!  Store bought granola may taste delicious but you are much better off making your own. 

Don’t believe me? I bet you’ll have a different opinion after making this Skinny Pumpkin Spice Granola. 

skinny pumpkin spice granola

I love this recipe because its packed full of healthy grains, heart healthy fats, and natural sugars. Not to mention its delicious and super easy to make! You’ll be out of the kitchen, start to finish, in about 35 minutes with only a few dishes to wash! 

skinny pumpkin spice granola ingredientsYou’ll start by toasting your old fashioned rolled oats and uncooked quinoa. To do this simply spread the oats and quinoa across a parchment lined baking sheet and place in the oven at 325 degrees F for 10 minutes. Note: There is no need to spray the baking sheet or parchment paper with cooking spray.  

Skinny pumpkin spice granola ingredients

After 10 minutes remove toasted quinoa and old fashioned rolled oats from oven and pour into a large bowl along with the rest of your dry ingredients which include flaxseed meal, chia seeds, slivered almonds, walnut pieces, and pumpkin seeds. If you’re not a fan of almonds, walnuts, or pumpkin seeds you can swap them out for a nut or seed that better suits your preferance. I’ve personally made this recipe using various combinations of sunflower seeds, pecans, cashews, and whole almonds and the result is delicious every time! Just make sure you stay true to the measurements in the recipe.

skinny pumpkin spice granolaStir all of your dry ingredients together and reduce the oven to 300 degrees F. 

In a microwave safe bowl combine your wet ingredients: maple syrup, honey, pumpkin puree, coconut oil, pumpkin pie spice, nutmeg, cinnamon, a dash of salt, and vanilla extract. Mix well and microwave for one minute. Your wet ingredient mixture should be thick and gooey. Warning- it will smell delicious! Since there are no raw eggs its okay to sneak a taste or two! 

Give your wet ingredients one more stir and pour over dry ingredients. Use a spatula to scrape the sides of the wet ingredients bowl to make sure you’re able to transfer as much as possible to your dry ingredients.

skinny pumpkin spice granola ingredients

Now its time to combine your wet and dry ingredients. Its important to make sure that all dry ingredients are evenly coated. I find best results come from applying a folding technique using a spatula to combine. 

Next, use your spatula to transfer all ingredients to a parchment lined baking sheet. Again, do not spray parchment paper or baking sheet with cooking spray. 

pumpkin-spice-granola-9-of-25

Make sure ingredients are tighly packed and evenly spread across the baking sheet. Place the goods in a 300 degree F oven for 20 – 22 minutes. Toss ingredients about 10 minutes in and sprinkle dried cranberries over the top. Bake for 10 – 12 more minutes until granola is golden brown. Remove from oven and immediately sprinkle dark chocolate chips (optional) across cooked granola. Its important to do this as soon as you remove the granola from the oven to enable the dark choclate chips to melt and spread across granola before it cools. 

skinny pumpkin spice granola

I know this will take alot of willpower, but let granola cool completely before digging in. Once granola has competely cooled you’re free to break granola into smaller chunks as desired and remove from the parchment paper lined baking sheet. 

skinny pumpkin spice granolaThere are a couple of options for how to store your granola. You can store this yummy treat in an airtight container (mason jar, tupperware, etc.) on your countertop or pantry or in the freezer. Granola will keep for at least one month if stored on your countertop and at least three months in your freezer. I’ve stored ganola for up to six months in the freezer. If storing granola in the freezer make sure you’re using a sturdy, well sealed container to avoid freezer burn. 

pumpkin-spice-granola-18-of-25 pumpkin-spice-granola-23-of-25 pumpkin-spice-granola-21-of-25

[yumprint-recipe id=’40’]Let me know what you think! 

Fabulous recipes by Mandi at godsavethequinoa.com

Spicy Roasted Chickpeas

Spicy Roasted Chickpeas

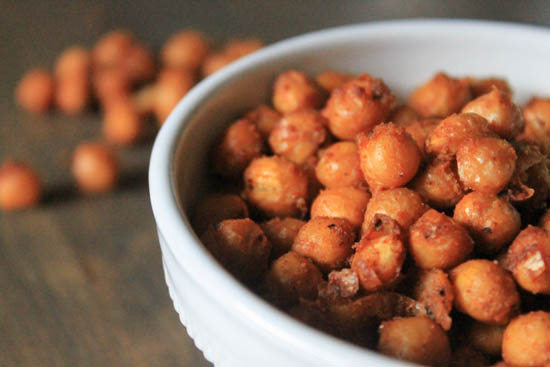
These no-effort, spicy roasted chickpeas are one snack you will never feel guilty about munching on! This spicy roasted chickpea recipe has quickly become one of my new go-to’s. I can’t remember the last grocery list I made that didn’t have at least two cans of  “chickpeas” on it. One of the reasons I love them so much is because they go with just about anything! Seriously, you can enjoy these delicious little nuggets a la carte, on top of a salad, over soups, in pastas, combined with trail mix… the options are truly limitless!  

Spicy Roasted Chickpeas

Start by lining a cookie sheet with foil and turning your oven on broil. Next, open your canned chickpeas and drain. Try and get all of the liquid out- the drier your chickpeas are, the better! Pat them dry with a paper towel or dish cloth if needed and place in a large bowl. Personally, I like to use a bowl with a lid that seals so I can shake everything together. I have some really awesome kitchenaid prep bowls that are PERFECT for this recipe! If you don’t have a bowl with a lid, don’t worry! You can always rely on a trusty tupperware container! Just make sure there’s enough room for everything to shake around! 

Pour one tablespoon of olive oil over your chickpeas followed by lemon juice and laundry list of spices: cumin, smoked paprika, chili powder OR use chipotle peppers for some extra heat, garlic powder, lemon pepper, and cardamom. Put the lid on your bowl and shake away! You’ll want to shake until chickpeas are completely coated in olive oil, lemon juice, and spices. (Bet you didn’t think you’d get a workout in when making these!) 

Spicy Roasted Chickpeas

Once chickpeas are completely coated, transfer all of the contents in your bowl onto a baking sheet. You’ll probably need to use a spatula to scrape the excess spices and oil off the sides of your bowl and onto your chickpeas. Once your bowl has been emptied use your spatula to evenly spread your chickpeas. You do not want them to overlap each other! 

Sprinkle chickpeas with a dash or two (or three if you’re feeling super spicy) and place in the oven. Let your new favorite snack broil for 10 minutes. I recommend you place your cookie sheet in the center of the middle rack for best results! 

Spicy Roasted Chickpeas

After 10 minutes open your oven to remove your cookie sheet and toss your chickpeas. I usually flip and rotate them around, mainly to prevent them from sticking to the foil and having one side be more crispy than the other. Once you’ve successfully tossed the chickpeas, put them back in the oven. I know… it’s a lot to ask, but you’ll have to wait for 5 more minutes until these bad boys are binge worthy!

Once the timer goes off remove them from the oven and prepare your taste buds for your new favorite snack! Make sure you let them cool so you don’t burn yourself! 

I hope you enjoy these as much as I do! 🙂 

[yumprint-recipe id=’37’] Fabulous recipes by Mandi at godsavethequinoa.com

Skinny Greek Yogurt Banana Muffins

Skinny Greek Yogurt Banana Muffins

Greek Yogurt Banana Muffins Title Page_GSQ

Hello! I hope you’re excited about this Skinny Greek Yogurt Banana Muffin Recipe! I sure am!

I know it’s been FOREVER since I last posted! You see, I’ve been a little busy lately. Since my last post in April I’ve finished two half marathons, two triathlons, planned a wedding, bought a house, started a new job at work, went on my bachelorette party in Mexico, moved into the house we bought, GOT MARRIED, went on my honeymoon to Costa Rica, traveled all over Texas to celebrate our first holiday season as newly weds with friends and family, and finished moving into the house we bought. It feels good to FINALLY have free time again!

Don’t worry, during all of the madness I continued to cook and come up with new recipes. Let’s be honest, there was no way to keep me from using my big new kitchen! My recipe book is full of new creations and I cannot wait to share them with you! Before I share this delicious and very healthy Greek Yogurt Banana Muffin Recipe without, I would be remiss if I didn’t share some of my favorite wedding photos! THANK YOU to the wonderful Beth McElhannon Photography for capturing all of these perfect moments! 

[envira-gallery id=”1307″]

Such fun memories!

Ok, I’ll stop fantasizing about the best day ever and share this recipe with you! 

First of all, this recipe is SUPER easy to make. In fact, you probably have most of the ingredients laying around your house! I love this recipe because all of the ingredients are natural and wholesome. Because there is no oil, flour, or butter in these muffins you actually feel good after eating one of these bad boys! 

Skinny Greek Yogurt Banana Muffins- ingredients

The batter is made from oats, greek yogurt, and “old” bananas. Just because a banana looks black, bruised, and feels extra soft does NOT mean you should throw it out! In fact, you should wait until your bananas show these characteristics before making this recipe. In my opinion, the older the banana, the better. While this isn’t 100% necessary, I highly recommend it (as long as your banana is not rotten). On a side note, you should not use green or unripened bananas to make this recipe. The batter just won’t be the same. 

Skinny Greek Yogurt Banana Muffins- Oats and Bananas

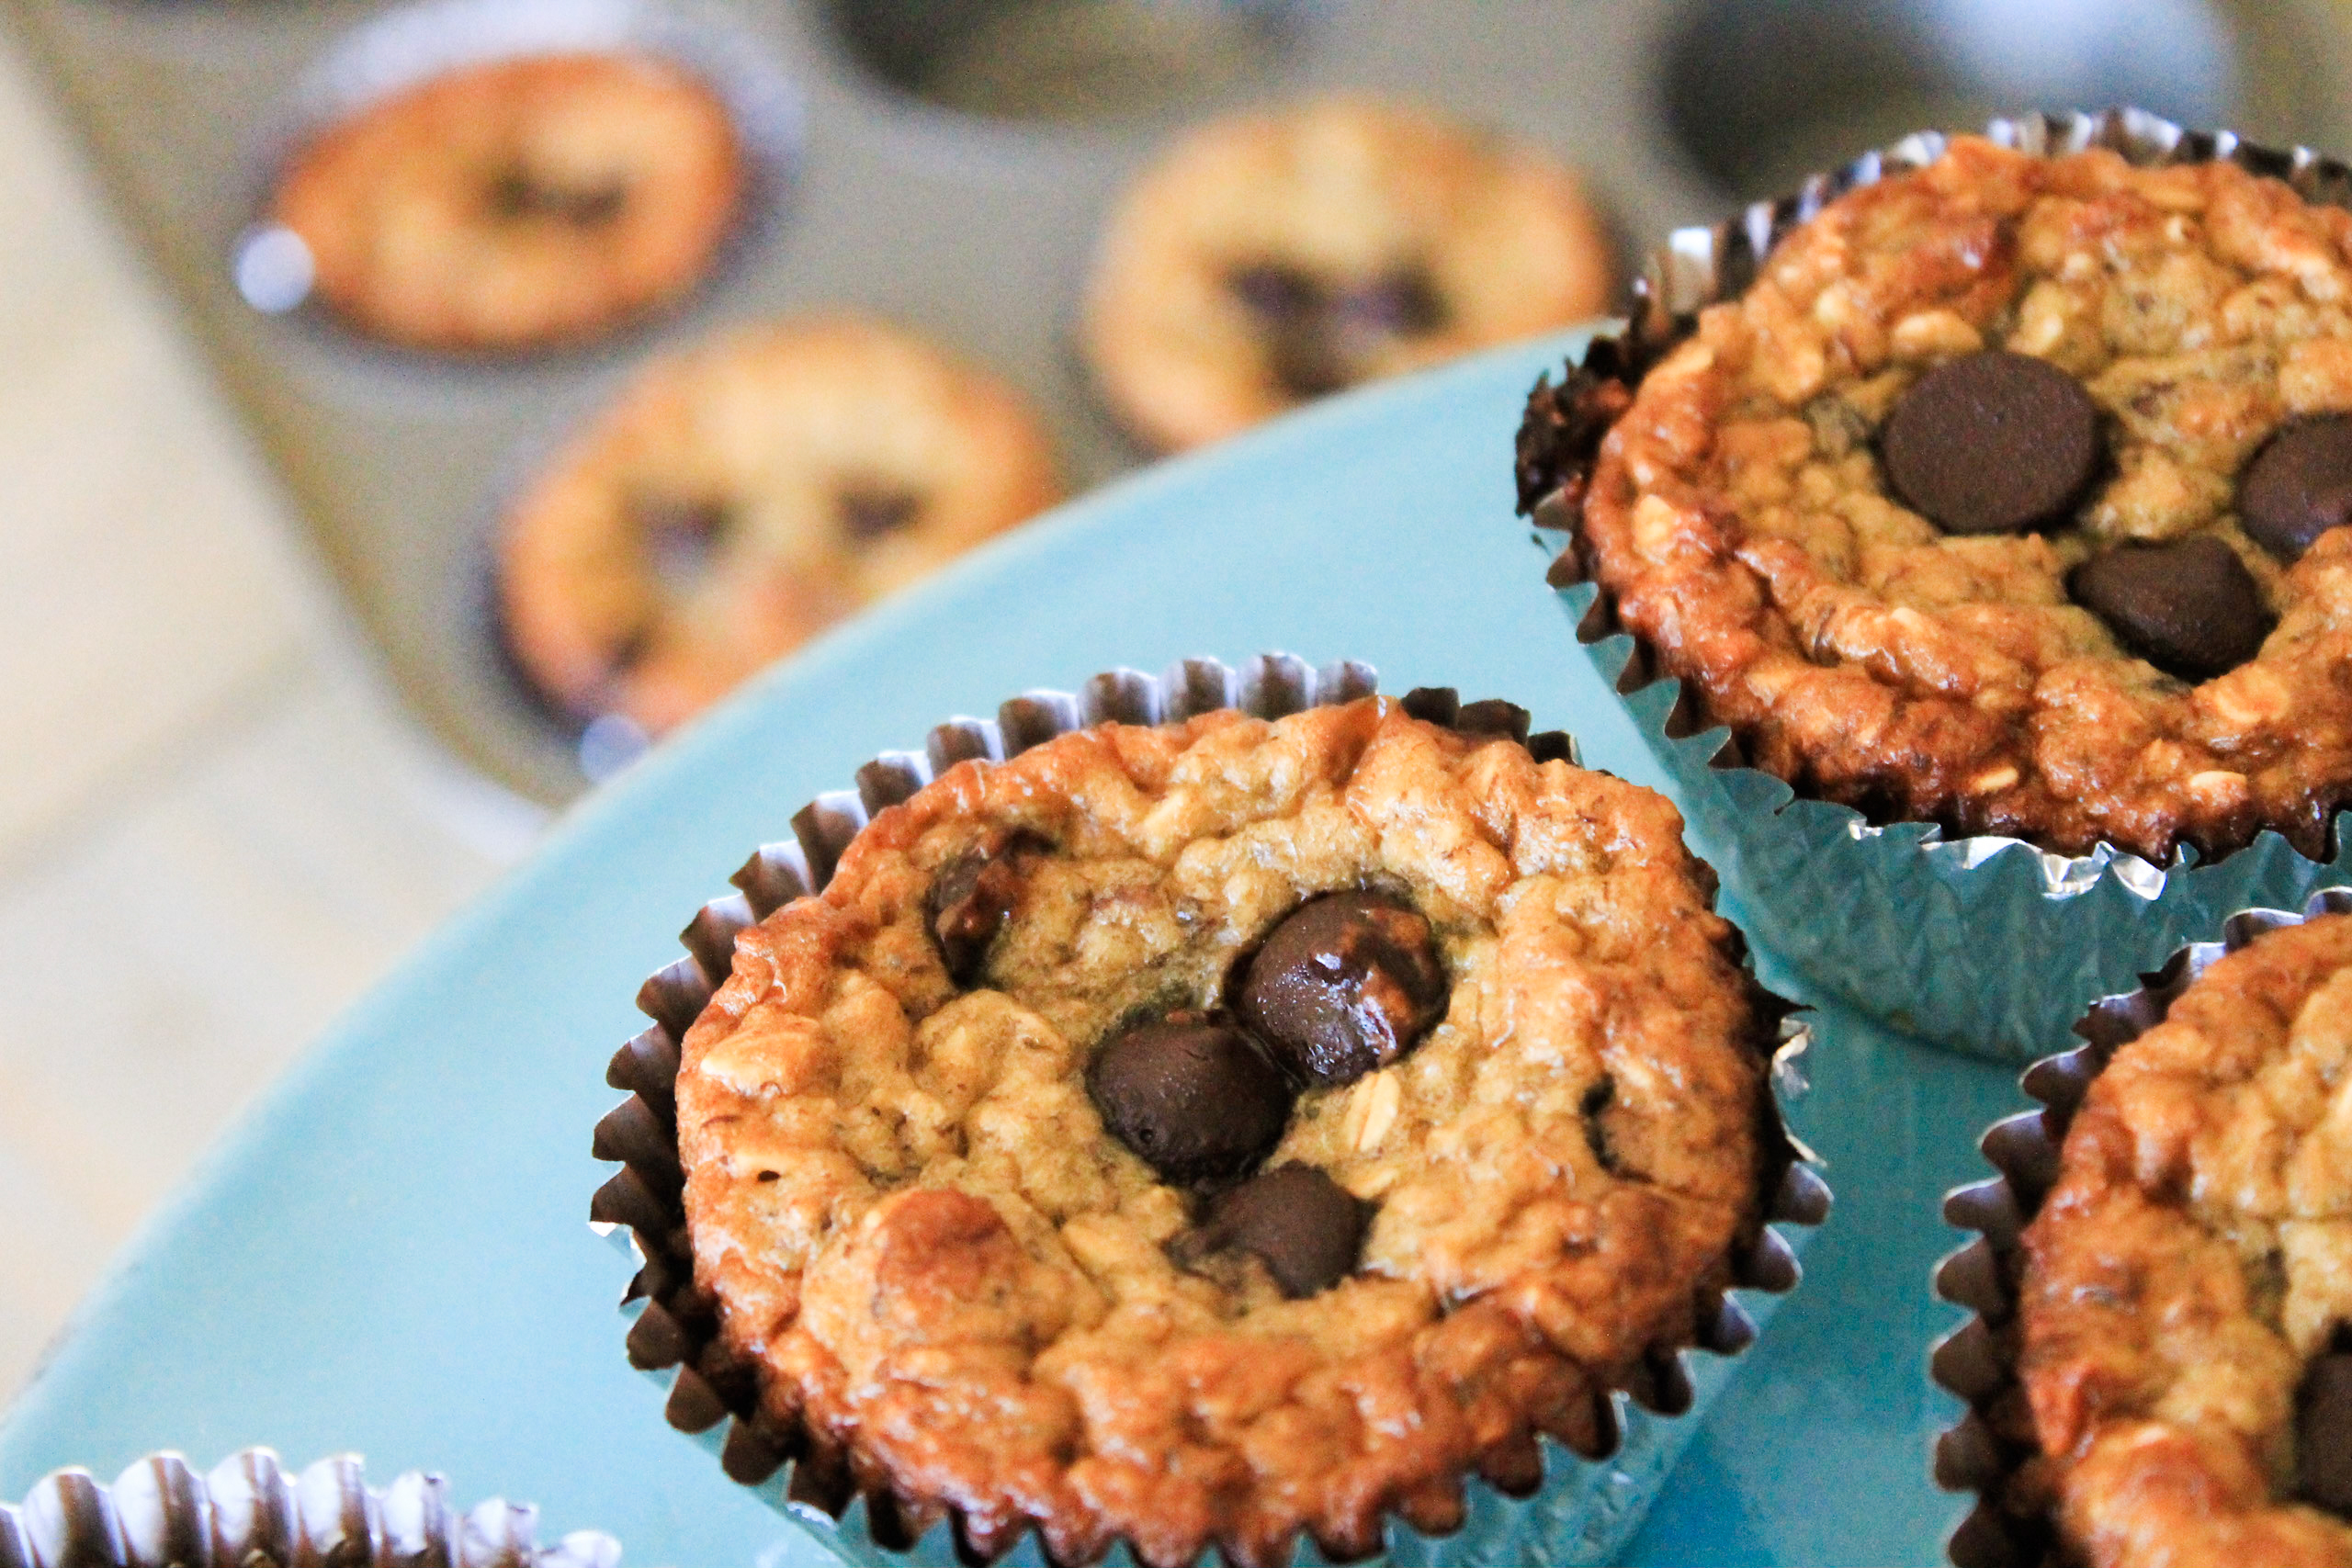
VERY IMPORTANT! If you don’t read anything else in this post, please read this paragraph. The lack of oil in these muffins WILL cause them to stick to paper muffin liners. I learned this the hard way after my first attempt making these. I basically had to perform surgery to remove the paper liners from the sides of the muffins before eating them. YOU MUST USE FOIL MUFFIN LINERS!!! I use the Reynolds Foil Baking Cups. YES- you should remove the paper liners! These are only used to prevent the liners from sticking together in their package. You should also grease the muffin pan, as well as the insides of the liners with non-stick cooking spray.

Skinny Greek Yogurt Banana Muffins Batter

These muffins take a mere 10 minutes to prep. Simply pre-heat your oven to 400 degrees. Spray your muffin pan and the insides of your cupcake liners with non-stick cooking spray. In a large mixing bowl or kitchen aid combine oats, bananas, greek yogurt, brown sugar, baking soda, baking powder, and eggs. Mix until well combined then stir in in dark chocolate chips, pecan pieces, and honey. Mix on medium-high for a few seconds until well combined. Fun fact, my sweet grandmother picked and shelled these pecans herself! They are so tasty and I love having them around the house to use in my recipes!

Skinny Greek Yogurt Banana Muffins Batter

Use a large spoon (or my personal favorite, an ice cram scoop) to fill each foil lined muffin pan about 3/4 full. Top with a few dark chocolate chips (optional) and pop them in the oven. My best results came from baking these for 15-20 minutes on the middle rack. You should remove these delicious bites from the oven once a tooth-pick comes out clean and muffins are a dreamy golden brown.

Skinny Greek Yogurt Banana Muffins

I know you will be DYING to dig in, but let them cool for about 10 minutes before taking that first bite. Let the countdown begin.

Skinny Greek Yogurt Banana Muffins

Congratulations! After the longest 10 minutes of your life has passed, you’re free to eat up!

Skinny Greek Yogurt Banana Muffins

You can eat these for dessert, a snack, or a quick on-the-go breakfast. My {new} husband, Greg, loves to eat these before long triathlon training sessions. Sometimes he spreads peanut butter across the top, which is delicious if I do say so myself.

[envira-gallery id=”1333″]

If you’re not a fan of dark chocolate or pecans, you can certainly use milk chocolate chips, walnuts, almond slivers, or cashews! The sky is the limit!

Skinny Greek Yogurt Banana Muffins

[yumprint-recipe id=’34’] 

 Fabulous recipes by Mandi at godsavethequinoa.com

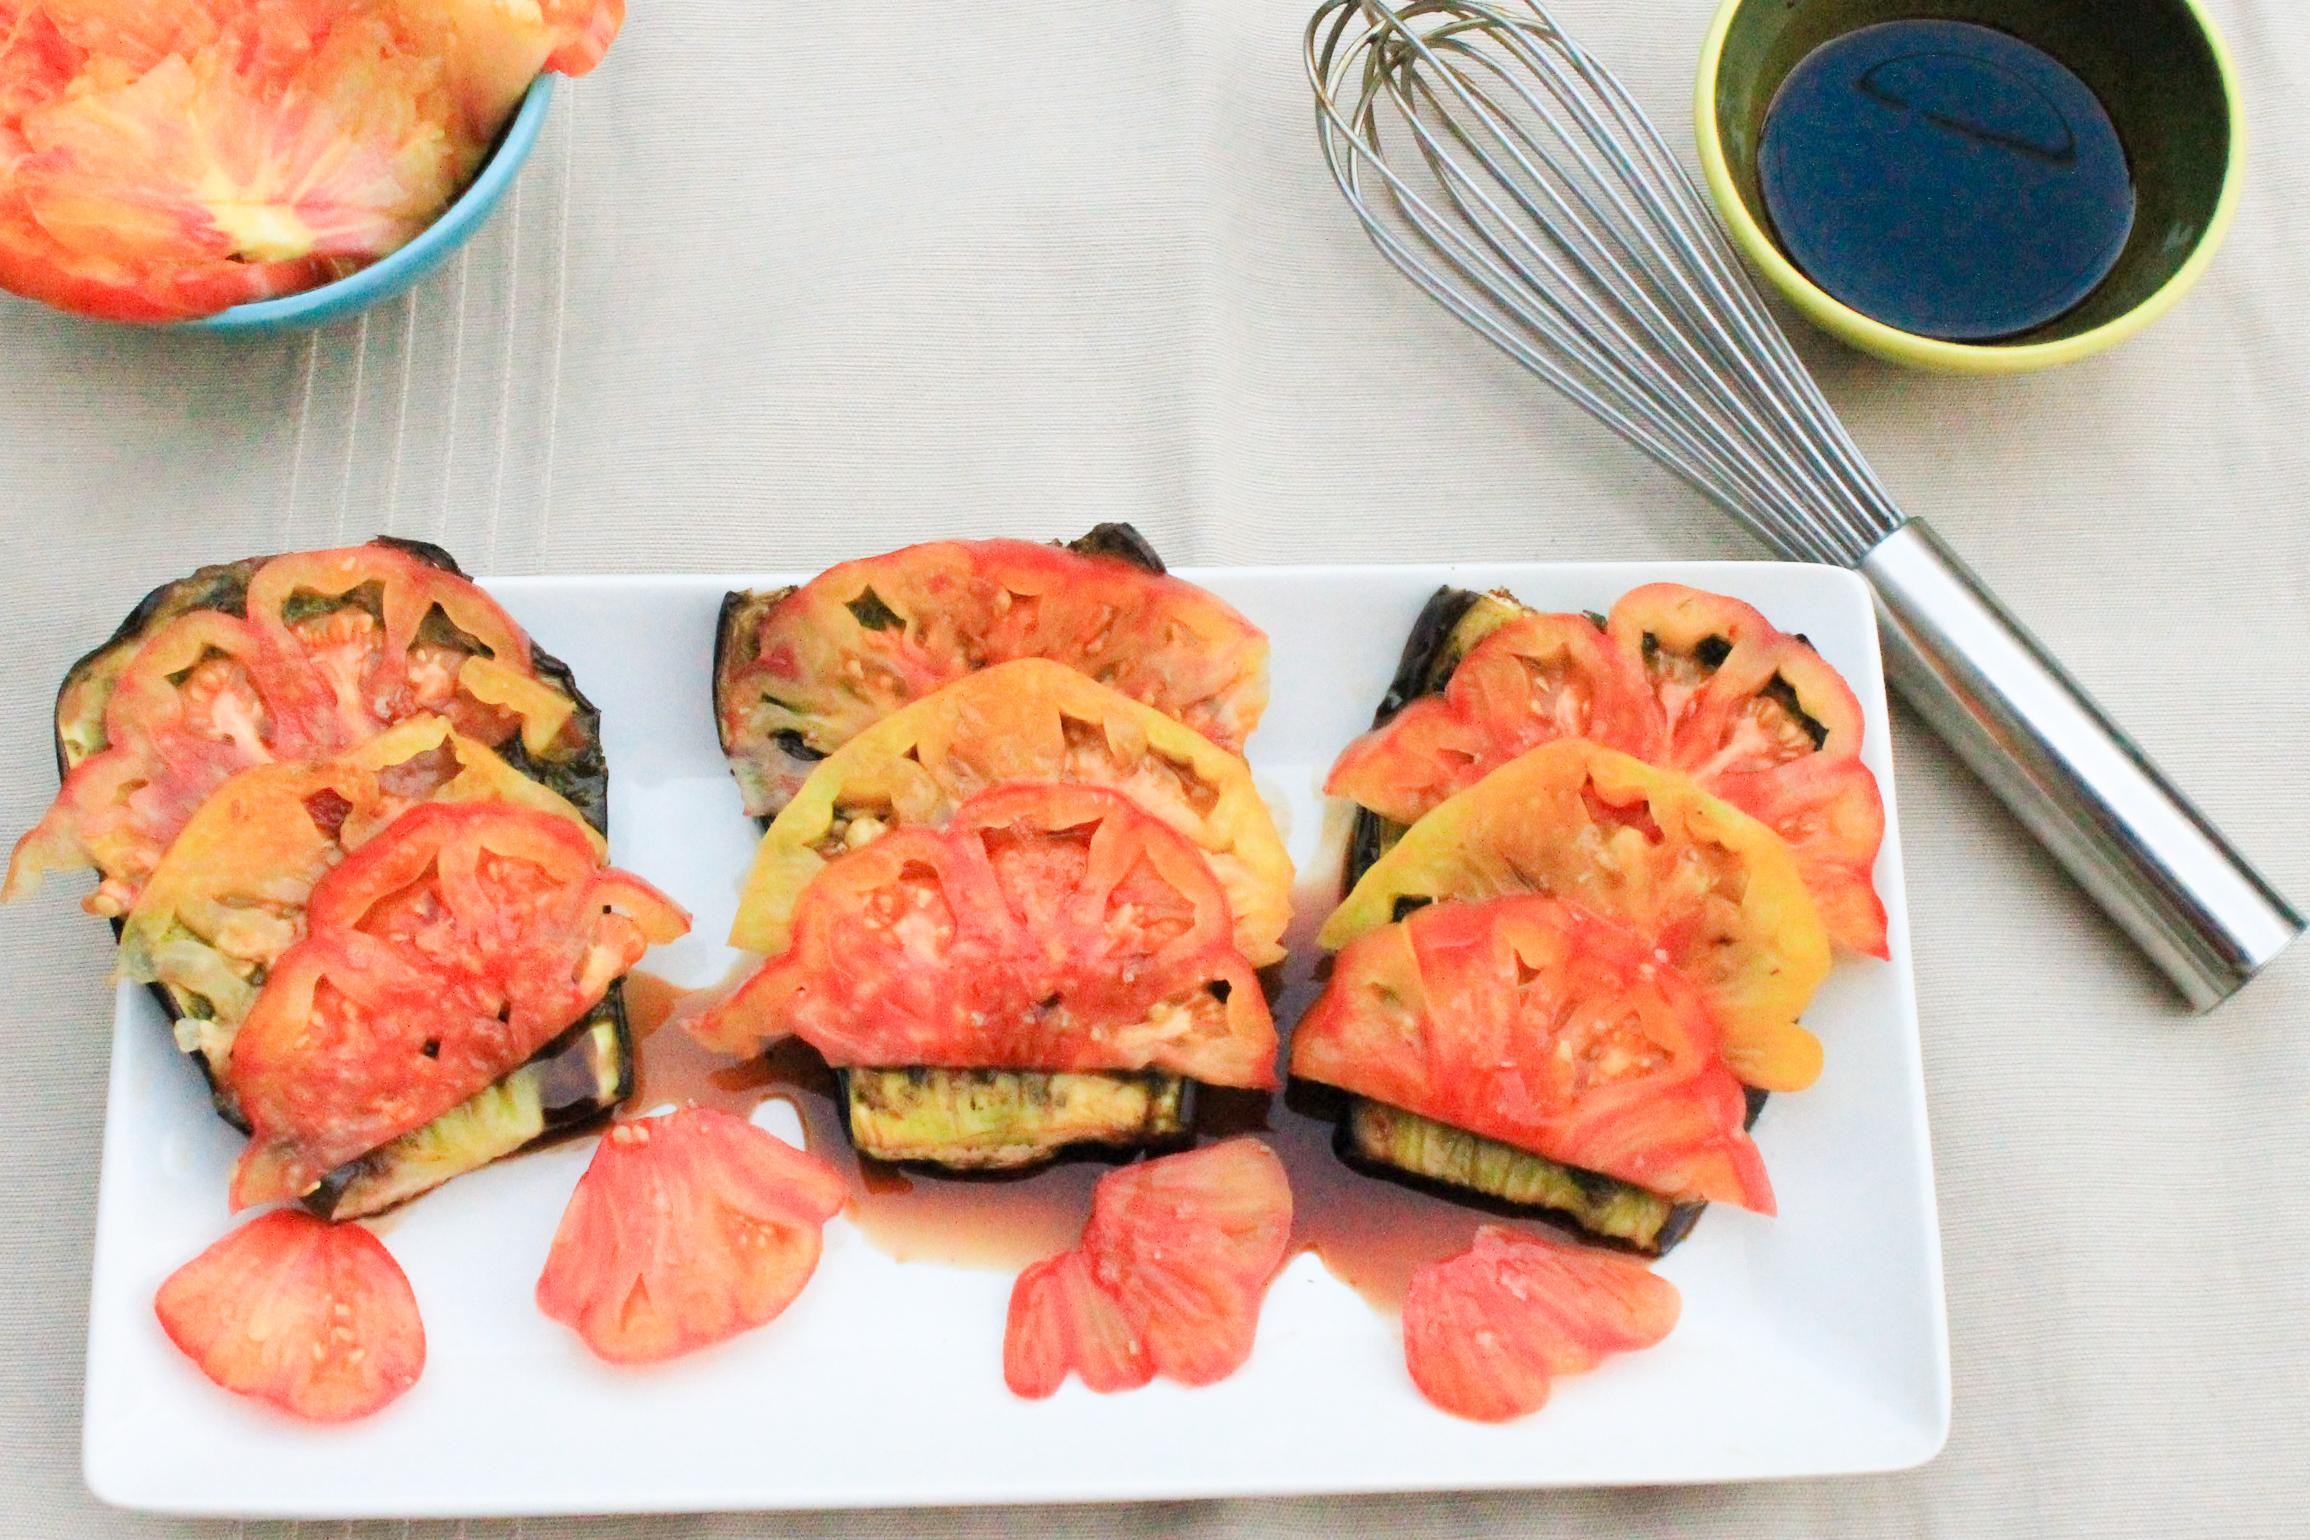
Basil Roasted Eggplant with Balsamic Drizzled Heirlooms

Basil Roasted Eggplant with Balsamic Drizzled Heirlooms Recipe

This Basil Roasted Eggplant with Balsamic Drizzled Heirlooms recipe is bursting with the fresh flavors (and colors) spring dreams are made of. Serve it as a main dish, snack, or appetizer during the cold winter months or while enjoying the refreshing spring air! Note: this dish pairs fabulously with the 70 degree weather we’re having in Dallas today! If you’re not in Dallas, and are snowed in or stuck in the cold, I’m sorry for bragging. Use this recipe to get you through the cold and into spring! 

 Don’t shy away from this dish because one of the main ingredients is eggplant. Eggplant can be tricky to cook. Believe me, I’ve had my fair share of eggplant disasters in the kitchen and have ended up throwing everything away and getting takeout instead. But luckily, this recipe is fairly simple and I think I’ve FINALLY figured out where I’ve been going wrong. It’s not me its the eggplant! At least that’s what I like to tell myself 😉 

Basil Roasted Eggplant with Balsamic Drizzled Heirlooms

But seriously, picking out the perfect eggplant is key to making any eggplant recipe. When picking out an eggplant, look for one with a smooth and shiny skin. An eggplant with a dull skin indicates that the eggplant is starting to turn bitter. Also, avoid purchasing an eggplant with streaking or blemishes on the skin. The perfect eggplant should have a deep dark purple-black color with no streaking or spots and should have a vibrant green stem. The flesh should be firm and should indent slightly when pressure is applied, but should spring back immediately. If a depression remains in the eggplant after poking, the eggplant is old.

Basil Roasted Eggplant with Balsamic Drizzled Heirlooms Recipe

This recipe is pretty easy and straightforward- which is why I love it! Wash and completely dry your eggplant before slicing. Place the eggplant on the table “hot-dog” style and cut off both the top and bottom  (each of the rounded ends) of your eggplant. Next, slice your eggplant lengthwise (still using the hot-dog style analogy here) into THREE 1 – 2 inch thick, skinless slices. NOTE: Your eggplant slices should have skin on the edges… just make sure neither of the “faces” has any of the purple-black skin on it. Dap each eggplant slice with a paper towel to remove all excess water. This is IMPORTANT to do!

When dry, brush the eggplant with EVOO and sprinkle with salt and pepper. Place in the oven  at 400 degrees to cook for about 10 minutes. 

Basil Roasted Eggplant with Balsamic Drizzled Heirlooms Recipe

What you can’t see pictured is the amazing basil spread, hiding between the eggplant and the heirloom tomatoes. Make this while the eggplant slices are roasting. Combine lemon juice, salt, pepper, 2 Tbs EVOO, 1 cup of fresh basil leaves, and garlic in a blender or food processor and blend until completely smooth. After 10 minutes, when your eggplant slices are finished roasting, remove them from oven and flip them over. Spread your basil mixture over the tops of the recently flipped eggplant slices and roast in the oven for about 10 more minutes, so they are brown and soft throughout.

Basil Roasted Eggplant with Balsamic Drizzled Heirlooms Recipe

You will place sliced heirloom tomatoes on top of the roasted eggplant slices. Why heirlooms and not another type of tomato for this recipe? Well, I chose heirlooms for this recipe because of how flavorful they are! They really compliment the flavors in the eggplant and basil spread. 

How to pick out Heirloom Tomatoes, Basil Roasted Eggplant with Balsamic Drizzled Heirlooms

A few tips when picking out your heirlooms:

  1. Appearances don’t matter. Unlike standard tomatoes, heirlooms are often misshapen. This is a GOOD thing, and in case you’re wondering, the shape of an heirloom will not have an impact on how it tastes…so don’t be put off by cracked skins. It will be safe to east as long as it isn’t leaking juice or moldy. 
  2. Pick it up before you buy it. An heirloom tomato should feel heavy for its size. That heaviness belies a volume that should provide good flavor.
  3. Smell it. Ripe heirlooms should have an earthy, green scent. Avoid those that smell musty.
  4. Handle with care. Don’t pile heirloom tomatoes on top of each other. Heirlooms are delicate and the weight of too many tomatoes can result in squashed or bruised tomatoes.
  5. Room temperature is key. When you get home, do NOT refrigerate your tomatoes. A temperature lower than 50 degrees will destroy both flavor and texture

Now that you know how to pick out the perfect Heirlooms, wash and slice the heirlooms while eggplant and basil are roasting. When eggplants are finished roasting, you will arrange heirlooms on top (as pictured). To add the finishing touches, you’ll top off this dish with a sweet balsamic drizzle. This takes about 10 – 15 minutes to make, so I suggest making it towards the beginning of the recipe if you’re in a hurry to feast your eyes! 

Basil Roasted Eggplant with Balsamic Drizzled Heirlooms Recipe

Whenever you decided to make the balsamic drizzle, do this by whisking together balsamic vinegar and honey in a saucepan over low-medium heat. When combined, slowly raise heat until contents come to a boil then reduce heat completely and let sit for 10 – 15 minutes.  This will allow mixture to thicken. 

Basil Roasted Eggplant with Balsamic Drizzled Heirlooms Recipe

When the oven timer finally goes off and your eggplants are done roasting, transfer slices to a plate or serving dish. Arrange sliced heirlooms on top of the roasted eggplant slices and generously drizzle balsamic glaze on top and enjoy! 


[yumprint-recipe id=’31’]
 
 Fabulous recipes by Mandi at godsavethequinoa.com


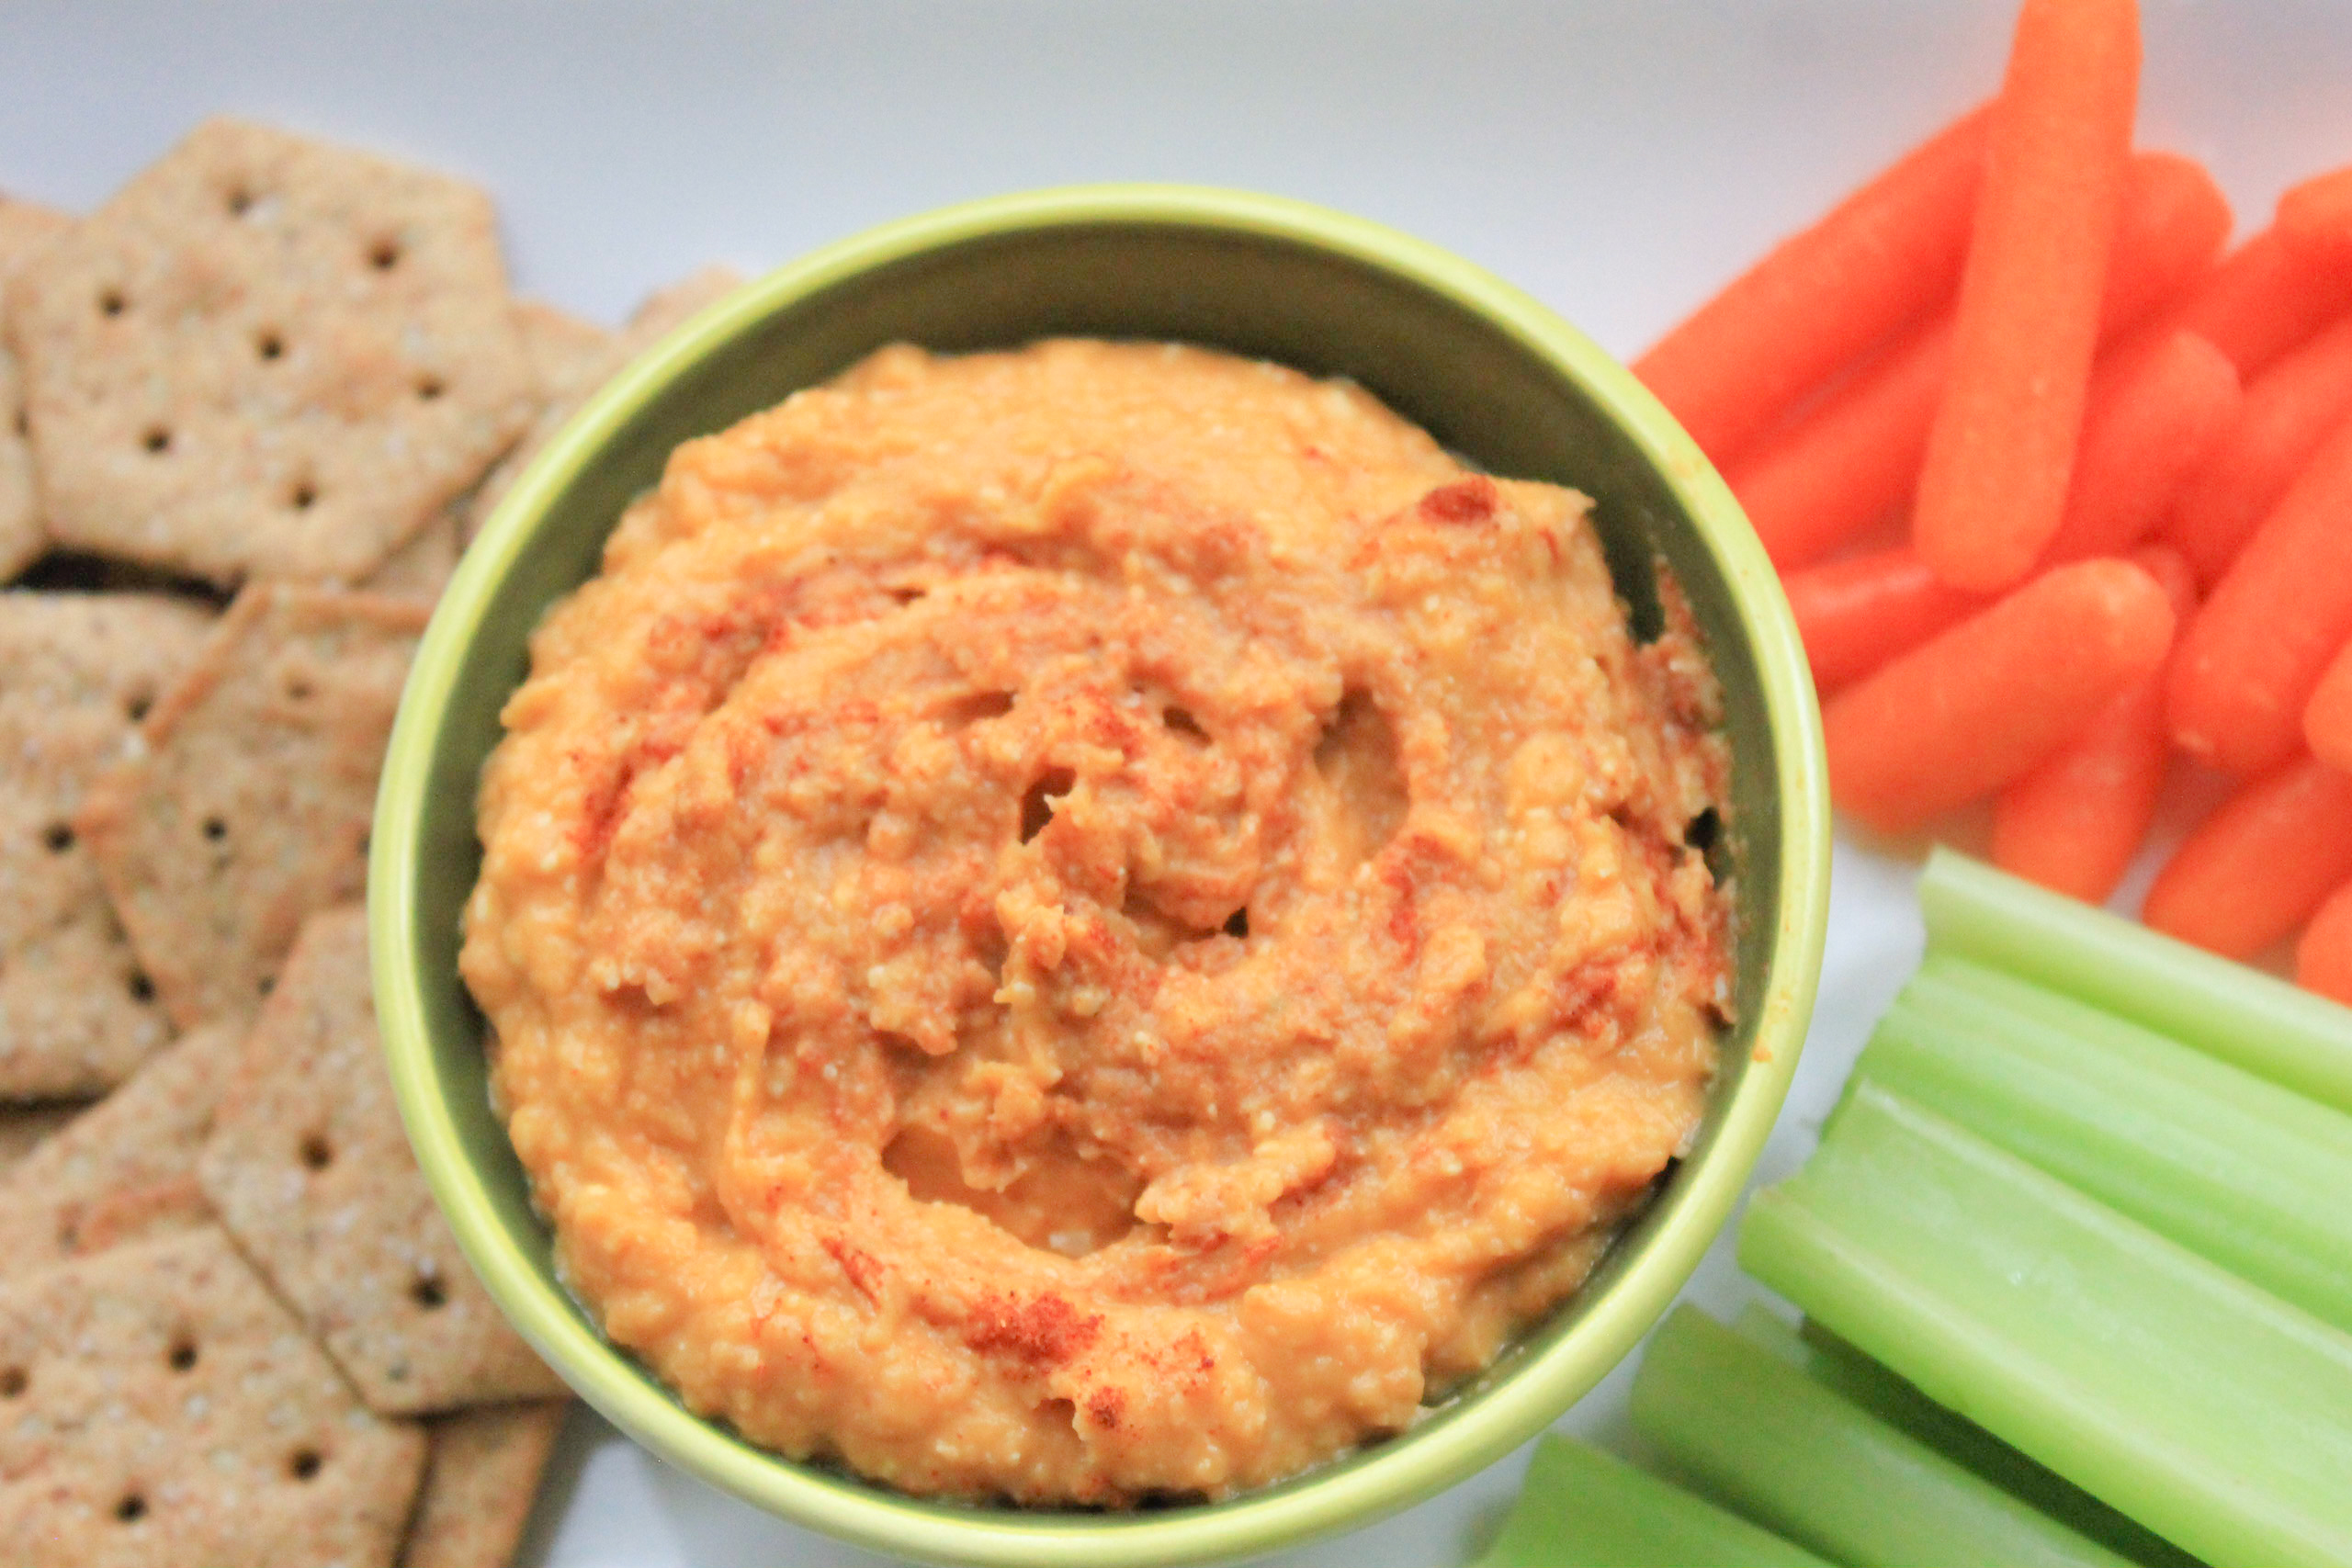
Pumpkin Hummus

Pumpkin Hummus  (9 of 12)

Happy Fall yall! I don’t know about you, but Fall is most certainly my FAVORITE time of year! The weather is finally starting to cool off and its seasonally appropriate to cook and eat pumpkin inspired goodies! (Hence the pumpkin hummus recipe you’re looking at now). 

Pumpkin Hummus  Recipe

This recipe is probably one of the easiest things I’ve ever made. All it takes is 9 simple ingredients: raw cashews, pumpkin puree, minced garlic, salt, white cannellini beans, cumin, paprika, fresh lemon juice, and EVOO. 

Pumpkin Hummus  (4 of 12)

Simply place ingredients into a food processor.

Pumpkin Hummus  (6 of 12)

(Use a blender if you don’t have a food processor.) 

Pumpkin Hummus  (7 of 12)

Combine until ingredients reach desired consistency. 

Pumpkin Hummus  (8 of 12)

Pair with chips, bread, or veggies, serve, and enjoy! 

Pumpkin Hummus  (10 of 12) Pumpkin Hummus  (11 of 12) Pumpkin Hummus  (12 of 12)

Did I mention there’s only 82 calories per serving? That’s right! (PS- one serving is 4 Tablespoons!) So, if you eat too much your waistline will forgive you. If you want more, you can make some more in a matter of seconds. You can thank me later! 

[yumprint-recipe id=’28’]Fabulous recipes by Mandi at godsavethequinoa.com

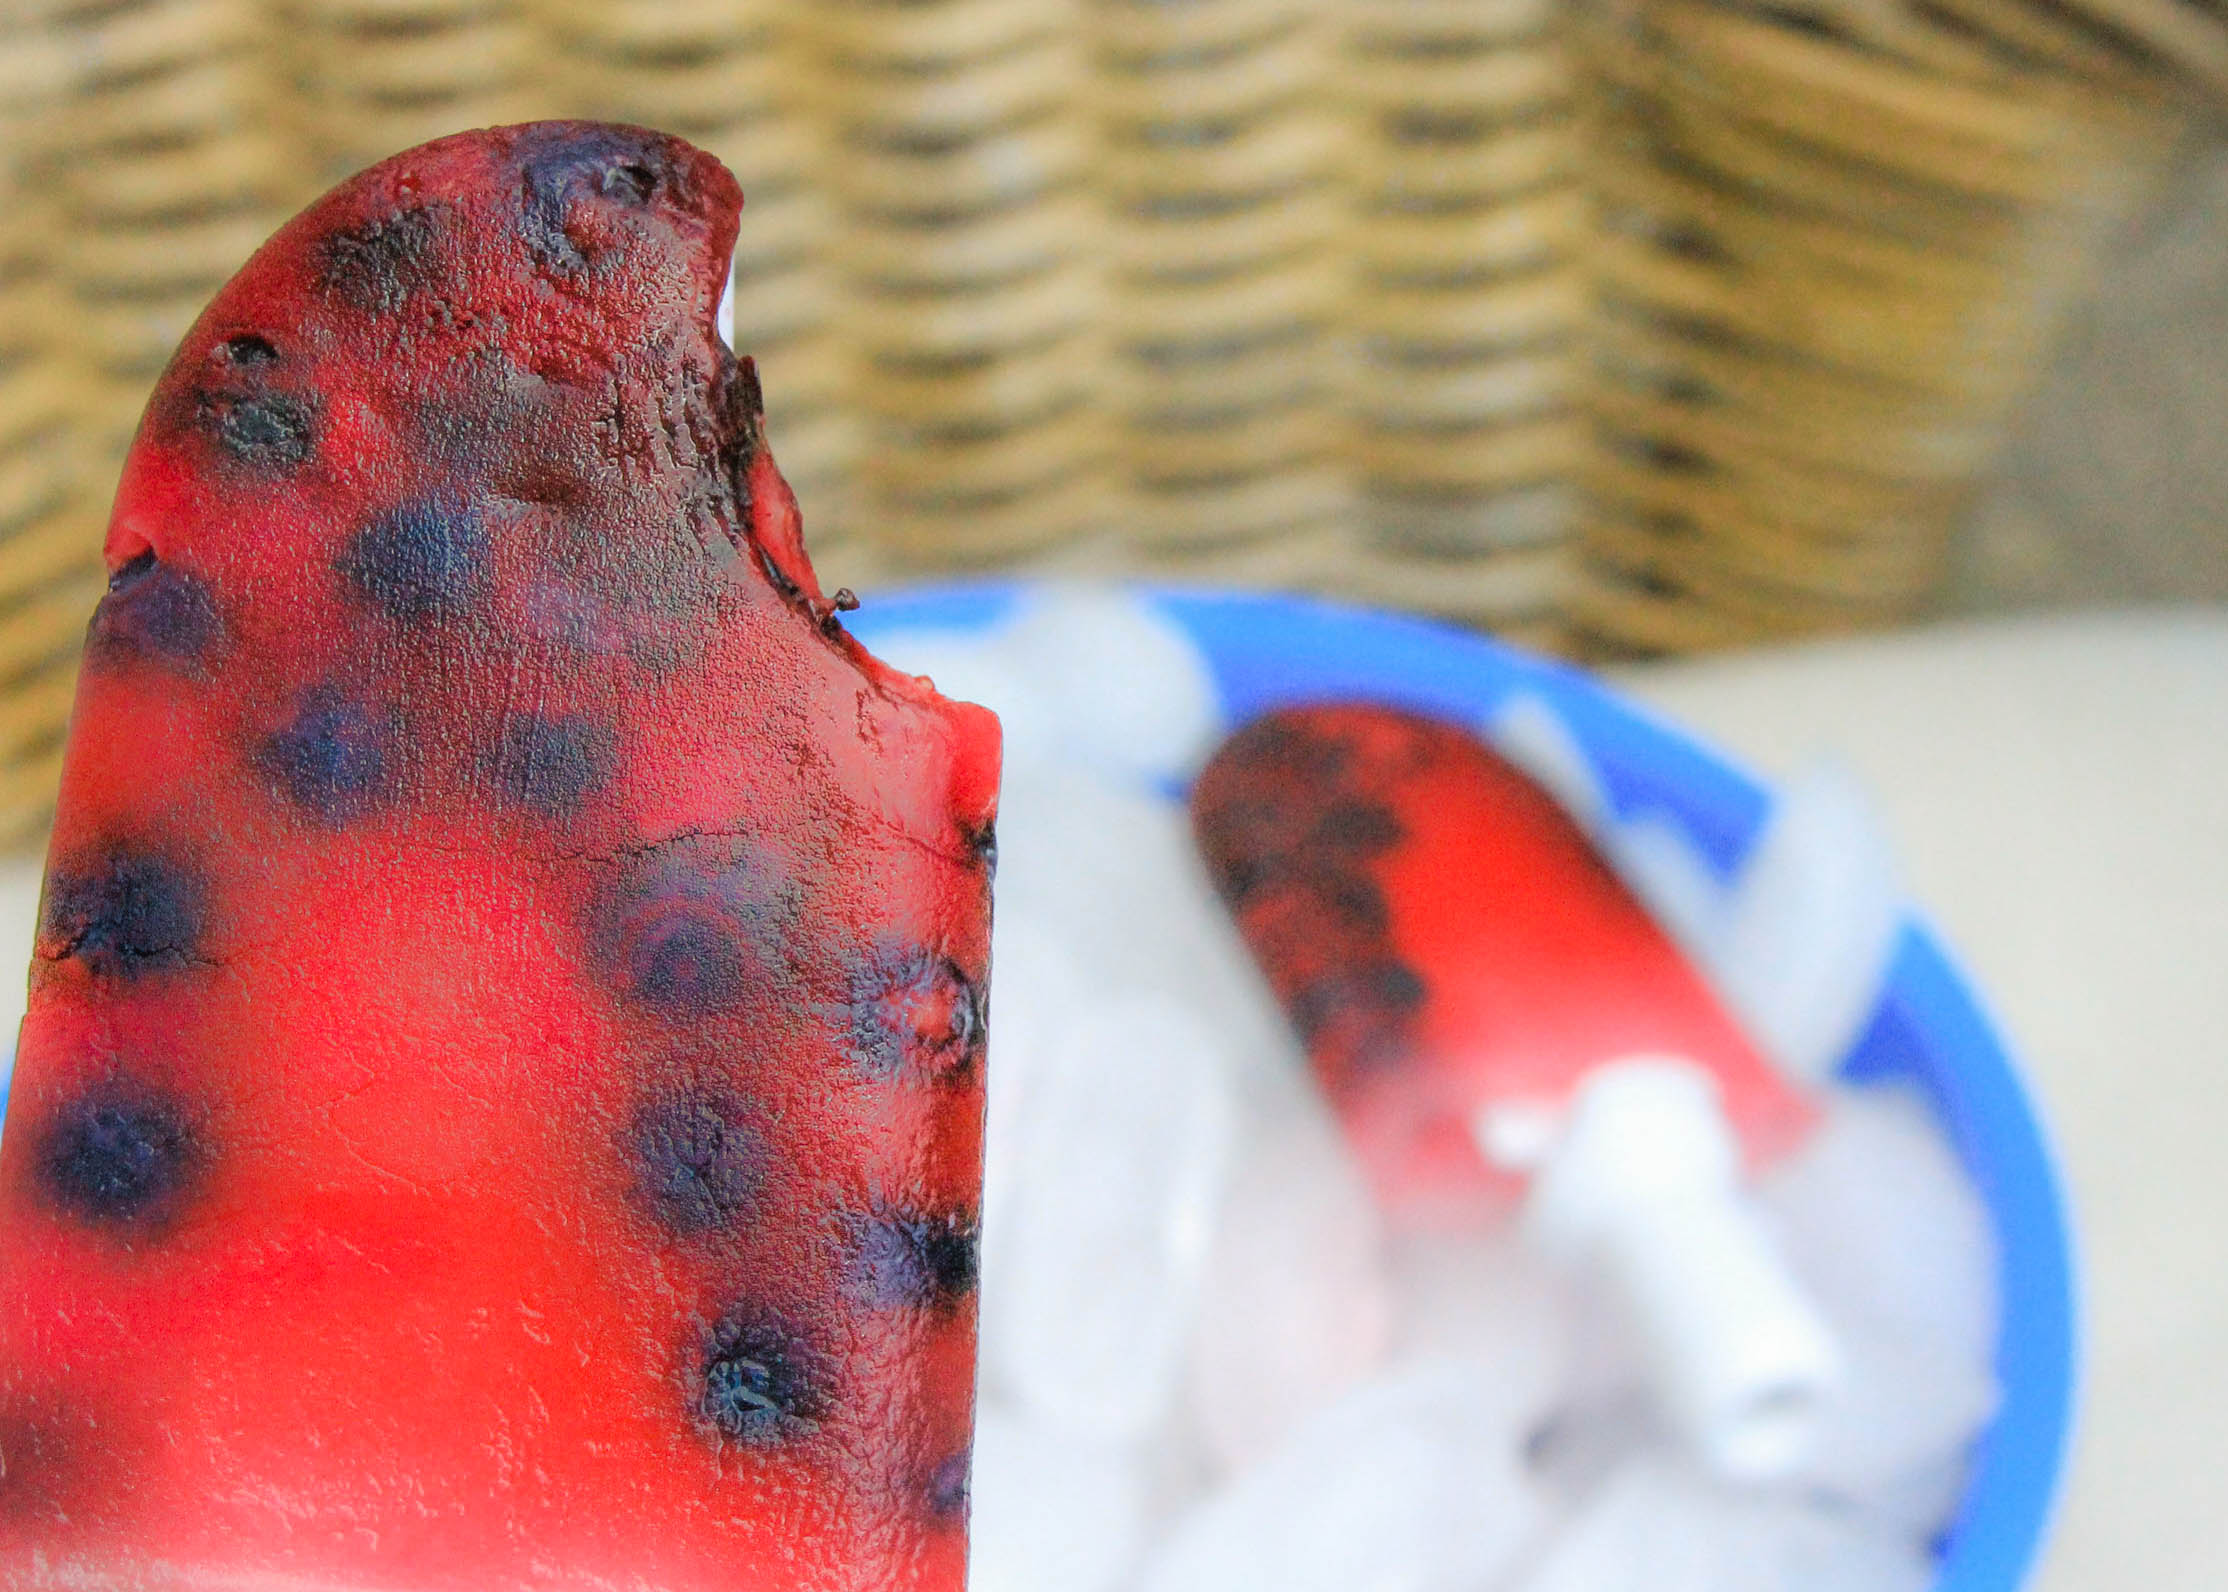
Cocozia Blueberry Lemon Pops

Cocozia Lemon Blueberry pops_title

Coconut water is an excellent way to rehydrate after a long sweat session on a summer day. I love keeping these in the freezer to enjoy after a long run in 90+ degree heat. Besides jumping in a swimming pool, there’s nothing that’s more refreshing! So, why not combine the best of both worlds and enjoy the delicious taste of coconut water and take advantage of its healthy benefits at the same time?

By the way, I used the leftover frozen blueberries and fresh lemon juice from the Blueberry Lemon Mini-Bundt Muffins I made the other day. Making popsicles is a great way to use any extra fruit you have before it goes bad! 

What is coconut water? Well, it’s a liquid that forms, naturally, inside the hard shell of a coconut and is packed full of B vitamins, potassium, electrolytes, enzymes, and amino acids. With this laundry list of ingredients, its no wonder people refer to coconut water as “nature’s sports drink”.

Cocozia Lemon Blueberry popsicles (1 of 2)

I don’t know about you, but this Texas girl tends to overindulge on chips and guacamole at Mexican restaurants. Did you know that the potassium in coconut water can help your body nix the excess sodium from all of these delicious, salty chips. Hooray! For best results, reach for coconut water labeled “100% raw or organic coconut water” with no added ingredients.

Cocozia Lemon Blueberry popsicles (1 of 7)

I’ve tried my fair share of coconut water, and trust me, nothing out there is better than Cocozia Coconut Water. Cocozia is the real deal, yall. It’s so fresh tasting- probably because its 100% coconut water and has zero additives or extra ingredients. Cocozia is very clean and natural tasting, and unlike other coconut waters I’ve had, is not overly sweet or sour. I’m telling you, when you drink Cocozia you’re going to think you’re drinking directly out of the fruit!

Cocozia Lemon Blueberry popsicles (2 of 7)

It comes in super convenient pouches that are perfect to throw in your gym bag or drink on the go! It tastes just as good straight out of the package as it does in these delicious popsicles. It’s also tasty in smoothies, and I’ve even used it to make quinoa! (Be on the lookout for this recipe coming soon).

Cocozia Lemon Blueberry popsicles (5 of 7)

These popsicles are SO easy to make! I purchased the Zoku single quick pop  maker at Crate and Barrel ON SALE! Seasonal Sales are the best time to stock up on new toys! You have to let the Zoku sit in the freezer for at least 24 hours before using, but the single quick pop maker will make 3 pops in one sitting, which is perfect for me. But if you have a bigger family (or appetite) you can purchase a two or three serving quick pop maker, to enjoy six or nine pops in one sitting.

Cocozia Lemon Blueberry popsicles (3 of 7)-2

All you have to do is mix together your freshly squeezed lemon juice and coconut water.  Measure out one third of the liquid and pour it into the Zoku, filing until your liquid is right below the fill line. Add your blueberries and jam the Zoku stick in the quick pop maker, wiping away any liquid that overflows. Let it sit for 9 minutes, then remove and immediately enjoy!

Cocozia Lemon Blueberry popsicles (2 of 2)Zoku also makes these awesome storage containers, made especially for Zoku Quick Pops you you can store your treats in the freezer and enjoy later in the week! 
 

[yumprint-recipe id=’25’] Fabulous recipes by Mandi at godsavethequinoa.com