Category: By staple

Recipe filter group: quinoa, sweet potato, chickpeas, salmon, tofu.

  • Quinoa Crust Pizza

    Quinoa Crust Pizza

    Quinoa Pizza Cover Page

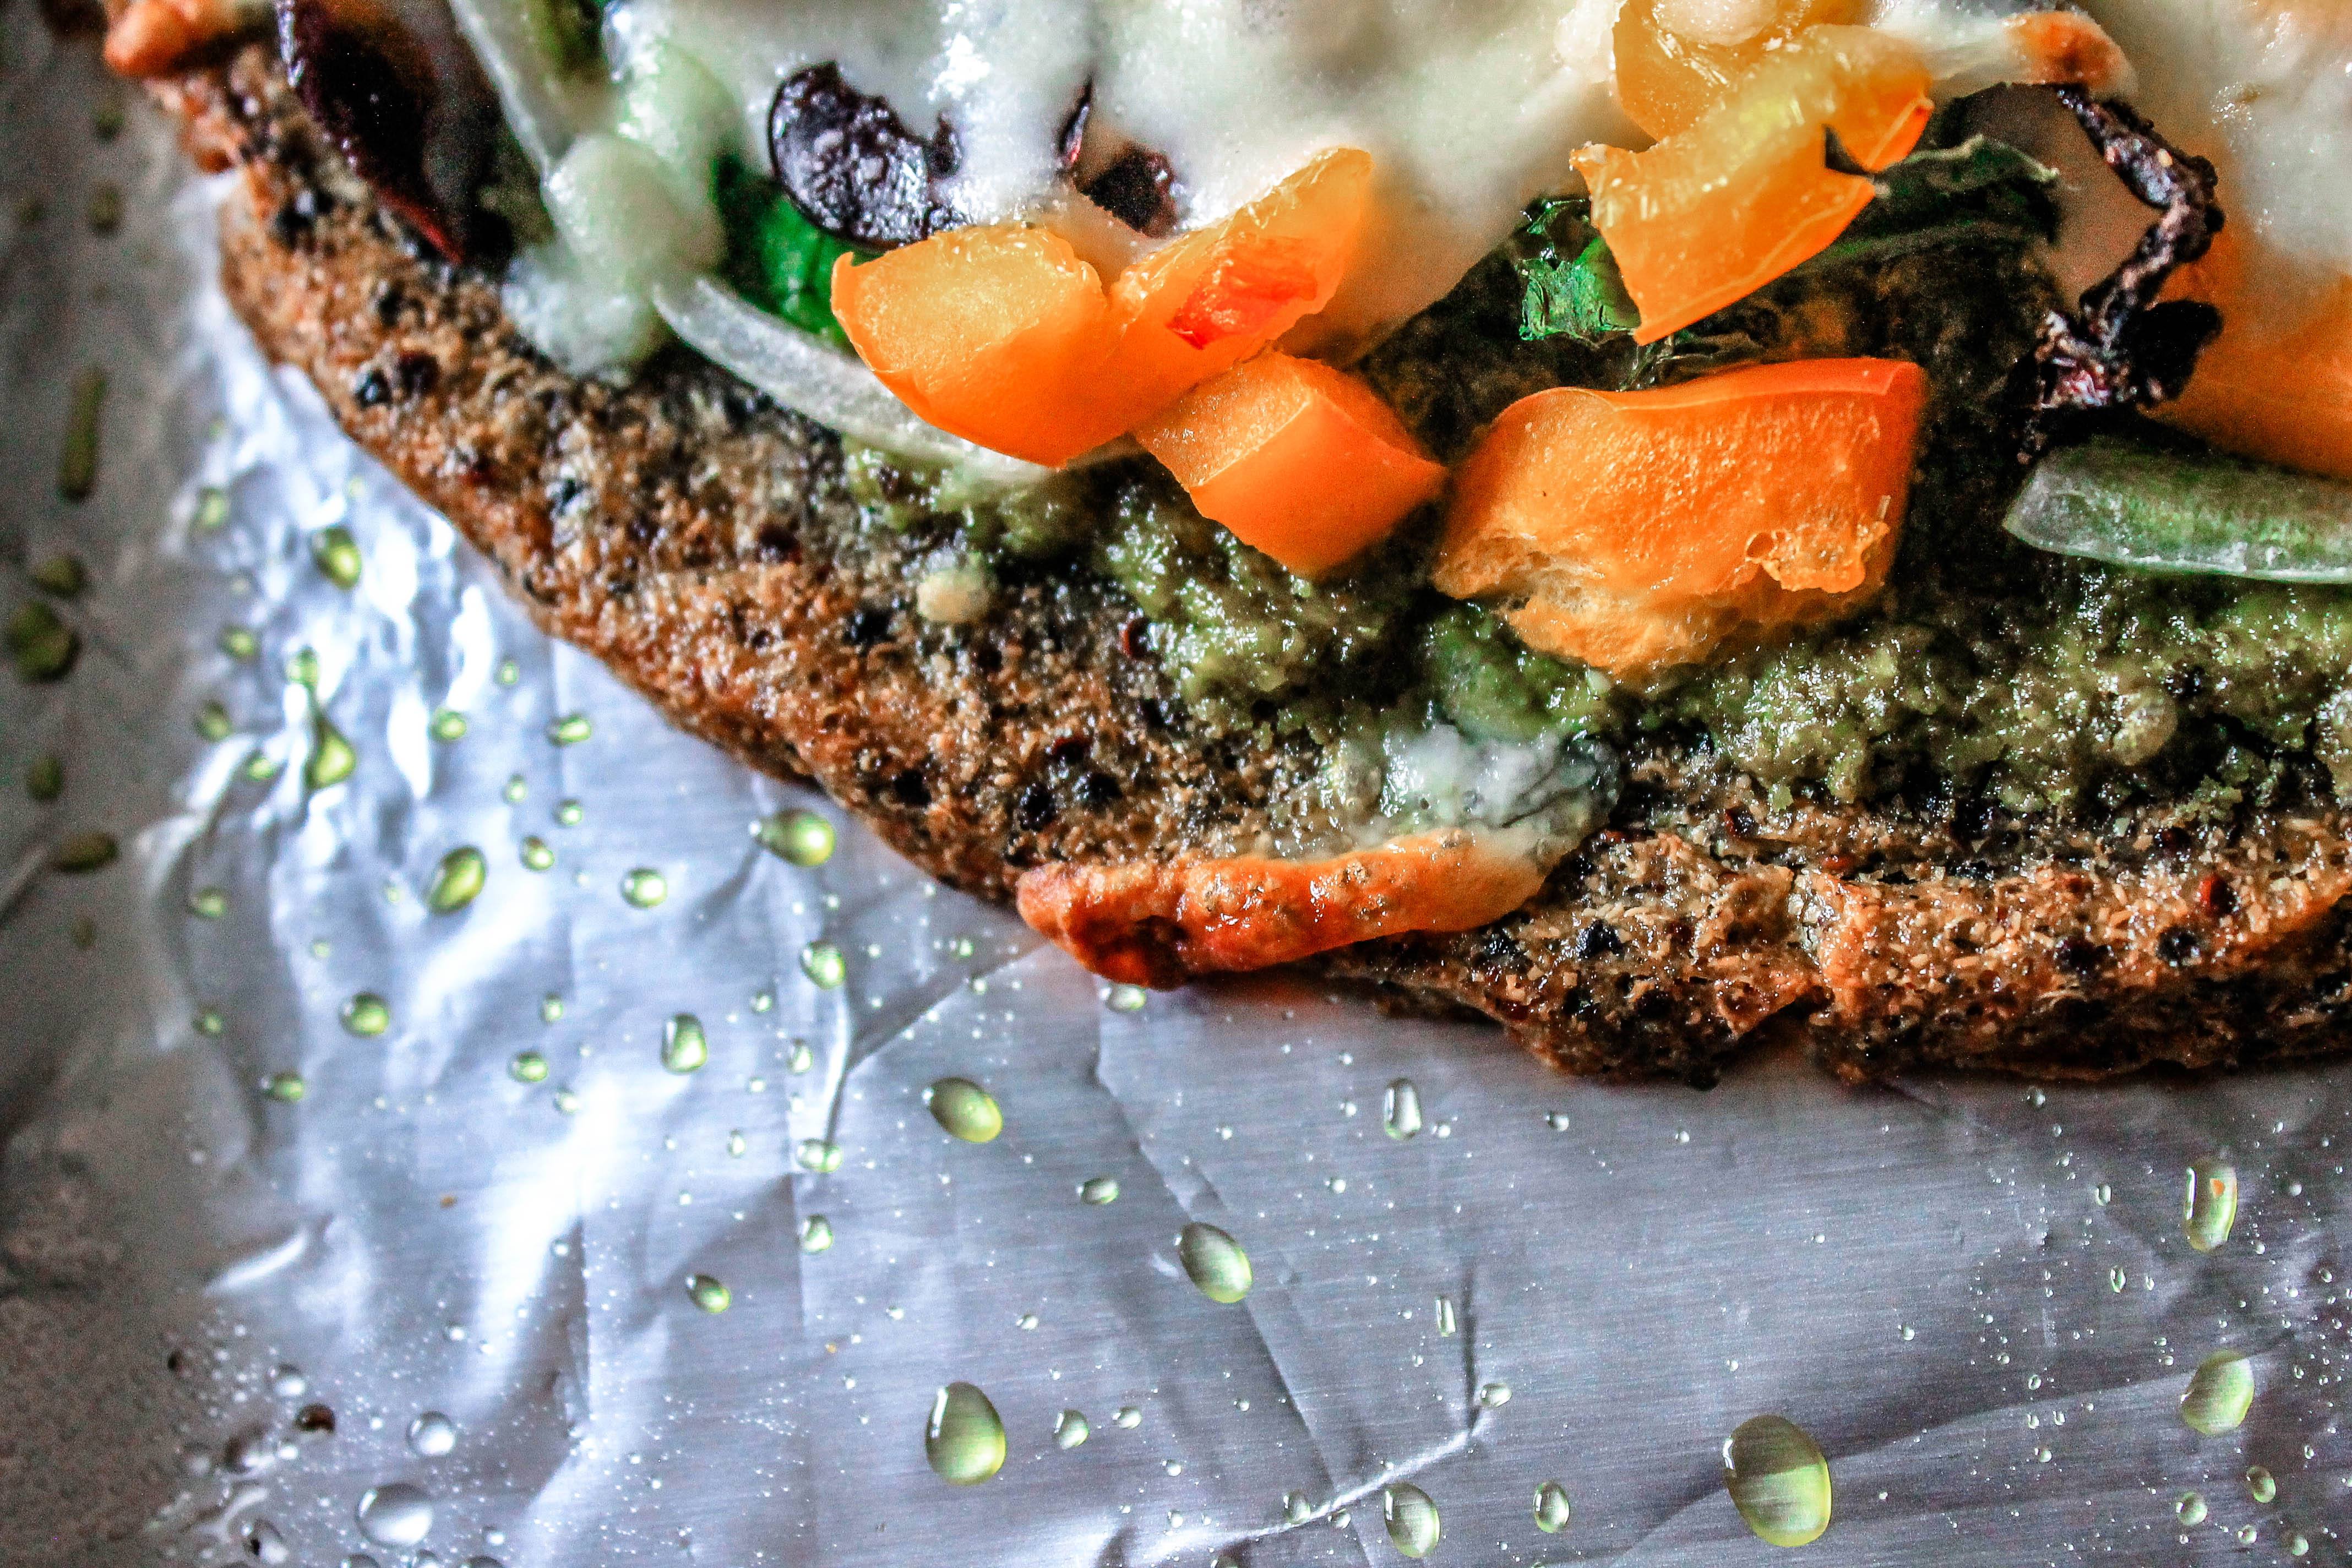
    This 5 ingredient pizza crust made out of quinoa will change your life! It sure has changed mine! I love pizza, but try to only eat it on “special occasions” … AKA the night before a big race! That said, I enjoy this quinoa crust version ALL. THE. TIME.

    Despite what you’re thinking, this is actually VERY EASY to make. I was intimidated the first time I tried it out too but all of those preconceived notions flew out the window as soon as I took my first bite.

    Quinoa Crust Pizza

    The first time I made this I didn’t even tell my husband what the crust was made of. I put it down in front of him and watched him scarf it down. When I asked him what he thought it was, he said “uh…pizza”. He had no clue the crust was made out of quinoa. I swear he asks me to make this at least once every other week. (I told you I eat this all the time!) 

    The crust is made with 5 ingredients and 4 steps… well, 6 ingredients if you count the salt & pepper.

    1. Quinoa (uncooked): 3/4 cup soaked overnight and drained
    2. Baking Powder: 1/2 tsp
    3. Water: 1/4 cup
    4. Extra Virgin Olive Oil: 2 TBS
    5. Dried Oregano: 1 TBS
    6. Sea salt and generous amounts of pepper

    The crust is vegan friendly, so depending on the toppings you select you have the freedom to make this a vegan, vegetarian, or meat lovers delight! 

    STEP 1: Combine all ingredients in food processor and pour into a round, foil lined cake pan sprayed with non-stick spray. Your batter will resemble that of pancakes. Place in oven for 15 minutes. 

    Quinoa Crust Pizza

    I use a round 9-inch cake pan to give my pizza a traditional, circular pizza shape. A round 9-inch cake pan will result in one personal pizza. I usually cook two at the same time; one for me and one for my husband and place the pans side by side in the oven. If you don’t have a round cake pan, you can use a similar sized square, rectangle, or other shape pan. If you do this, make sure not to use one too big or you will end up with super thin (and most-likely burnt) pizza crust. I’ve never tried doubling the recipe to make a large two person pizza, so if you try this you must tell me how it turns out! 

    STEP 2: Remove from oven. Let sit a few minutes, flip, and bake for another 12 – 15 minutes. 

    Quinoa Crust Pizza

    Your pizza crust should look more like a pizza crust when you open the oven to remove and flip after 15 minutes. After flipping your crust, you can place on a flat cookie sheet or back in the same cake pan. because I usually make two of these at the same time, I prefer to use a cookie sheet. If using a cookie sheet be sure to line with foil and spray with non-stick spray. Most importantly, make sure to let your pizza crust cool for a few minutes before you flip. DO NOT FORGET THIS! This is critical to making sure your pizza crust remains in tact!   

    While crust is cooking, this is a great time to chop veggies and prepare your toppings! 

    Step 3: Remove from oven. Add sauce, toppings, and cheese. Place back in oven for another 12 – 15 minutes. 

    Quinoa Crust Pizza

    My pizza (pictured above) is a vegetarian option. Ingredients include:

    • Sauce: My Homemade Basil Pesto  Make this by combining 2 cups of fresh, chopped basil, 5 TBS EVOO, ¼ cup grated Parmesan cheese, 2 TBS pine nuts, 2 tsp minced garlic, and ¼ tsp salt 
    • Toppings: Tuscan Kale, Sweet Onions, Black Olives, Orange Bell Peppers, Sun-dried Tomatoes 
    • Cheese: Shredded Mozzarella 

    Not pictured: Two to three dollops of ricotta. I didn’t realize we were out until I made this recipe! 

    Greg’s pizza (pictured below) is made with Chicken and veggies. Ingredients include: 

    • Sauce: Fresh Marinara 
    • Toppings: Shredded Chicken, Tuscan Kale, Sweet Onions, Black Olives, Orange Bell Peppers, Homemade Basil Pesto 
    • Cheese: Shredded Mozzarella 

    Quinoa Crust Pizza

    Step 4: Remove from oven. Let cool a few minutes. Slice, serve, and enjoy! 

    You’ll know your pizza is ready when the cheese begins to bubble and brown and the edges of your veggies begin to get crispy. 

    Quinoa Crust Pizza

    Quinoa Crust Pizza

    BRB. Drooling over how good this looks. 

    Quinoa Crust Pizza


    See, easy peasy. 5 ingredients. 4 steps. One delicious meal! 


    Quinoa Crust Pizza
    Serves 1
    A 5 ingredient, guilt free pizza crust option made with quinoa. This recipe is perfect for everyone from vegans to meat eaters!
    Write a review
    Print
    Prep Time
    10 min
    Cook Time
    45 min
    Total Time
    6 hr 55 min
    Prep Time
    10 min
    Cook Time
    45 min
    Total Time
    6 hr 55 min
    Ingredients
    1. • 3/4 cup uncooked quinoa (soaked in water overnight or up to 6 hours) drained
    2. • 1/4 cup water
    3. • 1/2 tsp baking powder
    4. • 2 TBS EVOO
    5. • 1 TBS dried oregano
    6. • Sea salt to taste + generous amounts of black pepper
    7. • Pizza toppings & sauce of your choice!
    Instructions
    1. • Place uncooked quinoa in a bowl and fill with water. Let sit overnight or up to 6 hours. Use fine mesh strainer to drain water and place soaked quinoa in food processor
    2. • Pre-heat oven to 425 degrees F. Line a 9 inch round cake pan with foil and spray with non-stick spray (I prefer olive or coconut oil spray)
    3. • Add water, EVOO, baking powder, oregano, salt and pepper to food processor and combine all ingredients. Batter should be smooth and creamy with a consistency similar to pancake batter. Your batter will contain some whole quinoa kernels, so no need to worry!
    4. • Pour batter into cake pan and bake for 15 minutes.
    5. • After 15 minutes, remove pan from oven and let sit for a few minutes. Flip crust on opposite side and return to oven for 12 – 15 minutes until crust is golden brown and edges are crispy. Chop your veggies now!
    6. • Remove from oven and dress pizza crust with sauce and toppings of your choice. Bake for another 12 – 15 minutes until cheese begins to bubble and brown and the edges of your veggies begin to crisp.
    7. • Remove from oven and let sit to cool for a few minutes. Slice, serve, and enjoy!
    Notes
    1. • If you’re flipping your crust to a new cookie sheet don’t forget to spray with non-stick spray!
    2. • Pre-cook any meat options placed on pizza. There is no need to pre-cook veggies.
    3. • Store leftovers in an airtight container for up to three days. Place in microwave to re-heat.
    God Save the Quinoa https://www.godsavethequinoa.com/


    Quinoa Crust Pizza

    Even Maggie is drooling over this recipe! 

    Recipes for endurance athletes


  • Sweet Potato Pad Thai

    Sweet Potato Pad Thai


    Sweet Potato Pad Thai title page

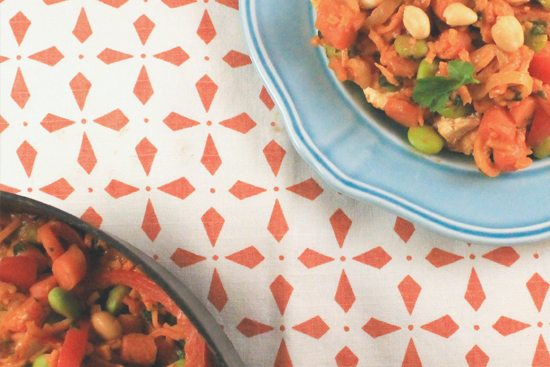
    Sweet potatoes are one of my favorite super foods to cook. If you don’t believe me, ask my husband. In our 2+ years of marriage, there have only been a handful of times when sweet potatoes have not been included on our Sunday grocery list. Greg and I both love Pad Thai but don’t love the high levels of sodium and unhealthy ingredients used at restaurants. To make sure we could still get our Pad Thai fix, I concocted Sweet Potato Pad Thai; a healthier version of Pad Thai made with sweet potato noodles, colorful veggies doused in a creamy peanut sauce, topped with chicken for Greg and Tofu for me.

    Sweet potatoes are one of my go-to’s because they provide a healthy dose of complex carbohydrates. Complex carbohydrates take longer to digest, allowing them to supply the body with energy over a longer period of time. This slow process breaks complex carbs into glycogen and stored in your body’s liver and muscles to be used as fuel for exercise, which is key to fuel an endurance athlete’s body during long workouts or on race day. Sweet potatoes are also high in Vitamin A, which plays a vital role in bone growth, immune system health, and helps the skin and mucus membranes repel bacteria and viruses. If you remember one thing from this post, make sure to load up on sweet potatoes during flu season! 

    Spiralized Sweet Potatoes

    Other performance enhancing benefits of sweet potatoes are their anti-inflammatory and blood sugar regulating properties. Stress, too much exercise, injury, and poor food choices create inflammation within the body, which will wreck havoc on your heath and performance if not addressed properly. The best way to control inflammation is by keeping your blood sugar levels low and stable. To do this, aim to eat a full serving of sweet potatoes post work out when your glycogen levels are low.

    Make a plate of Sweet Potato Pad Thai to restore depleted glycogen levels and help refuel your recovery needs so that your body is prepared to train hard for your next workout. By opting for foods like sweet potatoes instead of processed foods, white breads and avoiding anything with high fructose corn syrup, not only will you feel better, you’ll likely perform better too. 

    spiralized sweet potatoes

    Now that you know why you need to eat more sweet potatoes, lets talk about how to transform them into Pad Thai. If you don’t have a spiralizer, I highly recommend you invest $30 and buy one. There are so many things you can make with a spiralizer, the options are endless… but I’ll save that for another post. If you don’t have a spiralizer you can buy pre-spiralized sweet potatoes at Central Market, Target, and Tom Thumb to name a few.

    Before spiralizing your sweet potato, peel it and cut the ends off. If you’re working with a giant sweet potato, I suggest cutting it in half. You’ll need a nice flat surface so the sweet potato can stick (and remain stuck to) the teeth of the spiralizer on both ends (see picture above). Otherwise you’re likely to experience a situation where your sweet potato falls off the spiralizer forcing you to chase the rolling vegetable around the counter top. If you can catch it before it rolls off and onto the floor its your lucky day! Otherwise, you may need to make an emergency grocery trip… trust me, I know from experience. That said, you won’t need to worry about this as long as you cut your sweet potato so that it has nice, flat ends and make sure it is tightly attached to your spiralizer. 

    Sweet Potato Pad Thai chicken

     As mentioned above, you have the option to make this dish with chicken or tofu. Before you begin spiralizing, chopping, or preparing the peanut sauce, I recommend cutting your chicken breast and/or tofu and letting it soak in the marinade. If you’re making a chicken version AND a tofu version make sure you cut and marinade each option separately to avoid cross-contamination from the raw chicken. I recommend cooking these in separate pans, but if you insist on using only one to limit the number of dishes to clean (we often do this in my household) make sure you cook the tofu first! 

    Sweet Potato Pad Thai Plate Overview

    Sweet Potato Pad Thai
    Serves 4
    Enjoy a healthier version of Pad Thai! This dish is made with sweet potato noodles and paired with colorful veggies doused in a creamy homemade peanut sauce with your choice of chicken or tofu for added protein.
    Write a review
    Print
    Prep Time
    15 min
    Cook Time
    15 min
    Total Time
    30 min
    Prep Time
    15 min
    Cook Time
    15 min
    Total Time
    30 min
    Noodles and veggies
    1. • 2 large sweet potatoes, peeled and spiralized
    2. • 1 cup of sliced baby carrots (shredded carrots will also work)
    3. • 1 red bell pepper, thinly sliced
    4. • 1 small sweet onion, thinly sliced
    5. • 1/4 cup low or no sodium veggie broth
    6. • 1/4 cup raw, unsalted peanuts
    7. • 1 cup cooked, unsalted edamame
    8. • 2 TBS cilantro, finely chopped
    9. • Salt and pepper to taste
    Pad Thai Sauce
    1. • 2 TBS creamy peanut butter
    2. • 2 TBS sriracha
    3. • 2 TBS skim milk or unflavored almond milk
    4. • 1 tsp toasted sesame oil
    5. • 1/2 tsp apple cider vinegar
    6. • 1/2 TBS maple syrup
    7. • 1/2 tsp turmeric
    8. • 1/2 tsp ginger
    9. • 1/2 tsp saffron seasoning (optional)
    Chicken + Marinade
    1. • 1 large chicken breast (uncooked), cut into bite size pieces
    2. • 1 TBS fish sauce
    3. • 1 TBS maple syrup
    4. • Dollop of peanut butter
    5. • I TBS sriracha drizzled on top
    6. • 1 tsp curry powder
    7. • 1 tsp ginger
    Tofu + Marinade
    1. • 1 container of extra firm tofu, cut into cubes
    2. • 1 TBS fish sauce
    3. • 1 TBS maple syrup
    4. • Dollop of peanut butter
    5. • I TBS sriracha drizzled on top
    6. • 1 tsp curry powder
    7. • 1 tsp ginger
    Instructions
    1. • Cut chicken breast, tofu (or both) into small, bite size pieces. Place proteins in their respective bowls, stir in marinade until completely covered and set aside. I suggest allowing protein(s) to sit in marinade 20 – 30 minutes while you prepare and cook veggies.
    2. • Peel, spiralize, and prepare veggies as needed and set aside.
    3. • In a large sauce pan, combine spiralized sweet potatoes with sliced or shredded carrots, pour in veggie broth and toss well. Cook on medium heat for 3 -4 minutes, stirring occasionally.
    4. • Place sliced bell pepper and sliced sweet onion in sauce pan. Stir in salt and pepper and cook 5 – 7 minutes on medium heat, stirring occasionally, until veggies are tinder. (texture of sweet potato noodles should feel similar to the texture of cooked pasta.)
    5. • If cooking chicken, tofu, or both cook now. Place all contents including marinade into sauce pan and sauté until cooked (5 – 10 minutes). Set aside when done. (note: if cooking both, cook chicken and tofu separately to avoid cross contamination)
    6. • While veggies are cooking make peanut sauce by combining all ingredients into bowl and stir until creamy.
    7. • Once veggies are fork tender, stir in peanuts and edamame and cook for 1 minute.
    8. • Reduce veggies to low heat. Stir in peanut sauce and mix until veggies are completely covered and garnish with cilantro and raw peanuts.
    9. • To serve, place veggies in a bowl, stir in chicken/tofu and enjoy!
    Notes
    1. • Marinade chicken and/or tofu first to maximize flavor
    2. • If cooking chicken and tofu, marinade separately and cook tofu first (if using same pan) to avoid cross contamination
    3. • Store leftovers in an airtight container for up to 4 days
    God Save the Quinoa https://www.godsavethequinoa.com/


     What’s your favorite way to cook sweet potatoes? Comment below- I’d love to hear from you! Recipes for endurance athletes


  • Avocado Tuna Salad

    Avocado Tuna Salad

    Avocado Tuna Salad

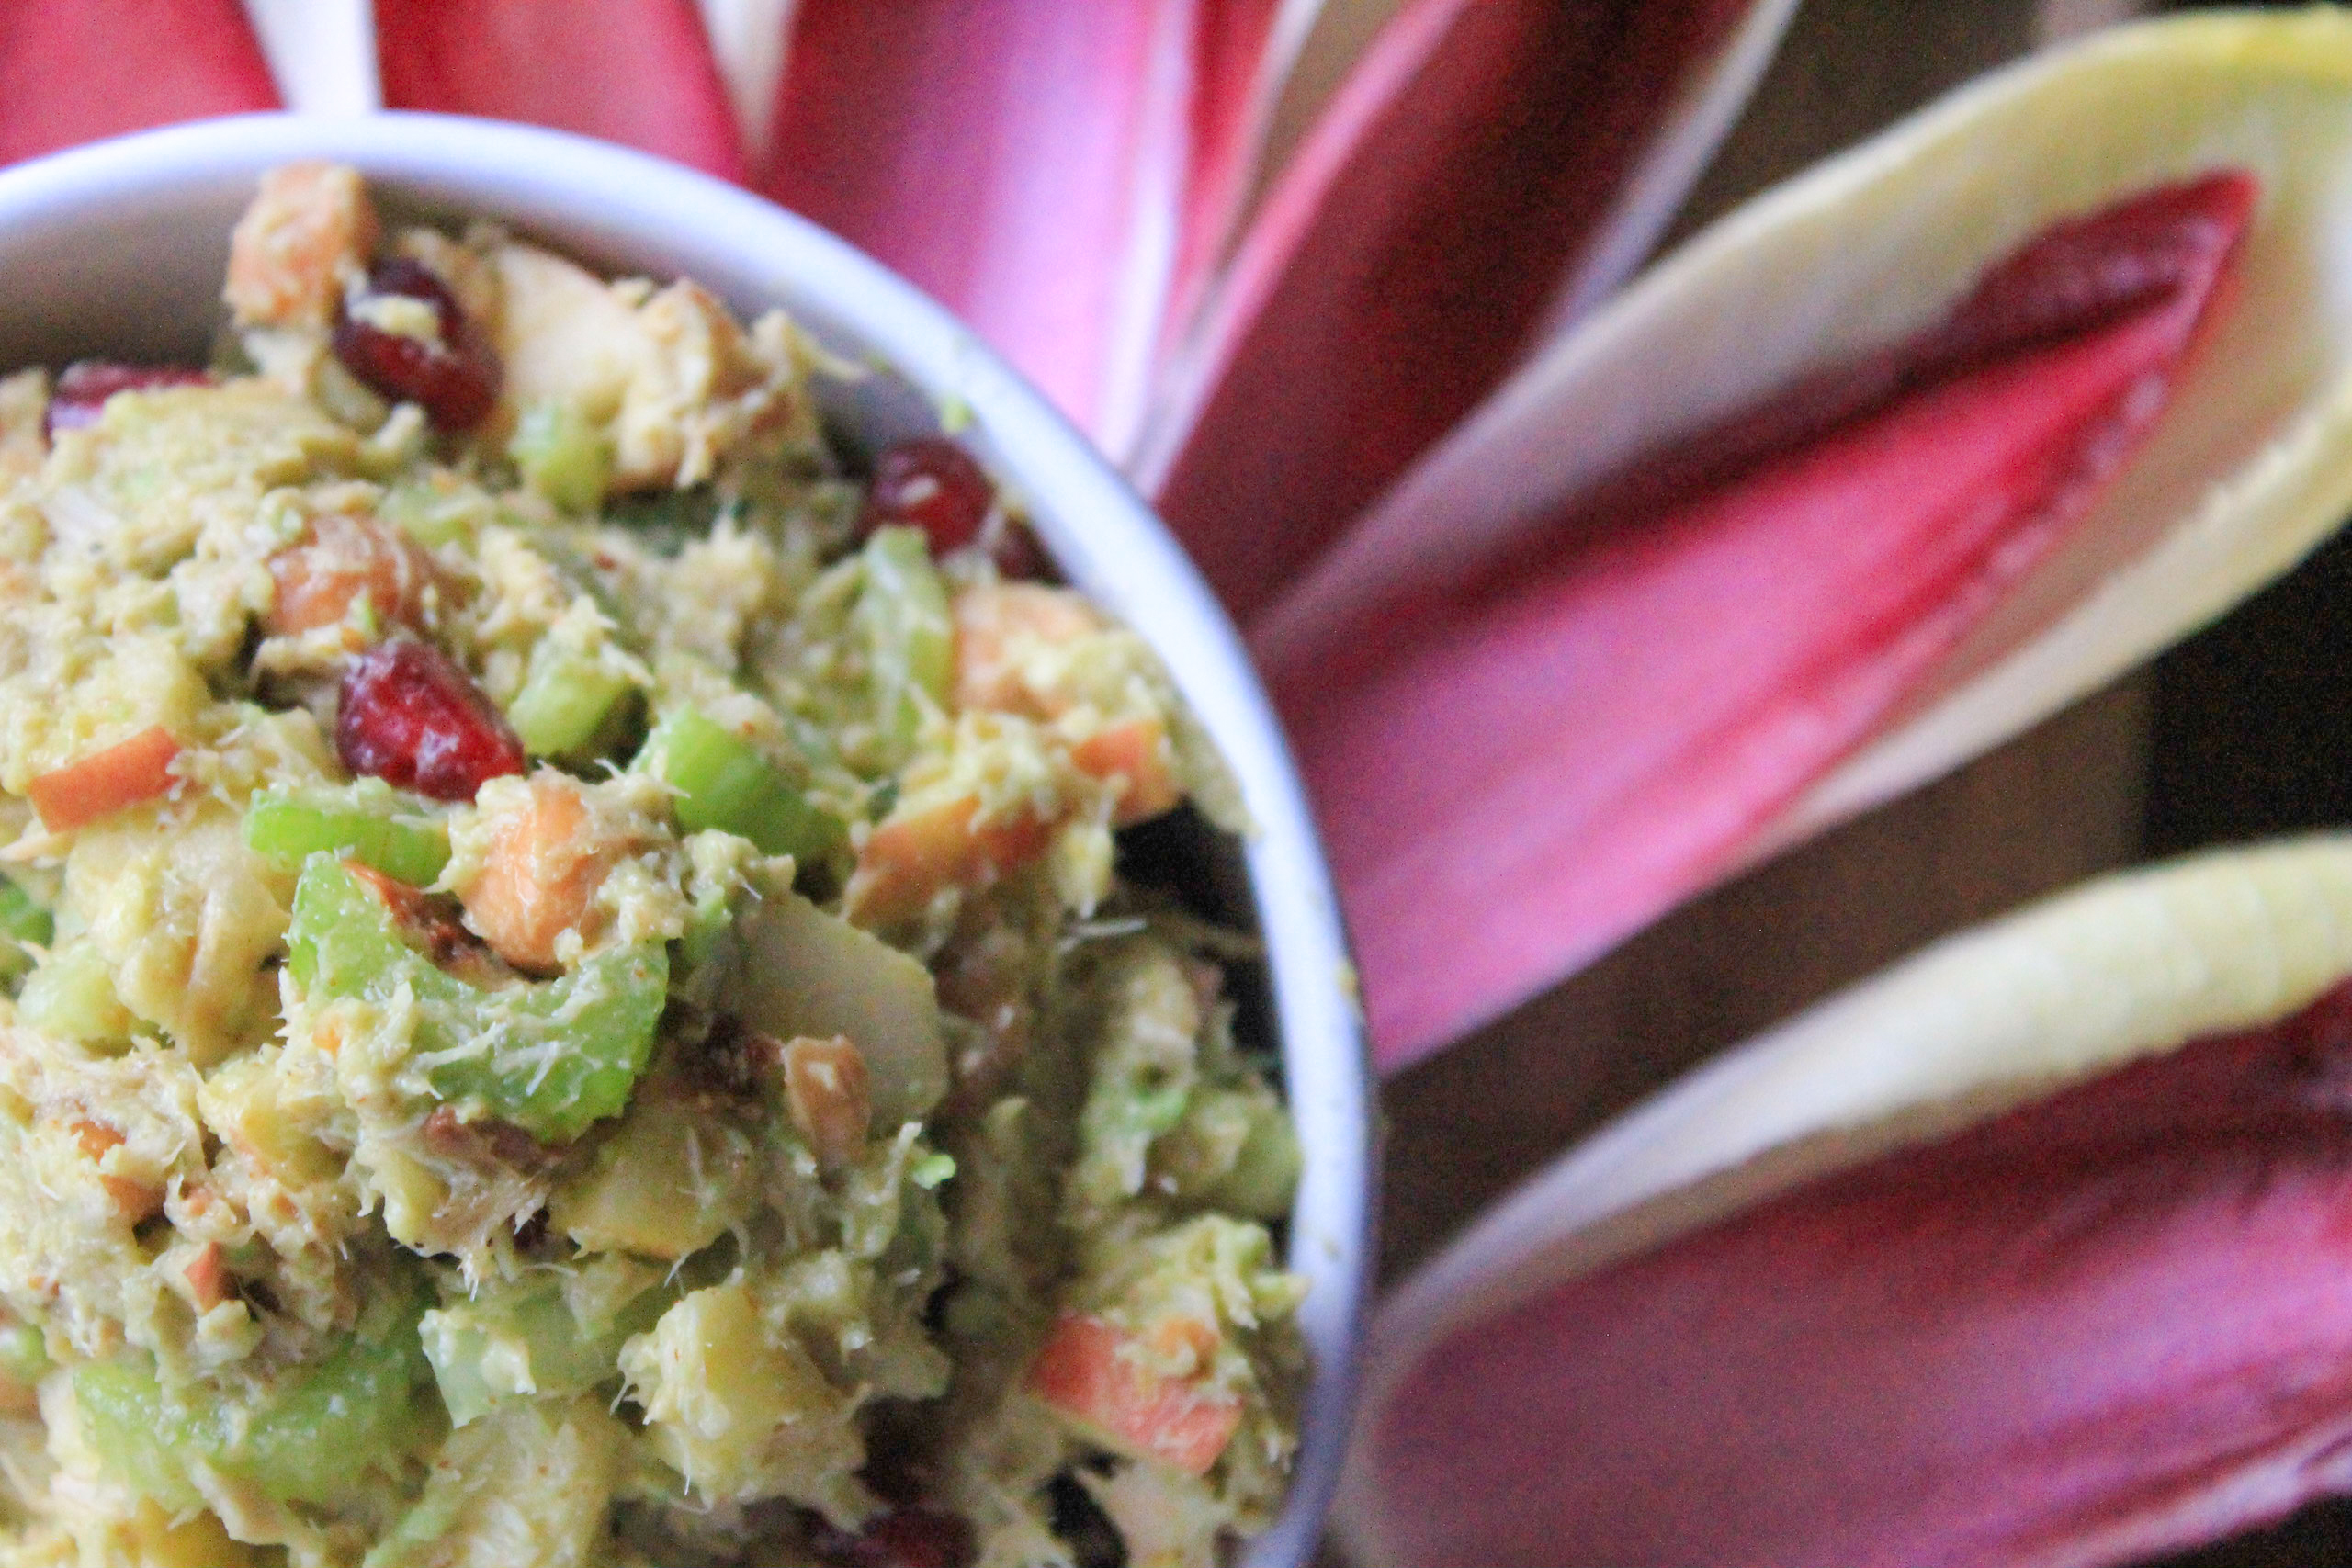
    Step up your salad game by making this quick and easy Avocado Tuna Salad. Those who are lucky enough to enjoy this gem of a recipe will never know the mayonnaise has been replaced with an avocado! Subbing an avocado for mayonnaise is a healthier choice not only because it contributes to your healthy omega-3 fatty acid servings for the day, it also adds flavor and a creamy mayonnaise-like texture. The celery, apple, and pecan pieces provide a nice crunch. The Spicy Roasted Chickpeas and Dijon Mustard give it a little extra kick. While the fresh pomegranate seeds provide a refreshing fruitful taste. Mix them all together and you’ve got yourself one heck of a meal! 

    Just look at all of those delicious ingredients! YUM!

    Avocado Tuna Salad Ingredients

    You can add normal chickpeas if you want, but I prefer to roast my chickpeas with spicy seasonings to add some extra kick when making this recipe.  I suggest following my Spicy Roasted Chickpea recipe. It’s one of my favorites and only takes 15 minutes. When I make this recipe I season my chickpeas, throw them in the oven on broil for 15 minutes, and chop all of the veggies while they’re cooking. The timing really does work out nicely! 

    Avocado Tuna Salad

    Once your chickpeas are done roasting (you can even roast them a few hours or a day before you’re ready to use them if you want to speed things up) the rest of this recipe is a piece of cake! All you have to do is combine all ingredients in a large mixing bowl and mix well. Seriously… it’s that easy! 

    One tip: make sure you use a very ripe avocado. Reach for a softer avocado because it will be easier to mix in. The softer the avocado the creamier your tuna salad will taste. Just make sure your avocado isn’t so soft that it has become rotten. When picking your avocado look for a dark greenish brown fruit. Once you’ve found one remove the stem from the top. If the color beneath the stem is bright green you’re good to go. If you see a white-ish green or brown color put it back and try again. 

    Avocado Tuna Salad (12 of 18)

    Growing up, my mom always served tuna salad on bread or with crackers. Now that I am older and a little more health conscious, I prefer to enjoy my Avocado Tuna Salad with endive leaves. I love endives because they provide the same crunch like you would get from a chip and are packed full of nutrients, such as vitamins A and K, folate, and fiber. Forewarning, they are a tad bitter at first bite and might take a little getting used to. Just be sure to wash them before eating- this should help eliminate some of the bitterness. 

    Avocado Tuna Salad- Endive Leaves

    If you elect to use endives, one or two endive stems should do the trick for this recipe. I usually buy mine at Trader Joe’s. They have a great 3-pack of “Red and White Belgian Endives” Stems, which are perfect for leftovers. They are usually located in the sam refrigerated area with all of the lettuce. If you’re not a loyal Trader Joe’s shopper like myself, you should be able to find these at your local grocery store in the same vicinity as the lettuce. You should store your endives in the refrigerator until you’re ready to use them. 

    Before cutting your endives rinse them with lukewarm water, stem side down (the water will help the leafy tops spread apart) and pat dry with a paper towel. Place endive stems on a cutting board and slice through the thick end of the stem, as pictured below. Next, simply peel the leaves apart and voila! your endives are ready to be eaten! 

    Simply scoop, eat, and enjoy! 

    Avocado Tuna Salad with endive scoop

    Avocado Tuna Salad
    Serves 4
    Enjoy this creamy tuna salad made with avocado, spicy roasted chickpeas, crunchy celery, apple pieces, pecans, and juicy pomegranate seeds over endive leaves.
    Write a review
    Print
    Prep Time
    10 min
    Cook Time
    15 min
    Total Time
    25 min
    Prep Time
    10 min
    Cook Time
    15 min
    Total Time
    25 min
    Ingredients
    1. • 1 (15 oz) can Albacore Tuna in water no salt, drained
    2. • 1 pink lady apple, chopped
    3. • 3 celery sticks, chopped
    4. • 1/4 cup of raw pecans, chopped
    5. • 1/2 cup fresh pomegranate seeds
    6. • 1/4 cup spicy Dijon Mustard
    7. • 1 can chickpeas, spicy roasted
    8. • 1 ripe avocado, cubed.
    9. • Endive leaves for serving (optional)
    Instructions
    1. • Roast your chickpeas if you have not done so already. (I suggest using my Spicy Roasted Chickpea recipe- it only takes 15 minutes!)
    2. • While chickpeas are roasting chop apple, celery sticks, and pecans and set aside.
    3. • De-seed pomegranate and set seeds aside.
    4. • Open canned tuna, drain water, and scoop tuna into a large mixing bowl
    5. • Add chopped apples, celery, pecans and pomegranate seeds in mixing bowl with tuna and combine. Mix in spicy roasted chickpeas when done cooking.
    6. • Pour spicy Dijon Mustard over contents and mix until all ingredients well combined.
    7. • Cut avocado into small cubes. Add cubed avocado into tuna and mix until avocado cubes are squished and all ingredients are well combined.
    8. • Wash and cut endive leaves. Scoop Avocado Tuna Salad with endive leaves, eat, and enjoy!
    Notes
    1. • If using Endive Leaves buy at least 2 Endive Stems. Store Endives in refrigerator until ready to use. Store left over endive leaves in an airtight container or zip lock baggie in the refridgerator.
    2. • Store left over Avocado Tuna Salad in refrigerator in an airtight container for up to three days. Stir Avocado Tuna Salad with a spoon before re-serving.
    God Save the Quinoa https://www.godsavethequinoa.com/
    Fabulous recipes by Mandi at godsavethequinoa.com


  • Skinny Pumpkin Spice Granola

    Skinny Pumpkin Spice Granola

    skinny-pumpkin-spice-granola-title

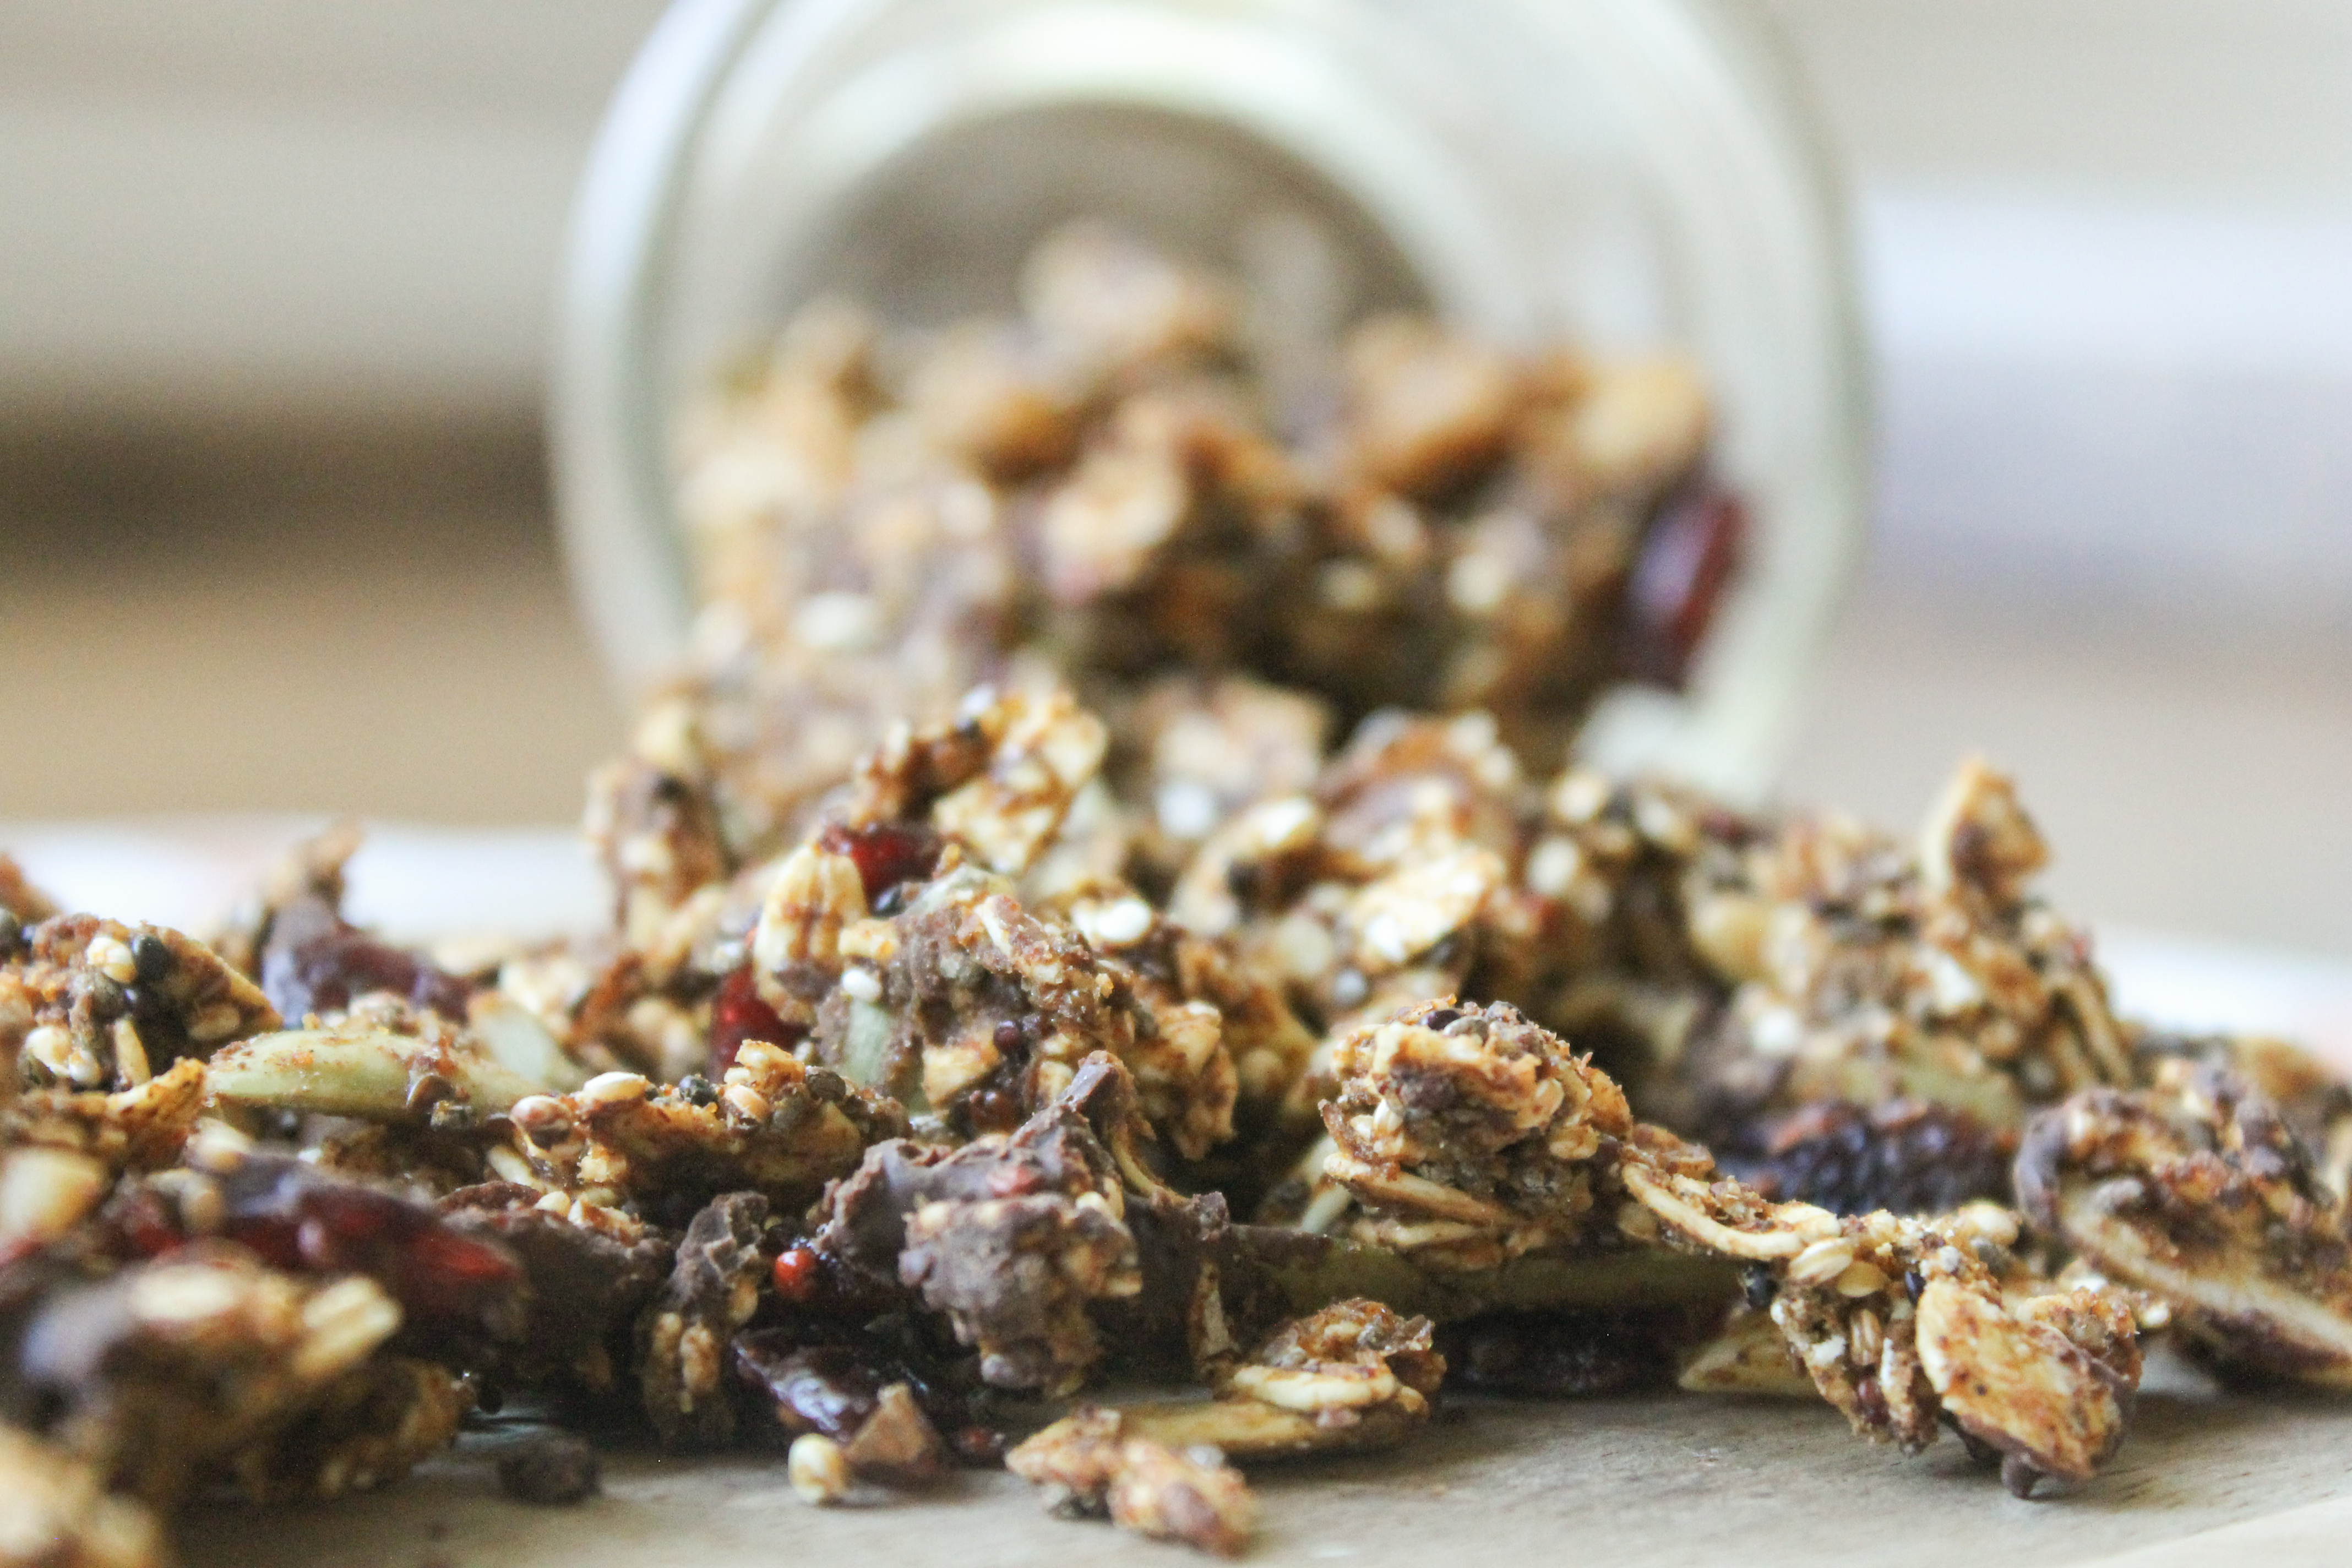
    This skinny pumpkin spice granola tastes like fall and is a perfect addition to any dish! I promise this recipe will quickly become one of your go-to “pumpkin spice” favorites. I love adding this to greek yogurt, ice cream, cereal, or eating it alone as a snack. The options are endless! 

    I prefer making homemade granola as opposed to buying the store bought stuff. Not only do you get alot more bang for your buck but you can also control the ingredients (especially the sugars) you’re putting into it.

    skinny pumpkin spice granola

    If you’ve ever read the ingredients list on the package of your favorite store bought granola you’ll likely see a list of various items such as cane syrup, brown rice syrup, corn syrup, cane sugar, canola oil, vegetable oil, fructose, natural and articfical flavoring, and soy lecithin to name a few. To translate… sugar, sugar, and more sugar! Ingredients on food labels are listed by quantity from highest to lowest. Anytime you see sugary ingredients like the ones listed above ahead of “real” ingredients you should think twice before buying!  Store bought granola may taste delicious but you are much better off making your own. 

    Don’t believe me? I bet you’ll have a different opinion after making this Skinny Pumpkin Spice Granola. 

    skinny pumpkin spice granola

    I love this recipe because its packed full of healthy grains, heart healthy fats, and natural sugars. Not to mention its delicious and super easy to make! You’ll be out of the kitchen, start to finish, in about 35 minutes with only a few dishes to wash! 

    skinny pumpkin spice granola ingredientsYou’ll start by toasting your old fashioned rolled oats and uncooked quinoa. To do this simply spread the oats and quinoa across a parchment lined baking sheet and place in the oven at 325 degrees F for 10 minutes. Note: There is no need to spray the baking sheet or parchment paper with cooking spray.  

    Skinny pumpkin spice granola ingredients

    After 10 minutes remove toasted quinoa and old fashioned rolled oats from oven and pour into a large bowl along with the rest of your dry ingredients which include flaxseed meal, chia seeds, slivered almonds, walnut pieces, and pumpkin seeds. If you’re not a fan of almonds, walnuts, or pumpkin seeds you can swap them out for a nut or seed that better suits your preferance. I’ve personally made this recipe using various combinations of sunflower seeds, pecans, cashews, and whole almonds and the result is delicious every time! Just make sure you stay true to the measurements in the recipe.

    skinny pumpkin spice granolaStir all of your dry ingredients together and reduce the oven to 300 degrees F. 

    In a microwave safe bowl combine your wet ingredients: maple syrup, honey, pumpkin puree, coconut oil, pumpkin pie spice, nutmeg, cinnamon, a dash of salt, and vanilla extract. Mix well and microwave for one minute. Your wet ingredient mixture should be thick and gooey. Warning- it will smell delicious! Since there are no raw eggs its okay to sneak a taste or two! 

    Give your wet ingredients one more stir and pour over dry ingredients. Use a spatula to scrape the sides of the wet ingredients bowl to make sure you’re able to transfer as much as possible to your dry ingredients.

    skinny pumpkin spice granola ingredients

    Now its time to combine your wet and dry ingredients. Its important to make sure that all dry ingredients are evenly coated. I find best results come from applying a folding technique using a spatula to combine. 

    Next, use your spatula to transfer all ingredients to a parchment lined baking sheet. Again, do not spray parchment paper or baking sheet with cooking spray. 

    pumpkin-spice-granola-9-of-25

    Make sure ingredients are tighly packed and evenly spread across the baking sheet. Place the goods in a 300 degree F oven for 20 – 22 minutes. Toss ingredients about 10 minutes in and sprinkle dried cranberries over the top. Bake for 10 – 12 more minutes until granola is golden brown. Remove from oven and immediately sprinkle dark chocolate chips (optional) across cooked granola. Its important to do this as soon as you remove the granola from the oven to enable the dark choclate chips to melt and spread across granola before it cools. 

    skinny pumpkin spice granola

    I know this will take alot of willpower, but let granola cool completely before digging in. Once granola has competely cooled you’re free to break granola into smaller chunks as desired and remove from the parchment paper lined baking sheet. 

    skinny pumpkin spice granolaThere are a couple of options for how to store your granola. You can store this yummy treat in an airtight container (mason jar, tupperware, etc.) on your countertop or pantry or in the freezer. Granola will keep for at least one month if stored on your countertop and at least three months in your freezer. I’ve stored ganola for up to six months in the freezer. If storing granola in the freezer make sure you’re using a sturdy, well sealed container to avoid freezer burn. 

    pumpkin-spice-granola-18-of-25 pumpkin-spice-granola-23-of-25 pumpkin-spice-granola-21-of-25

    Skinny Pumpkin Spice Granola
    Yields 4
    This recipe will become one of your go-to “pumpkin spice” favorites. This skinny pumpkin spice granola tastes like fall and is a perfect addition to any dish!
    Write a review
    Print
    Prep Time
    15 min
    Cook Time
    20 min
    Total Time
    35 min
    Prep Time
    15 min
    Cook Time
    20 min
    Total Time
    35 min
    Ingredients
    1. • 1/4 cup uncooked quinoa
    2. • 1.5 cups of old fashioned rolled oats
    3. • 1/4 cup flaxseed meal
    4. • 1/4 cup chia seeds
    5. • 1/4 cup raw, unsalted slivered almonds
    6. • 1/2 cup raw, unsalted walnuts halves & pieces
    7. • 1/4 cup raw, unsalted pumpkin seeds
    8. • 1/4 cup + 1 tsp real maple syrup
    9. • 2 tsp honey
    10. • 1/3 cup pumpkin puree
    11. • 2 tsp coconut oil
    12. • 1 TBS pumpkin pie spice
    13. • 1 TBS nutmeg
    14. • 1 TBS cinnamon
    15. • Dash of salt
    16. • 1.5 tsp vanilla extract
    17. • 1/4 cup dried cranberries
    18. • 1/4 cup dark chocolate chips (optional)
    Instructions
    1. • Pre-heat oven to 325 degrees F
    2. • Spread uncooked quinoa and old fashioned rolled oats on a baking sheet with parchment paper & place in the oven to toast for 10 minutes (do NOT spray any cooking spray on the parchment paper)
    3. • Remove quinoa and old fashioned rolled oats from oven and pour into a large bowl along with flaxseed meal, chia seeds, slivered almonds, walnut pieces, and pumpkin seeds. Stir to combine. These are your dry ingredients.
    4. • Reduce oven heat to 300 degrees F
    5. • In a microwave safe bowl combine maple syrup, honey, pumpkin puree, coconut oil, pumpkin pie spice, nutmeg, cinnamon, salt, and vanilla extract. These are your wet ingredients.
    6. • Mix wet ingredients well and heat in microwave for 1 minute.
    7. • Stir wet ingredients one more time and pour over dry ingredients using a spatula to combine until dry ingredients are completely coated.
    8. • Spread combined ingredients on a baking sheet lined with parchment paper (again, do NOT spray any cooking spray on parchment paper). Pack ingredients tightly by pressing down on them with a spatula to form a thin, evenly dispersed layer.
    9. • Place baking sheet in 300 degree F oven for 20 – 22 minutes. Toss ingredients with a spatula about halfway through and sprinkle dried cranberries on top.
    10. When golden, remove from oven and sprinkle dark chocolate chips (optional) on top. Let ingredients cool completely and break larger chunks into smaller pieces as desired and enjoy!
    Notes
    1. Store in an air-tight container on counter-top or freezer. Granola will keep for at least one month when stored on counter and at least three months when stored in freezer.
    2. Use any combination of nuts and seeds (cashews, sunflower seeds, whole almonds, pecans, etc.) as preferred. For best results keep measurements listed above true.
    God Save the Quinoa https://www.godsavethequinoa.com/
    Let me know what you think! 

    Fabulous recipes by Mandi at godsavethequinoa.com

  • Sweet Potato Quinoa Patties with Basil Avocado Spread

    Sweet Potato Quinoa Patties with Basil Avocado Spread

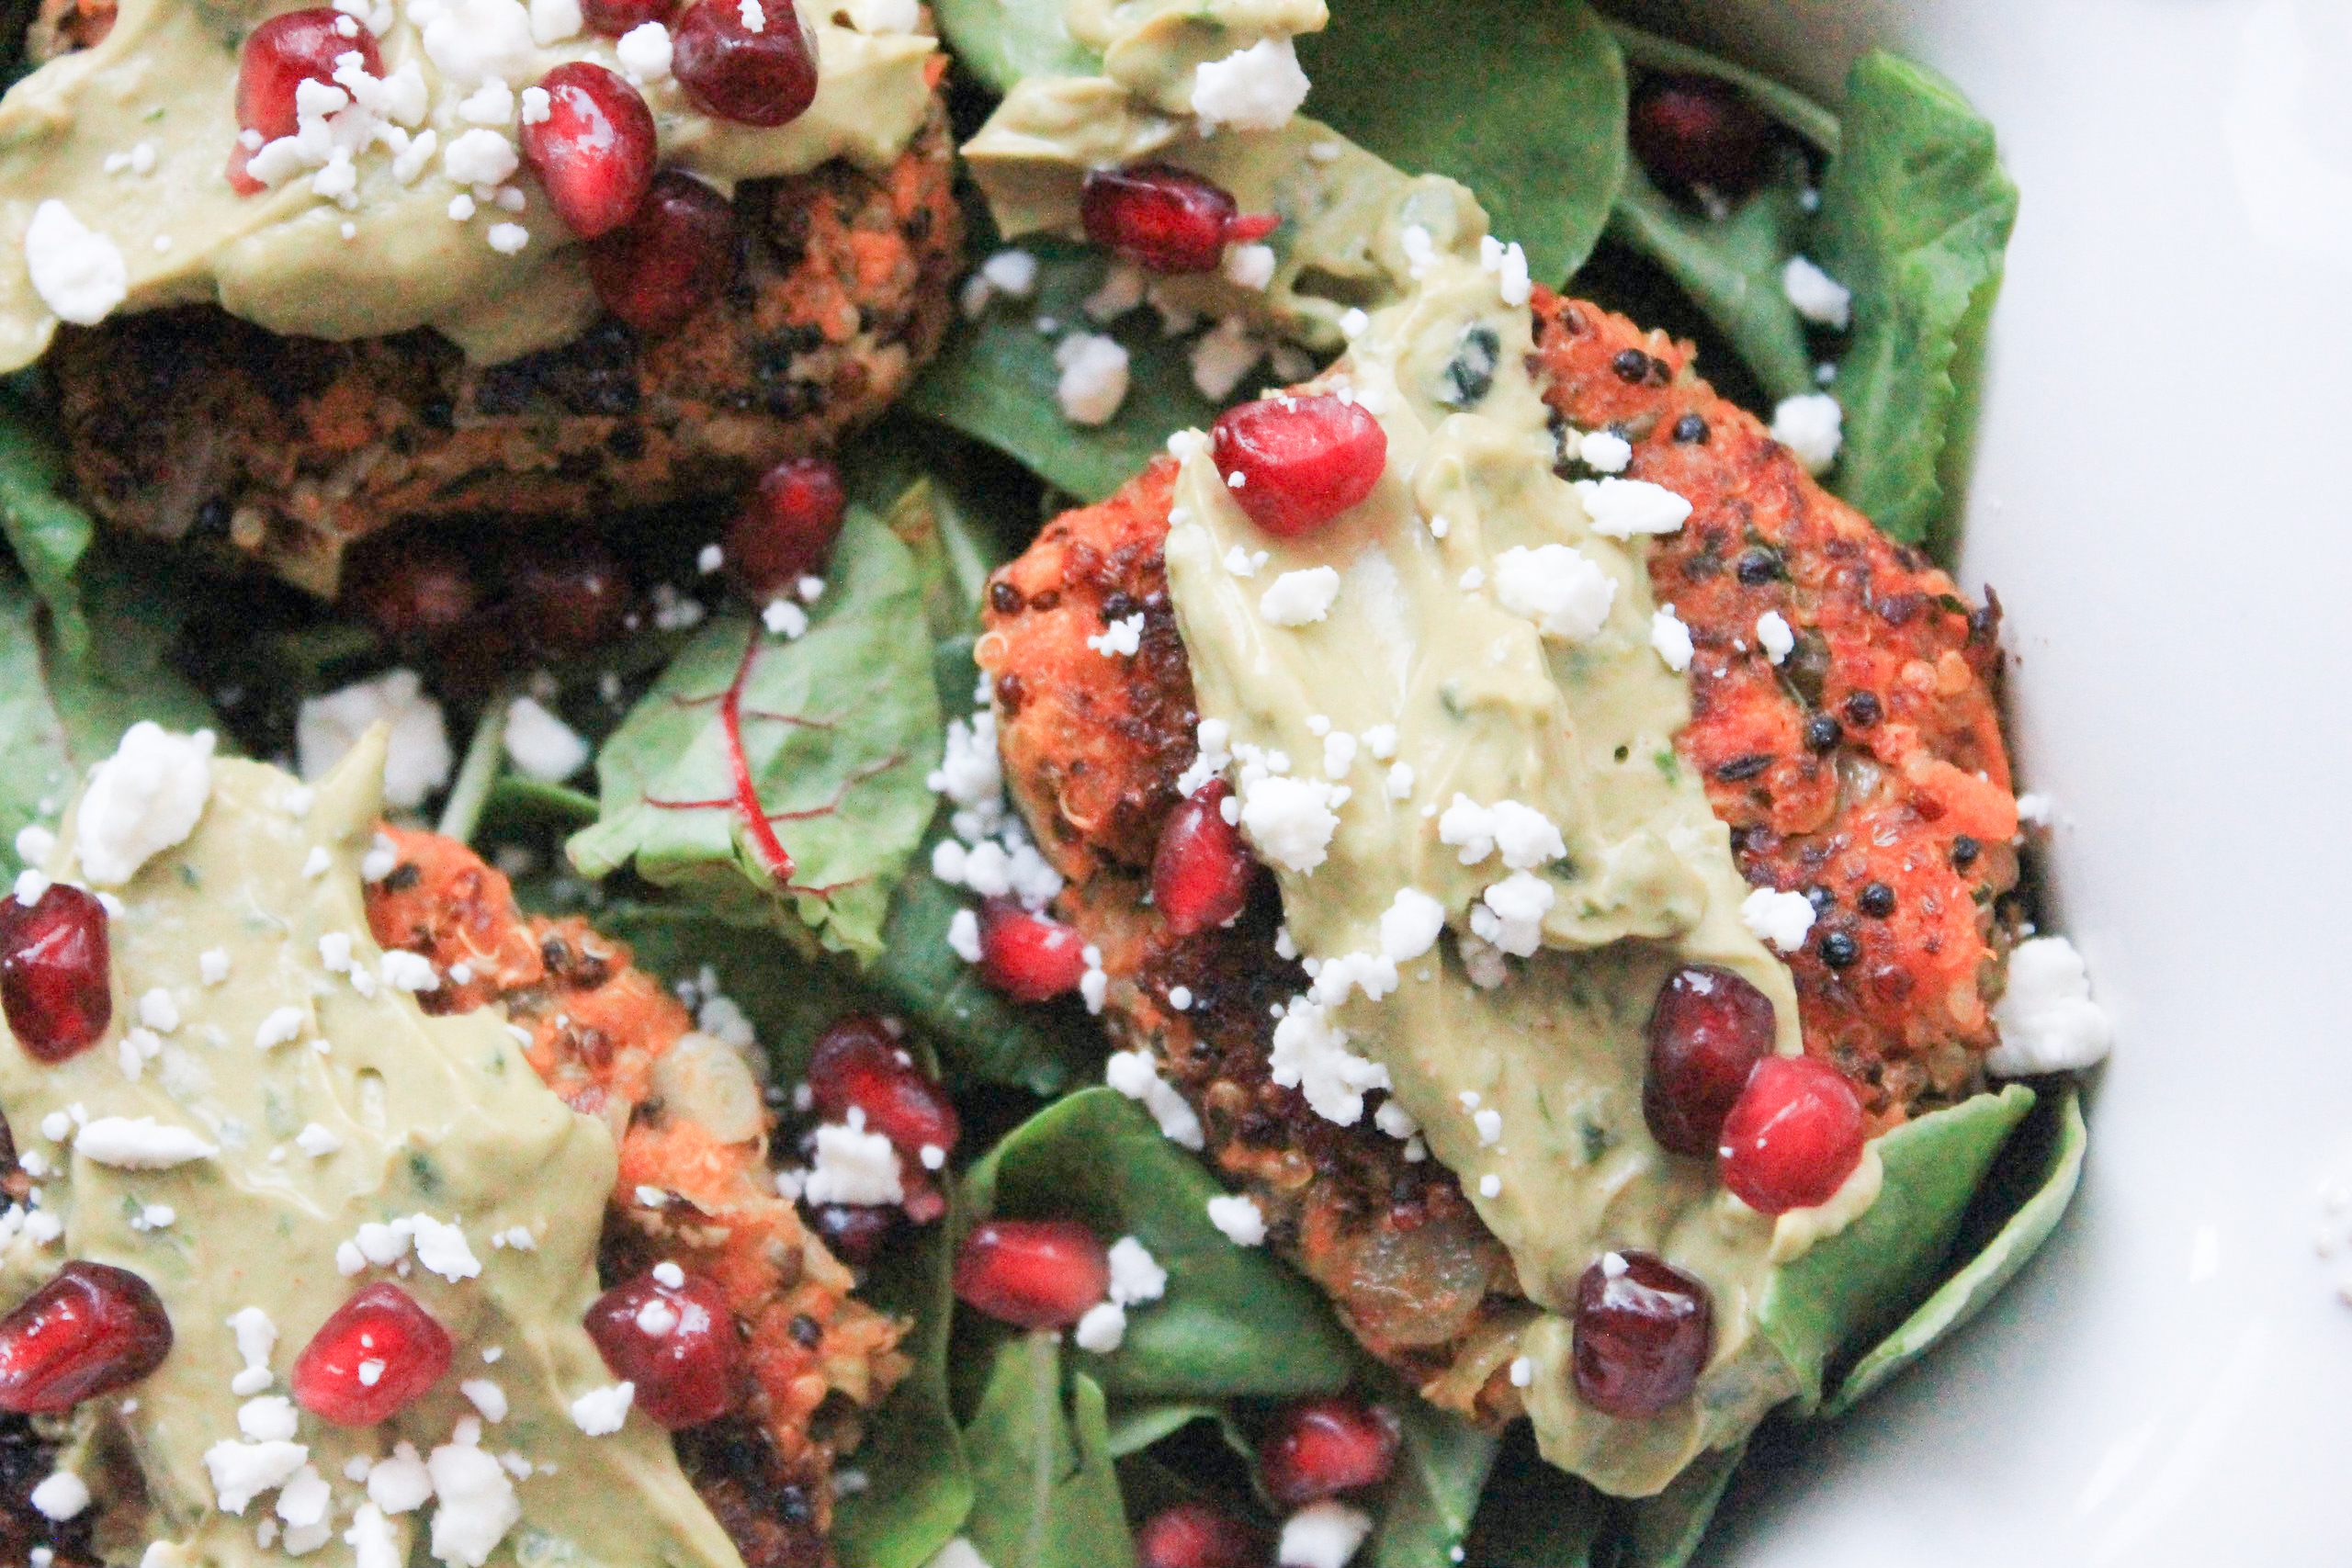
    Sweet Potato Quinoa Patties with Basil Avocado SpreadIf you don’t have dinner plans for tonight I’ve got you covered! My sweet potato quinoa patty recipe is always a big hit. I mean who doesn’t love good hearty veggie burger made with sweet potatoes and quinoa, smothered in a creamy basil avocado spread, topped with fresh pomegranate seeds and served over a fresh bed of lettuce? I know not everyone agrees with the fact that veggie burgers > hamburgers (just ask my husband). One thing you will agree with is how much you love these sweet potato quinoa patties! 

    This recipe makes quite a few patties and (depending on how hungry you are or how big your family is) you’re pretty much guaranteed to have leftovers! Okay….this post is officially making me hungry! 

    Sweet Potato Quinoa Patties

    In all seriousness, my favorite food combination right now is….wait for it…. sweet potatoes, avocados, and pomegranate seeds. I know… its kind of random and sounds totally gross, but trust me on this one. You will not regret making this dish or any others that have to do with sweet potatoes, avocado, and pomegranate seeds for that matter! I can’t wait to post all of my delicious creations for you to try! 

    Basil Avocado Spread

    When you look at the recipe for the first time, these might seem daunting to make. Truth be told, they’re actually pretty simple. Aside from containing yourself from eating them before they’re served, the most difficult task is cooking the quinoa, the sweet potatoes, and sauteeing the onions. 

    If you break this recipe into three parts you’ll see what I mean: 

    Step 1: Prepare ingredients for quinoa patties. Ingredients include cooked quinoa, cooked sweet potatoes, and sauteed onions.

    Sweet Potato Quinoa Patties ingredientsYou’ll need 2 cups of cooked quinoa. (That’s 1 cup of dry quinoa mixed with two cups of water). If you need to brush up on how to make quinoa check out my post on how to cook the perfect quinoa. When quinoa is cooked, scoop into a bowl and set aside.

    Cook your sweet potatoes by rinsing then with water, brushing them with EVOO, and piercing the with a fork. (Note: I cooked my sweet potatoes in the microwave to speed things up). Wrap each sweet potato in a paper towel. Heat potatoes in microwave on high for 5 minutes. Flip potatoes to other side and heat for 3 more minutes or until they’re soft to the touch. They should be very soft and very hot so be careful! 

    Sweet Potato Quinoa Patties (2 of 17)

    Scoop out sweet potato insides into the bowl with the quinoa. Lastly, you’ll need to saute your onion. Heat EVOO in a sauté pan and stir in some minced garlic. Add your diced onions, sprinkle with salt, pepper, and thyme and sauté until onions become translucent.  then place onions in bowl with quinoa and sweet potatoes.

    Lastly, you’ll need to saute your onion. Heat EVOO in a sauté pan and stir in some minced garlic. Add your diced onions, sprinkle with salt, pepper, and thyme and sauté until onions become translucent.  then place onions in bowl with quinoa and sweet potatoes.

    Add sauteed onions to the bowl with quinoa and sweet potatoes. Throw in some fresh basil, mix together and baby, you’re in business! 

    Sweet Potato Quinoa Patties

    Step 2: Shape and bake your quinoa patties. Use your hands to shape patty mixture into balls. Aim for a size slightly larger than golf ball size. IMPORTANT!!! Make sure they are very tightly packed so they don’t fall apart in the skillet! 

    Sweet Potato Quinoa Patties (5 of 17)

    Use coconut oil to cook your patties in a cast iron skillet. Make sure your skillet is nice and hot before you put your patties in. Place 3 – 4 patty balls in a skillet at one time and listen to them sizzle! Use a spatula to VERY VERY GENTLY press the top of each patty. Do NOT attempt to flatten the patties. If you press too hard the patties will fall into pieces and you will end up eating sweet potato quinoa scramble instead of these delicious sweet potato quinoa patties. This has happened to me and I can attest that the sweet potato quinoa stir-fry is also delicious. 🙂 You shouldn’t be afraid of messing these up because either way, the outcome will taste fantastic! 

    Cook patties for about 3 minutes on each side. Add another 1 – 2 tablespoons of coconut oil to cast iron skillet between batches for best results. 

    Sweet Potato Quinoa Patties (7 of 17)

    Step 3: Make the Basil Avocado Spread. Basil? Check! Avocado? Check! Greek Yogurt? Check! Now that the gang’s all here, throw them in the food processor. Sprinkle salt, pepper, and paprika over the contents and grind away! In about 30 – 45 seconds your delicious creamy basil avocado spread will be your for the tasting! (Add salt and pepper until your taste buds are satisfied!) 

    Basil Avocado Spread 2

    DINNER IS SERVED! 

    Arrange your sweet potato quinoa patties over a bed of leafy green lettuce (my favorite is the baby spinach and kale mix) drizzle with basil avocado spread, top with fresh pomegranate seeds and goat cheese then dig in! 

    Sweet Potato Quinoa Patties (17 of 17)

    Sweet Potato Quinoa Patties (6 of 17)

    Wondering how to use those leftovers? These sweet potato quinoa patties are delicious in a pita or severed in a whole wheat hamburger bun. Have an idea of your own? Leave a comment and let me know! I’d love to hear from you! 

    Sweet Potato Quinoa Patties with Basil Avocado Spread
    Yields 10
    Write a review
    Print
    Prep Time
    25 min
    Total Time
    35 min
    Prep Time
    25 min
    Total Time
    35 min
    Ingredients
    1. • 2 cups cooked quinoa
    2. • Insides of 2 cooked sweet potatoes
    3. • 1 medium yellow onion, diced
    4. • 3 garlic cloves, minced
    5. • 1 TBS fresh thyme, finely chopped
    6. • 1 TBS EVOO
    7. • Salt and pepper
    8. • Coconut oil for cooking patties
    9. • 1/4 cup + 1 cup fresh basil leaves, divided
    10. • 1 large avocado
    11. • 2 TBS Greek Yogurt
    12. • 1 TBS paprika
    13. • Leafy green lettuce (I prefer kale and spinach mixture)
    14. • Feta cheese
    15. • Pomegranate seeds
    Instructions
    1. • Prepare 2 cups of cooked quinoa (1 cup dry quinoa and 2 cups of water). Scoop cooked quinoa into a bowl and set aside.
    2. • Rinse sweet potatoes with water. Brush sweet potatoes with EVOO, pierce with a fork, and wrap each sweet potato in a paper towel. Heat in microwave on high for 5 minutes. Flip potatoes to other side and heat for 3 more minutes or until sweet potatoes are soft to the touch.
    3. • Cut sweet potatoes in half, scoop insides out and place in bowl with cooked quinoa.
    4. • Heat EVOO in a sauté pan. Stir in minced garlic cloves. When fragrant, stir in diced onions salt, pepper, and thyme. Sauté until onions become translucent then place onions in bowl with quinoa and sweet potatoes.
    5. • While contents in bowl cool, finely chop 1/4 cup basil leaves and stir in to mixture. Use hands to completely combine all ingredients.
    6. • When combined, pack mixture together in balls (slightly larger than golf ball size). Make sure ingredients are well packed. This will help ensure your patties stay in one piece.
    7. • Heat 1-2 TBS of coconut oil in a cast iron skillet over medium-high heat.
    8. • Place 3 – 4 sweet potato quinoa balls in skillet. Using a spatula, very gently press down on the top of each ball to flatten. (NOTE: Do not attempt to completely flatten the patty).
    9. • Cook patties for about 3 minutes on each side until a crispy brown crust begins to form and set aside. (Add 1-2 TBS coconut oil to cast iron skillet each time you start a new “batch” of patties.)
    10. • While patties cool, prepare Basil Avocado spread by peeling and placing 1 ripe avocado, 1 cup of fresh basil leaves, and 2 TBS of Greek yogurt in a food processor. Add 1 TBS paprika and salt and pepper to taste. Combine until reaching desired consistency.
    11. • Serve patties over a bed of leafy green lettuce. Place a dollop of basil avocado spread on each patty. Top with pomegranate seeds and feta, serve and enjoy!
    Notes
    1. Make sure to pack patties very tightly before cooking.
    2. Add an additional 1 -2 TBS of coconut oil to cast iron skillet after each round of patties. Let coconut oil heat up before placing patties in cast iron skillet. For best results cook 3 – 4 patties at same time. Depending on size of balls, patties might take longer to cook. Do not cook patties for more than 6 minutes on each side.
    3. Store leftover patties and basil avocado spread in separate airtight containers. Contents should keep for up to 5 days. Stir basil avocado spread before re-serving to bring back color.
    God Save the Quinoa https://www.godsavethequinoa.com/
    Fabulous recipes by Mandi at godsavethequinoa.com

  • Spicy Roasted Chickpeas

    Spicy Roasted Chickpeas

    Spicy Roasted Chickpeas

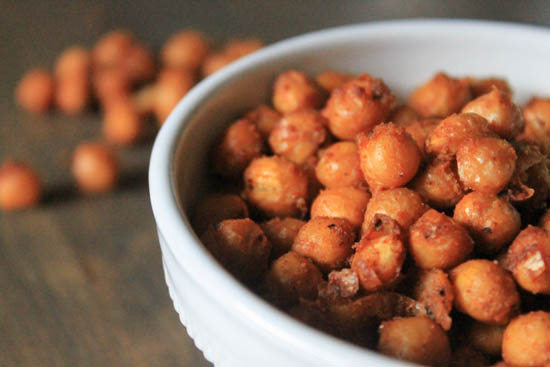
    These no-effort, spicy roasted chickpeas are one snack you will never feel guilty about munching on! This spicy roasted chickpea recipe has quickly become one of my new go-to’s. I can’t remember the last grocery list I made that didn’t have at least two cans of  “chickpeas” on it. One of the reasons I love them so much is because they go with just about anything! Seriously, you can enjoy these delicious little nuggets a la carte, on top of a salad, over soups, in pastas, combined with trail mix… the options are truly limitless!  

    Spicy Roasted Chickpeas

    Start by lining a cookie sheet with foil and turning your oven on broil. Next, open your canned chickpeas and drain. Try and get all of the liquid out- the drier your chickpeas are, the better! Pat them dry with a paper towel or dish cloth if needed and place in a large bowl. Personally, I like to use a bowl with a lid that seals so I can shake everything together. I have some really awesome kitchenaid prep bowls that are PERFECT for this recipe! If you don’t have a bowl with a lid, don’t worry! You can always rely on a trusty tupperware container! Just make sure there’s enough room for everything to shake around! 
    Pour one tablespoon of olive oil over your chickpeas followed by lemon juice and laundry list of spices: cumin, smoked paprika, chili powder OR use chipotle peppers for some extra heat, garlic powder, lemon pepper, and cardamom. Put the lid on your bowl and shake away! You’ll want to shake until chickpeas are completely coated in olive oil, lemon juice, and spices. (Bet you didn’t think you’d get a workout in when making these!) 

    Spicy Roasted Chickpeas

    Once chickpeas are completely coated, transfer all of the contents in your bowl onto a baking sheet. You’ll probably need to use a spatula to scrape the excess spices and oil off the sides of your bowl and onto your chickpeas. Once your bowl has been emptied use your spatula to evenly spread your chickpeas. You do not want them to overlap each other! 

    Sprinkle chickpeas with a dash or two (or three if you’re feeling super spicy) and place in the oven. Let your new favorite snack broil for 10 minutes. I recommend you place your cookie sheet in the center of the middle rack for best results! 

    Spicy Roasted Chickpeas

    After 10 minutes open your oven to remove your cookie sheet and toss your chickpeas. I usually flip and rotate them around, mainly to prevent them from sticking to the foil and having one side be more crispy than the other. Once you’ve successfully tossed the chickpeas, put them back in the oven. I know… it’s a lot to ask, but you’ll have to wait for 5 more minutes until these bad boys are binge worthy!

    Once the timer goes off remove them from the oven and prepare your taste buds for your new favorite snack! Make sure you let them cool so you don’t burn yourself! 

    I hope you enjoy these as much as I do! 🙂 

    Spicy Roasted Chickpeas
    Serves 2
    These no-effort, spicy roasted chickpeas are one snack you will never feel guilty about munching on! Simply toss in olive oil, lemon juice, and assortment of spices, pop in the oven and enjoy!
    Write a review
    Print
    Prep Time
    3 min
    Cook Time
    15 min
    Prep Time
    3 min
    Cook Time
    15 min
    Ingredients
    1. • 1 (15 oz) can of Chickpeas, drained
    2. • 1 TBS EVOO
    3. • 1 TBS lemon juice
    4. • 1 TBS Smoked Paprika
    5. • 2 TBS Chili Powder OR if you want your chickpeas to be REALLY spicy use 1 TBS of Chipotle Peppers
    6. • 2 TBS Cumin
    7. • 1 TBS Garlic Powder
    8. • 1 TBS Lemon Pepper
    9. • 1 tsp Cardamom
    10. • Dash of Cayenne for extra spice
    Instructions
    1. • Line a small cookie sheet with foil and place oven on broil
    2. • Drain chickpeas and place in a bowl or bag
    3. • Add Olive Oil, Lemon Juice, and all Spices to your drained chickpeas and mix well so that chickpeas are fully coated.
    4. • Use a spatula to spread spiced chickpeas across foil lined baking sheet (scrape sides of bowl to transfer excess spices as needed).
    5. • Sprinkle cayenne on top of chickpeas for some added spice and place baking sheet on the middle rack of oven. Broil for 10 minutes.
    6. • After 10 minutes, use your spatula to toss and rotate chickpeas and let broil for 5 more minutes
    7. • When chickpeas are crispy, remove from oven to let cool and enjoy!
    Notes
    1. Enjoy these spicy roasted chickpeas as a snack or mixed in with your favorite salad!
    2. Store in an airtight container for up to 5 days
    God Save the Quinoa https://www.godsavethequinoa.com/
     Fabulous recipes by Mandi at godsavethequinoa.com

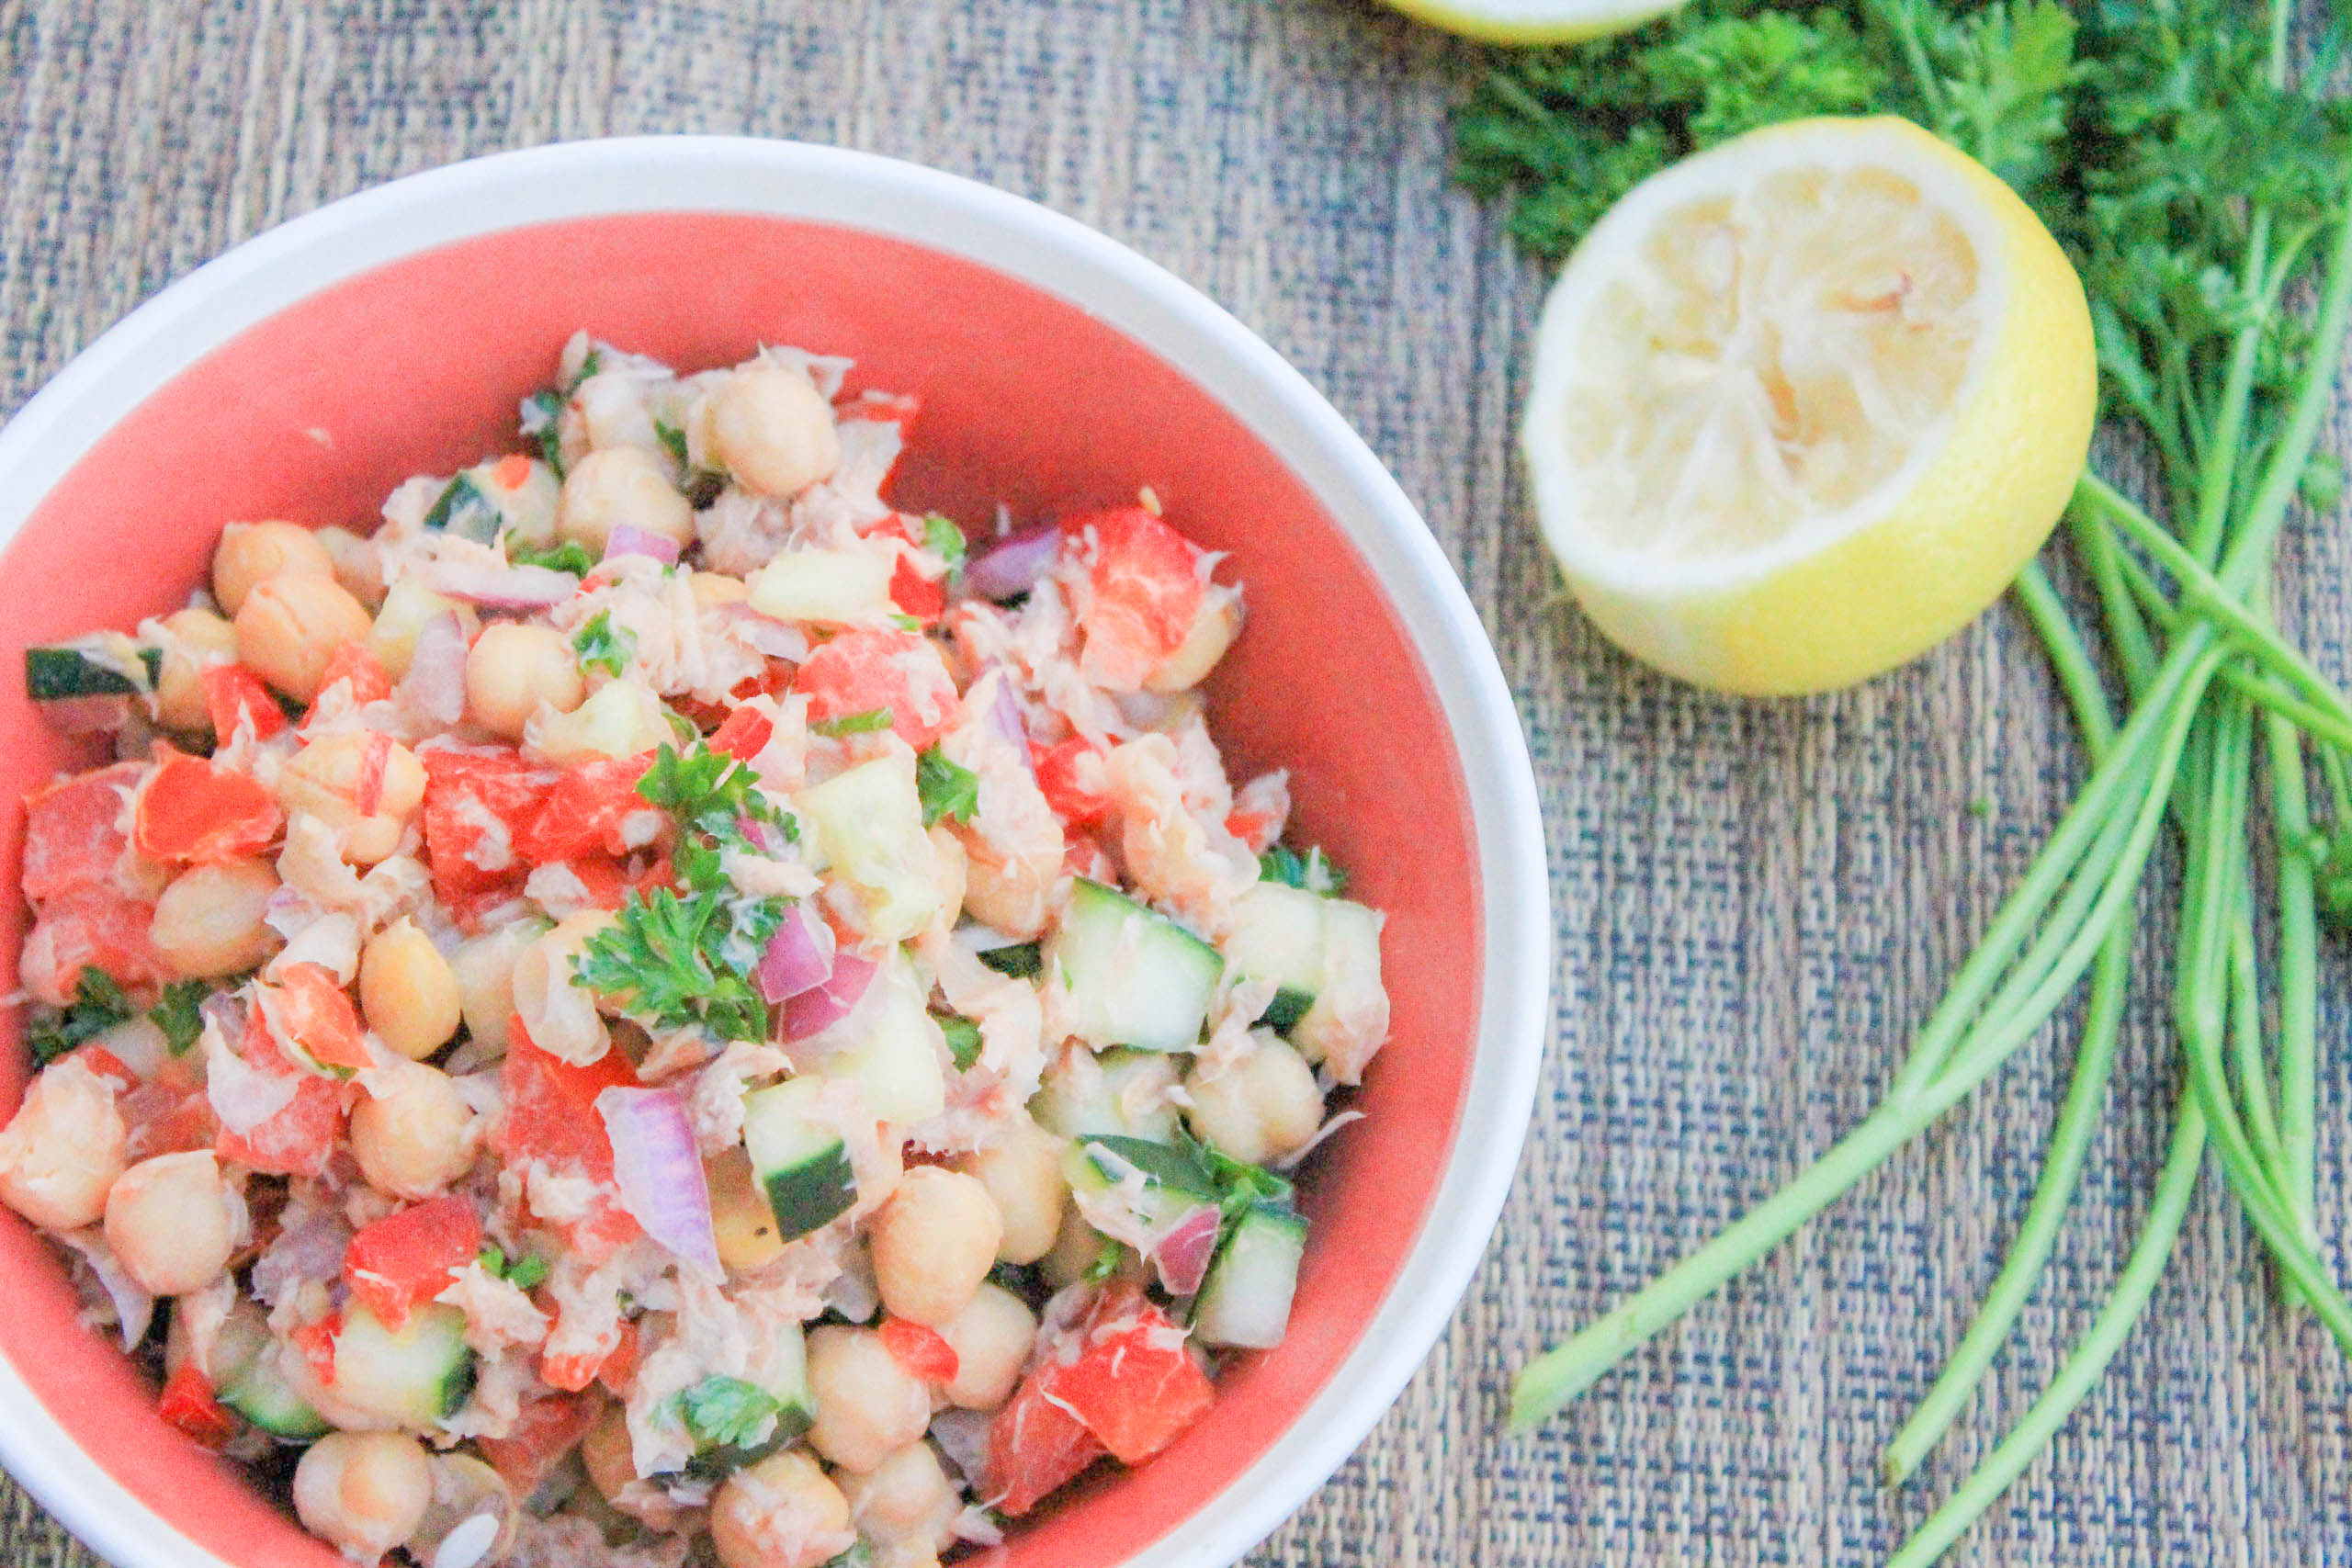
  • Chickpea, lemon, and tuna salad

    Chickpea, lemon, and tuna salad

    Lemon, chickpea, and tuna salad (14 of 16) copy

    Lately I’ve been using chickpeas non-stop in my recipes. They’re so versatile and easy to cook with, not to mention they have great health benefits! They’re an excellent source of fiber, full of iron, and believe it or not, actually have a lot of protein! With all these pro’s, I couldn’t resist adding them to this tuna salad recipe!

    Lemon, chickpea, and tuna salad (1 of 16)

    One thing I love about this tuna salad recipe is it requires NO cooking, making it the perfect recipe for one of those “I’m too lazy to cook” nights. All you have to do is chop the ingredients and mix them together.

    Chop and dice fresh cucumbers, onions, tomatoes, bell peppers, and parsley, then zest and juice your lemons.  


    In a large bowl combine your veggies and add in your chickpeas, lemon zest, fresh lemon juice and mix.

    Lemon, chickpea, and tuna salad (6 of 16)


    Lemon, chickpea, and tuna salad (9 of 16)

    Fold in your tuna and a dash of EVOO, followed by salt, pepper, and spicy dijon mustard to taste. Fold and mix all ingredients together until everything is completely combined. Scoop into a bowl or onto pita bread and enjoy! 

    Lemon, chickpea, and tuna salad (10 of 16)

    Lemon, chickpea, and tuna salad (11 of 16) Lemon, chickpea, and tuna salad (12 of 16) Lemon, chickpea, and tuna salad (13 of 16) Lemon, chickpea, and tuna salad (14 of 16) Lemon, chickpea, and tuna salad (15 of 16) Lemon, chickpea, and tuna salad (16 of 16)

    Chickpea, lemon, and tuna salad
    Serves 5
    A fresh medley of chickpeas, tomatoes, onions, cucumbers, and bell peppers, mixed with lemon juice and tuna. Mixed with spicy mustard instead of mayo, this tuna salad is a light and refreshing dish for you to enjoy anytime of the day!
    Write a review
    Print
    Prep Time
    15 min
    Prep Time
    15 min
    Ingredients
    1. • 1 (15.5 oz.) can of chickpeas, drained
    2. • 3 Roma tomatoes, chopped
    3. • 1/2 red onion, diced
    4. • 1 handful of chopped parsley
    5. • 1 red bell pepper, diced
    6. • 1 cucumber, diced
    7. • 1/2 tsp lemon zest
    8. • 3 Tbs lemon juice
    9. • 1 tsp extra virgin olive oil (EVOO)
    10. • Salt and pepper to taste
    11. • 1 (12 oz.) can chunk light tuna in water
    12. • 3 Tbs Dijon mustard
    Instructions
    1. • Combine all ingredients together in a bowl and fold tuna in last
    2. • Top with dijon mustard and mix until all ingredients are completely combined
    3. • Sever over a bed of lettuce, pita bread, crackers, or eat with fork and enjoy!
    Notes
    1. Store in airtight container in refridgerator for 4 – 5 days.
    God Save the Quinoa https://www.godsavethequinoa.com/
     Fabulous recipes by Mandi at godsavethequinoa.com


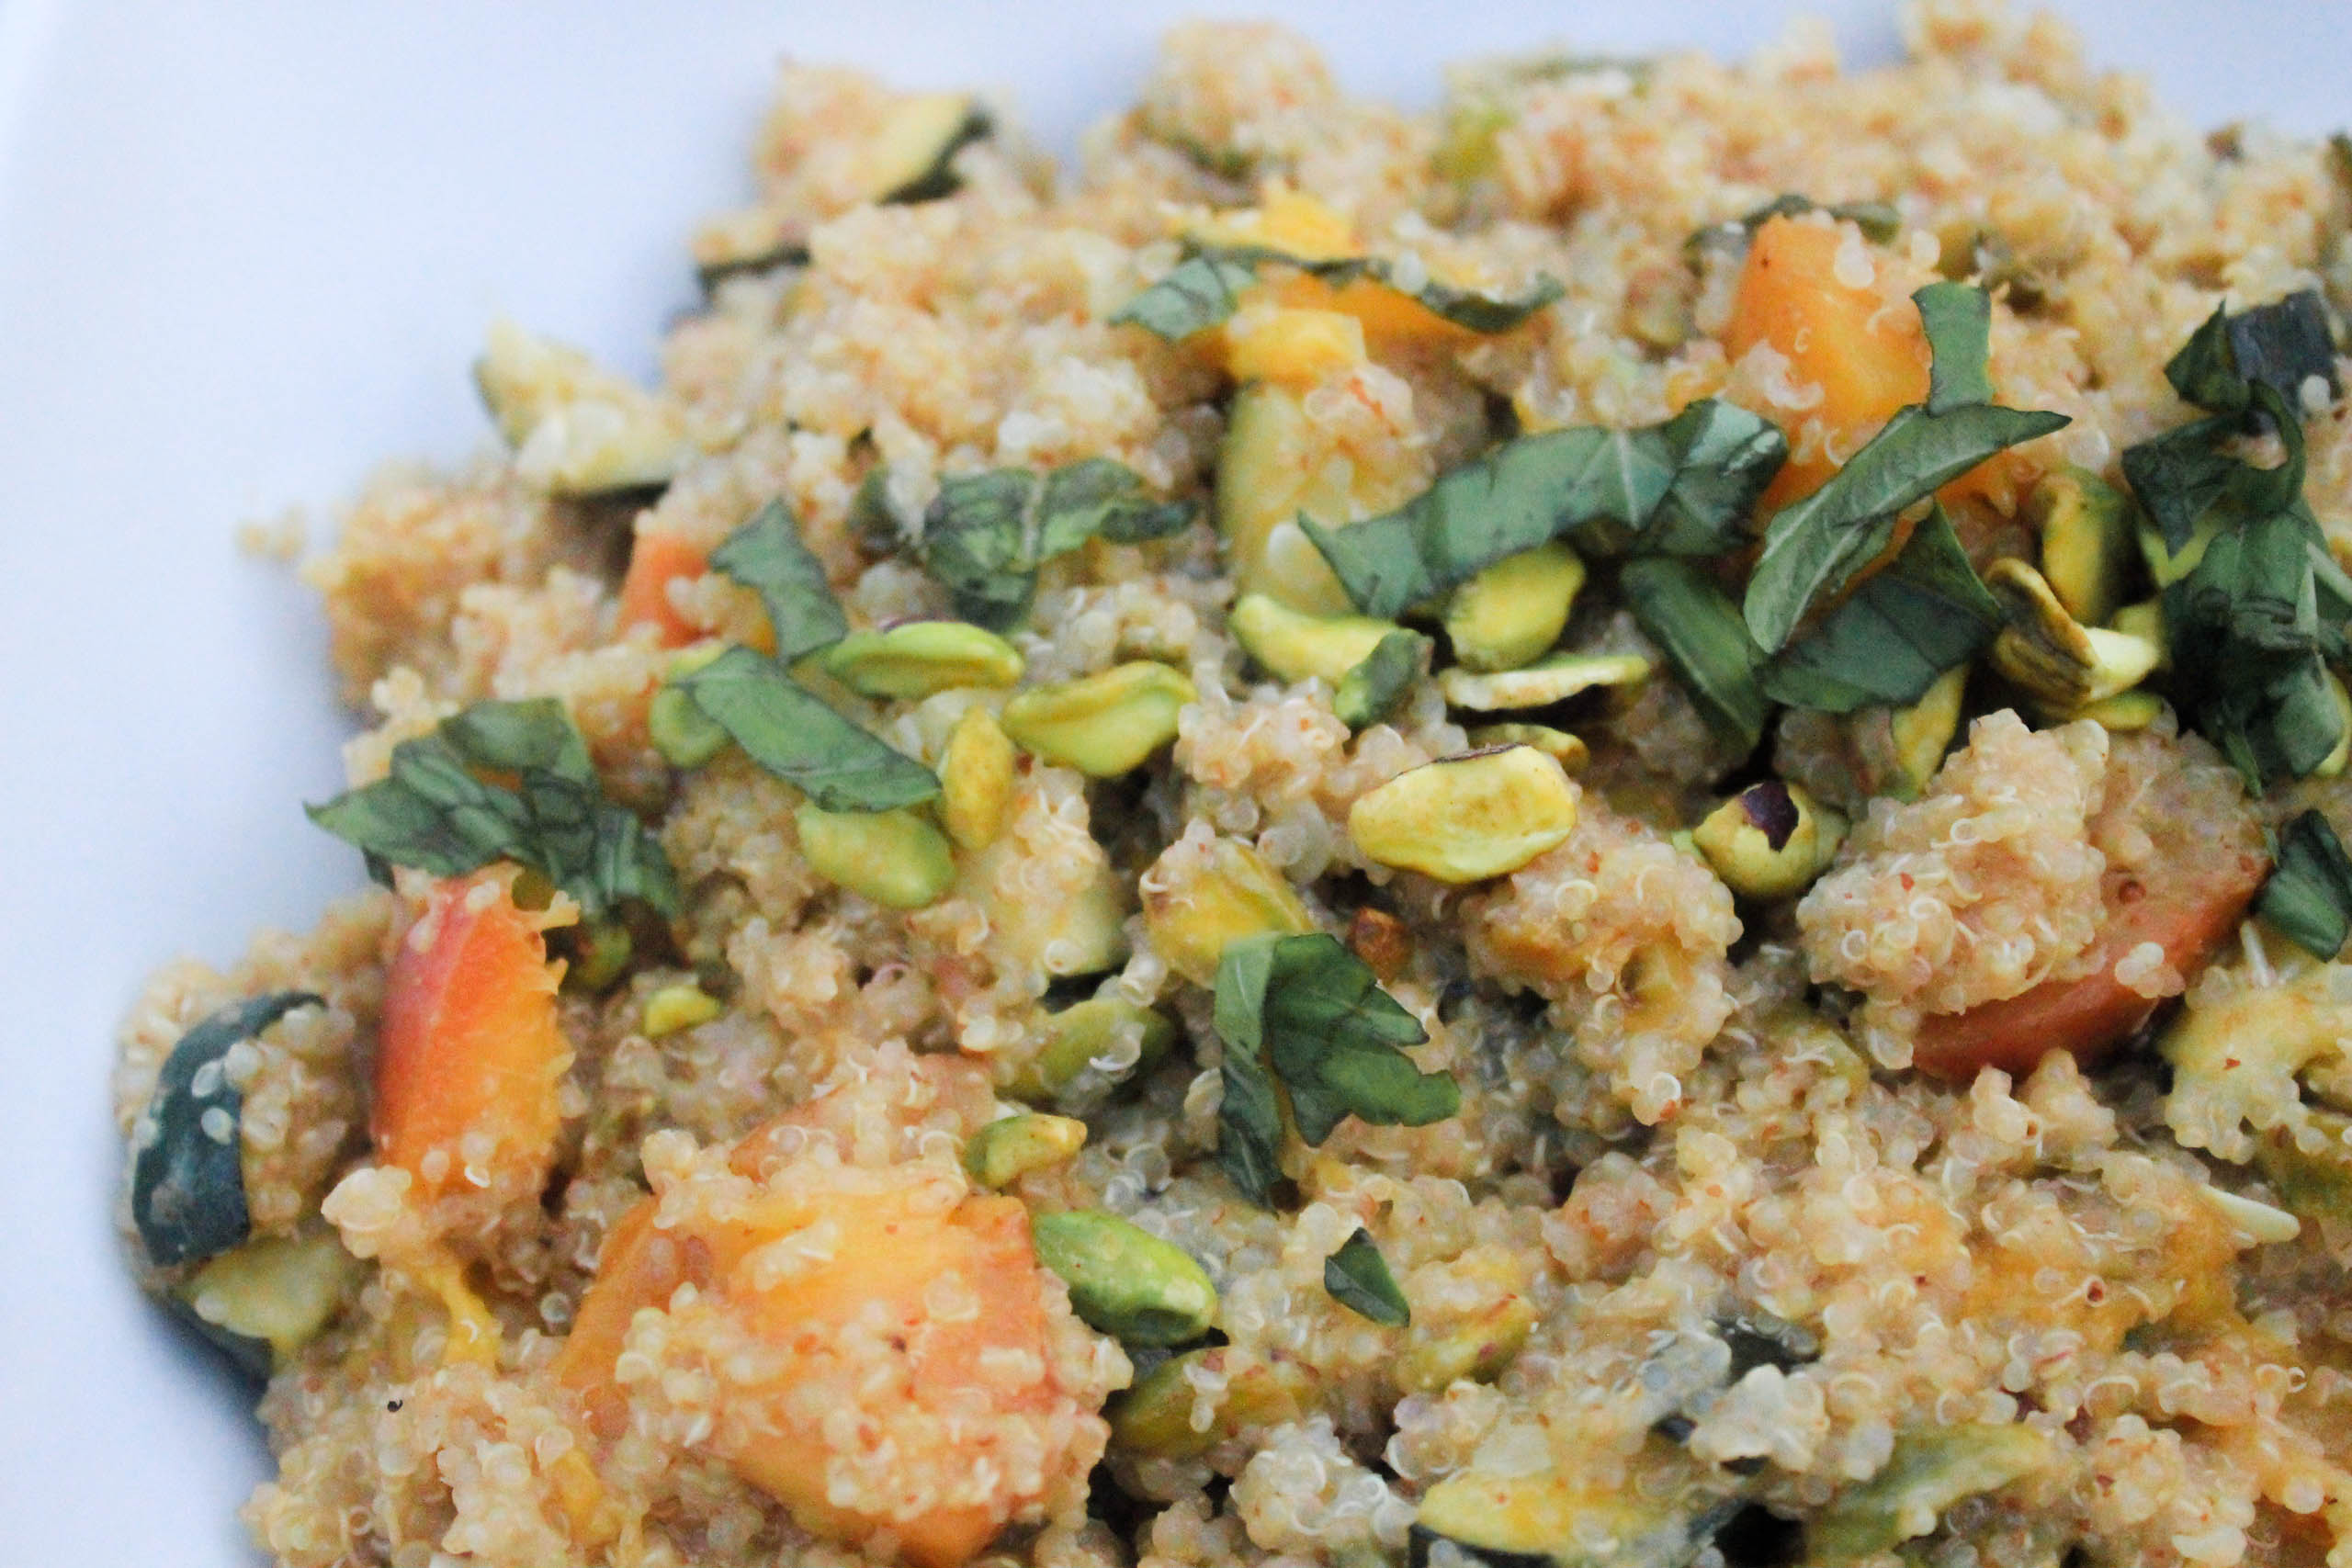
  • Grilled nectarine & pistachio quinoa salad

    Grilled nectarine & pistachio quinoa salad

    Grilled nectarine & pistachio quinoa salad (3 of 7)

    Greetings! I hope summer is treating everyone well, I’m sorry I haven’t posted in a while…I’ve been SO busy lately! But get excited because I have tons of recipes to be posted, so stay tuned! 

    Anyways, let me introduce you to one of my favorite summer recipes: Grilled nectarine and pistachio quinoa salad. This dish combines the soft, sweet flavors of grilled nectarines with the crunchy, salty flavors of raw pistachios. (I’m getting hungry just thinking about this!) Mix that together with warm quinoa and fresh veggies drizzled in a lemon-dijon basil dressing, and you’ve got yourself the ultimate summer evening dish! 

    With 8 main ingredients, this dish is SUPER easy to make and can be cooked in about 30 minutes. All you have to do is cook the quinoa, sauté the nectarines followed by the zucchini, and make your dressing. See, its literally as easy as 1, 2, 3! 

    Ingredients with words

     Step 1: Start by cooking the quinoa in half water half veggie broth. Need some quinoa cooking tips? Look here! 

    Step 2: While quinoa is cooking cut the nectarines (the same way as you would an apple slice), quarter the zucchini, and slice the basil. Brush the nectarines with olive oil and arrange them on a grill pan to caramelize. You want grill marks to show up on the sides of the fruit, so  cook each side for about 2 minutes. When nectarines are done cooking, set them aside, add a little extra olive oil to the pan and sauté the zucchini until pieces become soft and translucent. This should take about 5-7 minutes. When this is done, remove zucchini pieces from heat and set aside. 

    Don’t forget to check on the profess of step 1! By now your quinoa should be done cooking (or close to it). When the quinoa is al dente, fluff with a form, remove from heat, set aside and cover with a lid. 

    Grilled nectarine & pistachio quinoa salad (4 of 7)

    Step 3: Last but not least, you will make the dressing. To do this, start by combining the dijon and lemon juice in a small bowl and stir with a fork or whisk both ingredients are combined. Very, very slowly (while constantly stirring dijon lemon mixture) pour olive oil into bowl in a smooth, steady stream. DO NOT FORGET TO STIR DIJON LEMON MIXTURE WHILE POURING OLIVE OIL INTO BOWL. I cannot tell you how important this is!! Stirring the ingredients already in the bowl while simultaneously pouring in the olive oil will allow ingredients to emulsify. Emulsify is a fancy word used to describe two ingredients that aren’t meant to blend together but will become “one” under the right conditions… sounds like a love story, right? 

    Anyways, if you start to notice that the olive oil isn’t playing nice with the dijon lemon mixture, stop pouring the olive oil and in the words of the late MJ “just beat it”. All jokes aside, stir your little heart out until ingredients start to combine. When they finally start to blend, continue stirring while you (more slowly this time) pour the rest olive oil into the bowl, pausing to stir ingredients as needed. When finished, add in basil and salt and pepper to taste.  

    Grilled nectarine & pistachio quinoa salad (6 of 7)

    You’re almost done! In a large bowl simply combine the cooked quinoa, grilled nectarines, and sautéed zucchini. Next, fold in the dressing so it is evenly dispersed throughout the quinoa. Top with chopped pistachios and left over basil and ENJOY! 

    Grilled nectarine & pistachio quinoa salad (2 of 7)

    Grilled nectarine & pistachio quinoa salad
    Yields 6
    A crowd pleasing dish that combines the refreshing flavors of sweet nectarines, salty pistachios, with aromas from spicy Dijon mustard and fresh basil. This delectable summer salad can be served as an appetizer, side dish, or can be included as part of your main course.
    Write a review
    Print
    Prep Time
    10 min
    Cook Time
    30 min
    Total Time
    40 min
    Prep Time
    10 min
    Cook Time
    30 min
    Total Time
    40 min
    Ingredients
    1. • 1.5 cups uncooked white quinoa
    2. • 1 cup veggie broth
    3. • 1 cup water
    4. • 1 zucchini, quartered
    5. • 3 nectarines, quartered
    6. • Juice of 2 lemons
    7. • 2 Tbs spicy Dijon mustard
    8. • 2 Tbs EVOO (extra virgin olive oil)
    9. • 1/4 cup fresh basil, sliced
    10. • 3/4 cup raw, unsalted pistachios
    11. • Salt & pepper
    Instructions
    1. • Cook quinoa by placing dry quinoa, water, and veggie broth in a pot and bring to a boil. Reduce to low heat and cover with lid and simmer (about 15 minutes) until quinoa is cooked and most of the liquid has been absorbed. When finished, remove from heat, fluff with a fork, cover with lid and set aside.
    2. • While quinoa is cooking, cut nectarines into quarters (apple slices). Brush olive oil in a grill pan, place on high heat, and arrange nectarine pieces face side down. Let nectarines sit for 2 minutes to caramelize and develop grill marks. After 2 minutes, or when finished, flip nectarines to cook other side. Let sit for about 2 minutes. When finished, remove from heat and set aside. Dice nectarine pieces when cool.
    3. • Quarter the zucchini and place in the same pan used for the nectarines, adding more olive oil if needed. Sauté zucchini pieces until they become soft and translucent (about 5-7 minutes). When finished remove from heat and set aside.
    4. • To make dressing, combine mustard and lemon juice in a medium bowl. Whisk with a small whisk or a fork until completely blended. Continue to whisk the mixture and slowly begin to drizzle olive oil into bowl. Be sure to pour olive oil in a very small, steady stream to create an emulsion. You must continue to whisk the mixture in order for the ingredients to emulsify. If olive oil is not combining, stop pouring olive oil and whisk ingredients until combined then resume pouring. When finished, add basil slivers and salt and pepper to taste.
    5. • In a large bowl, combine cooked quinoa, grilled nectarines, sautéed zucchini, and pistachios. Mix well. When finished, pour dressing over mixture and combine until evenly dispersed. Garnish with left over basil and pistachios and enjoy!
    Notes
    1. Serve at room temperature.
    2. Store in an airtight container for up to 5 days.
    God Save the Quinoa https://www.godsavethequinoa.com/
    I hope you enjoy this dish as much as I do! Comment below and let me know what you think! I’d love to hear from you! 

    Fabulous recipes by Mandi at godsavethequinoa.com

  • Grilled Salmon Kebabs

    Grilled Salmon Kebabs

    Lemon Salmon Kebabs (6 of 6)

    Are you tired of cooking salmon in the oven, using the same spices, in the same dish, over and over again? I was. So, to spice things up I decided to take a stab at making some salmon skewers on the grill. (No pun intended). Believe it or not, they’re super easy to make and only require a few ingredients (salmon, lemons, some spices, and olive oil spray) and a couple of pieces of hardware (bamboo skewers and a grill).

    I tested this recipe out on my parents and I think they thought the idea of salmon kebabs sounded strange because when I first told them what I was planning on cooking they told me they “didn’t like salmon”. Now, now, Mom and Dad, if you’re reading this, I’ve been your child for over 24 years and know all of your tricks (because I often use them myself). There’s no fooling me! But to ease the tension I grabbed some shrimp to make shrimp skewers for those who wanted to be difficult… I won’t mention any names. Anyways, the point of this story is that once the salmon kebabs were cooked and placed on the table the reluctant and curious words from my parents of “I’ll just try a bite” quickly turned into “Are there anymore salmon skewers?” and “Can you make some more?”. Now those are pretty bold words from someone who “doesn’t like salmon”. This recipe was a hit and apparently turned salmon haters into salmon lovers. I hope it will do the same for you!  

    Lemon Salmon Kebabs__3 (1 of 1)

    What kind of salmon do I need? Go to the fish counter at your local grocery store (I went to Central Market) and look for skinless salmon filets. You will need about one pound of salmon to make 8 kebabs. There will probably be a plethera of choices to choose from and all of them will most likely still have the skin on them. Talk to the fishmonger behind the counter (the fishmonger is the “butcher” of the fish counter) and tell him or her that you’re planning on making salmon kebabs and that you need the skin removed and the filets cut into equal sized 1 – 1.5 inch cubes. The fishmonger should be able to do this for you at no extra charge. I LOVE asking the fishmonger to do this (and peel and de-vein my shrimp). If you don’t do so already, take advantage of these services. It’ll save you a ton of prep time when you get home! As for what type of salmon to use, its up to you. I recommend using fresh salmon from behind the fish counter, not the kind that comes frozen in a bag like a bunch of chicken breasts. But like I said, the choice is yours!  

    What else do I need to know? When you’re at the store, buy the biggest lemons you can find. If I remember correctly, I found some HUGE ones at Central Market that were from Mexico. You will need to slice the lemons very, very thinly and fold each slice in half to put on the bamboo skewers. This is much easier to do with big lemons. Trust me! 

    You will need to use TWO bamboo skewers for each kebab. So, make sure you have enough! Also, do NOT forget to soak your bamboo skewers in water for at least 15 minutes before assembling kebabs and placing them on the grill. This will prevent your skewers from catching on fire once they’re on the grill. Make sure your skewers are fully submerged in water. From my experiences, you can’t soak your skewers for too long. To make sure I don’t forget to do this, I’ll throw my skewers in a bowl of water before I leave to go get ingredients or will start soaking them as soon as I get back from the grocery store just to make sure they have plenty of time to marinate before I start cooking. 

    Lemon Salmon Kebabs (1 of 6)

    Where do I start? Before you do anything, soak your bamboo skewers in water. Next, skin and cube your salmon filets (if your fishmonger has not done so already). Using a mandolin or a very sharp knife, cut your lemons into very thin slices. Keep in mind that these lemon slices will be folded in half when you’re assembling the kebabs. If they’re too thick they might break in half and fall off when you put them on the grill. 

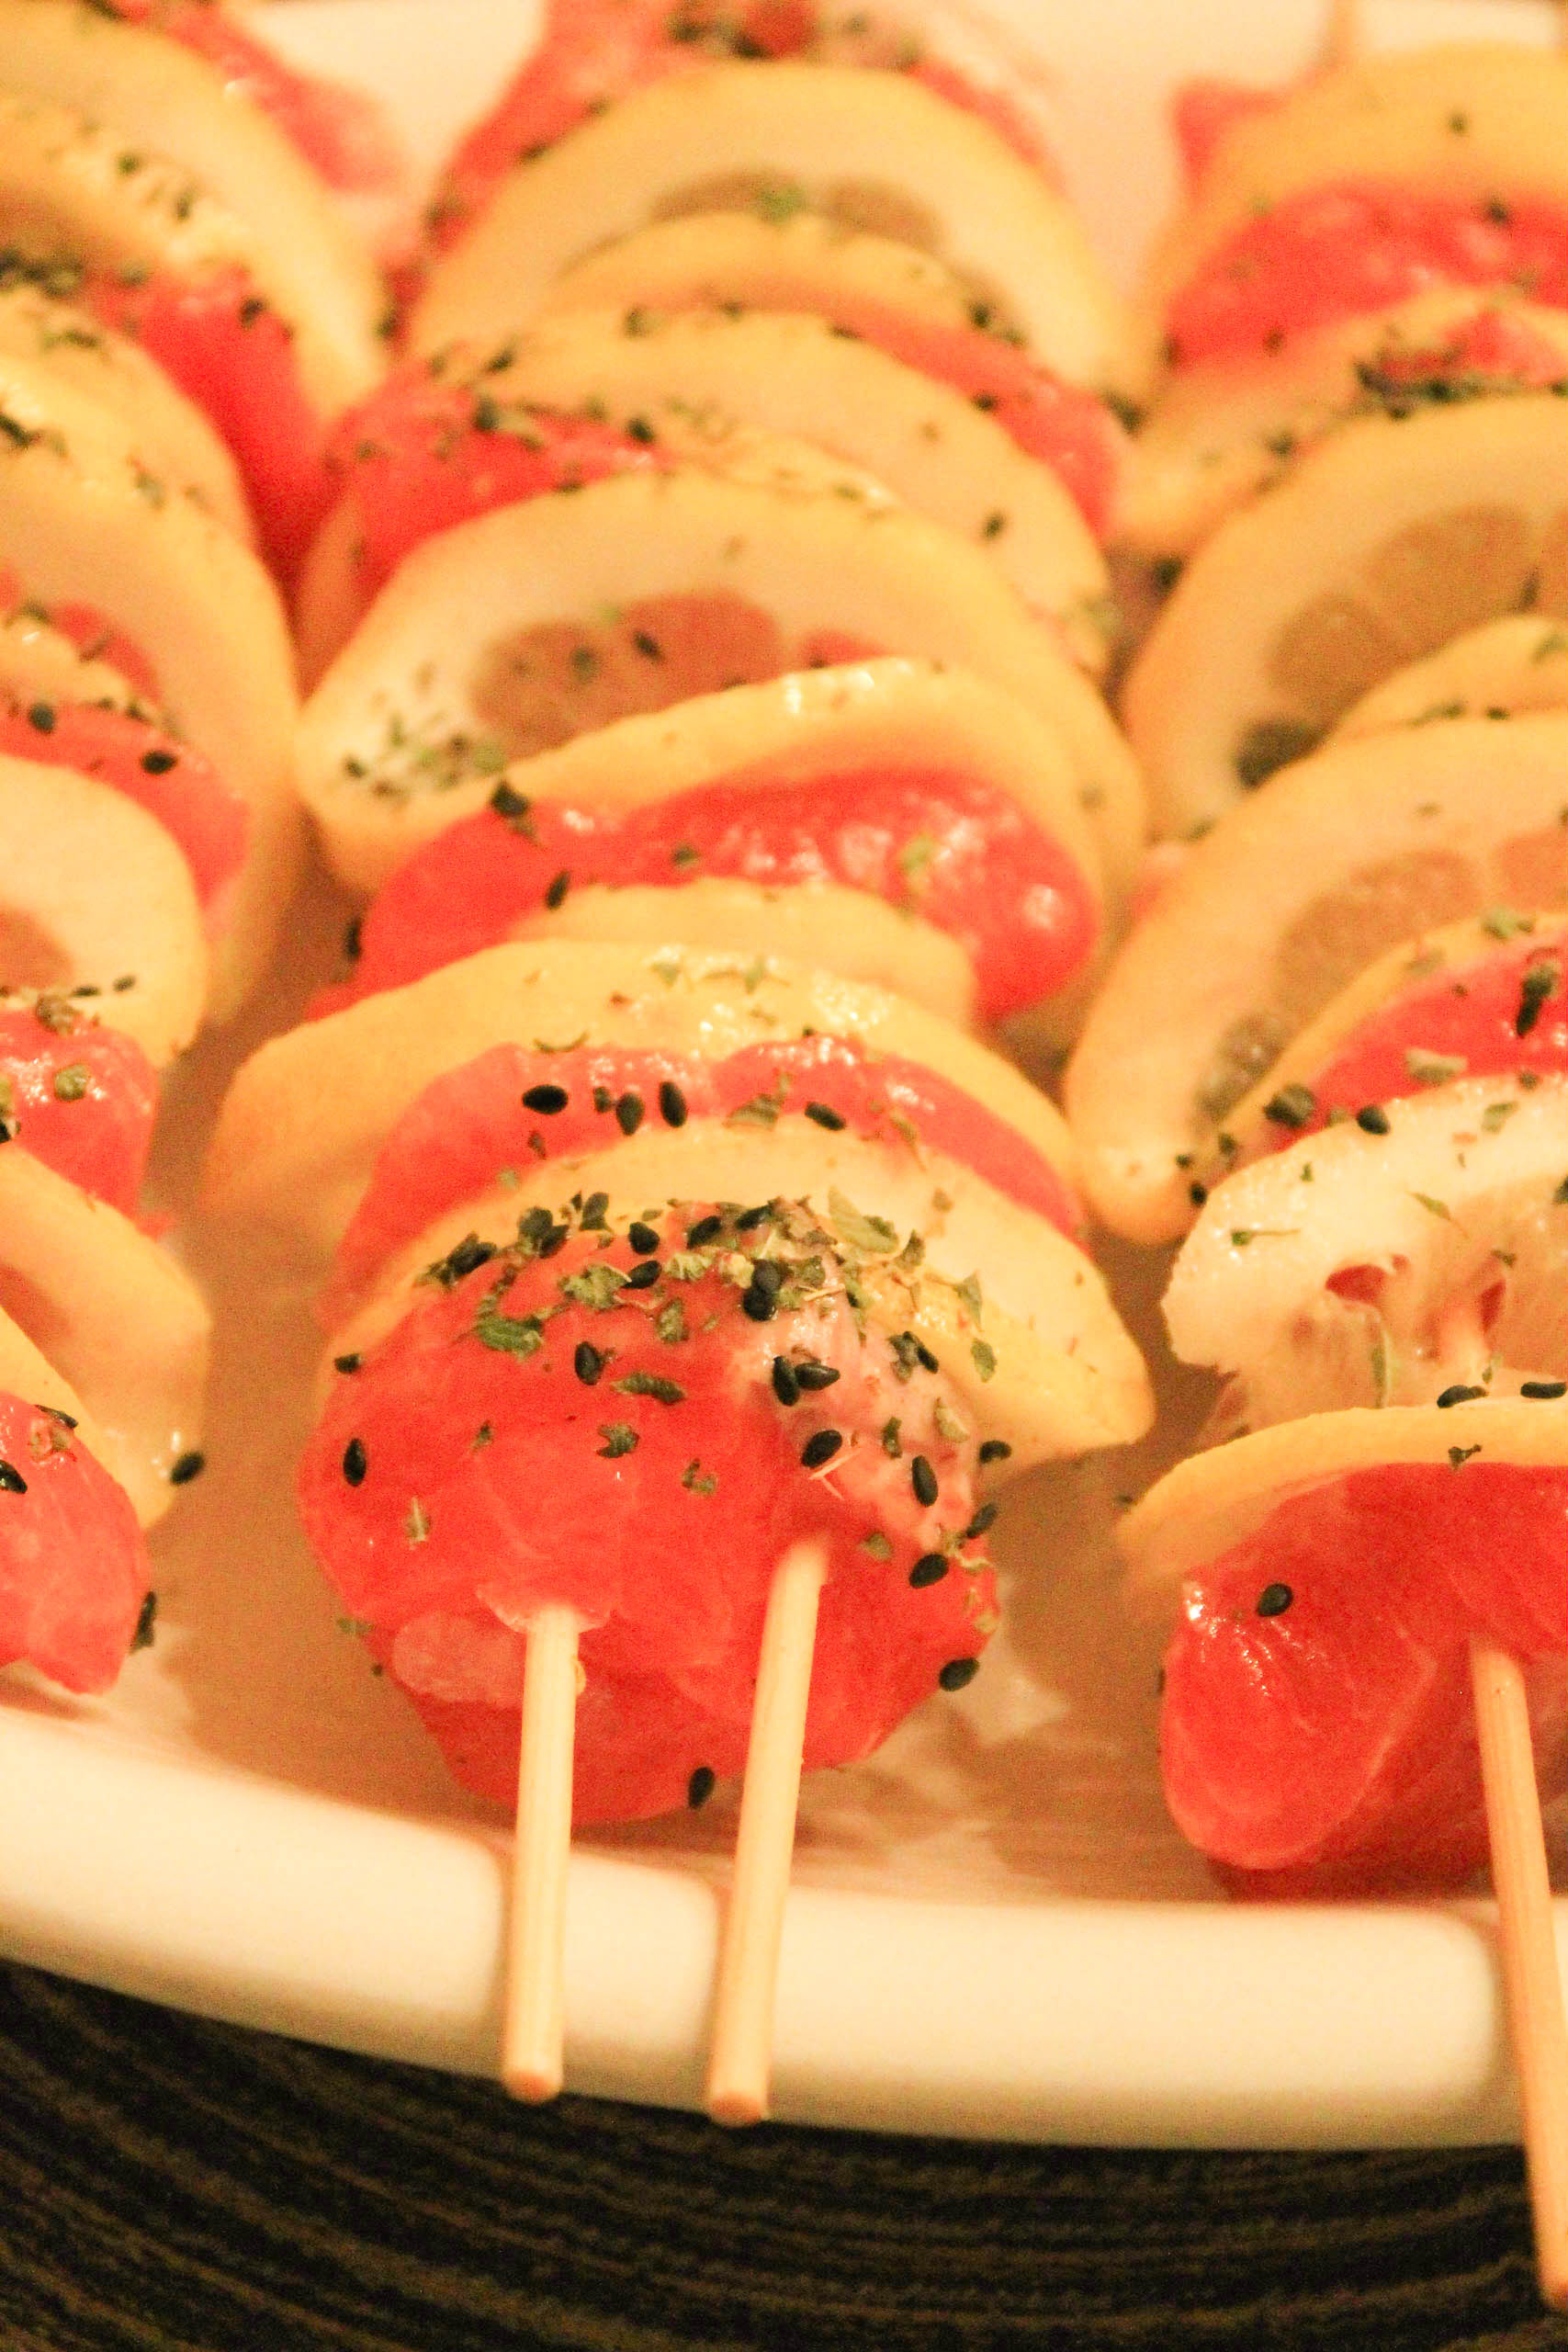
    Once your lemon slices and salmon cubes are cut, you can start to assemble your kebabs. Each kebab will have 6 salmon cubes and 5 lemon slices. Each kebab should start and end with salmon. To assemble the kebabs, hold TWO skewers side by side (a little less than once inch apart) so that they’re parallel to each other. Start by sliding a salmon cube on the skewers followed by a folded lemon slice. Continue until the skewers are full. (The pattern should go a little something like this: salmon, lemon, salmon, lemon, salmon, lemon, salmon, lemon, salmon, lemon, salmon.) As a reminder, each kebab should have 6 pieces of salmon, and 5 slices on lemon, starting and ending with salmon. Once assembled, lay your kebabs on a dish (as pictured below). 

    In a separate bowl, combine 2 Tbs oregano, 2 tsp of sesame seeds, 1 tsp cumin, and 1/4 tsp of crushed red pepper flakes and mix well. Sprinkle the oregano sesame seed mixture across all salmon kebabs and head to the grill! 

    Lemon Salmon Kebabs (2 of 6)

    Heat the grill to medium heat and spay with olive oil cooking spray to prevent kebabs from sticking. When the grill is ready to go, throw on the kebabs! You will cook your kebabs until the salmon is opaque throughout. You will need to turn each kebab occasionally to ensure they cook evenly. Each kebab should take between 8 and 10 minutes to cook, but keep in mind that this time could vary depending on the intensity of your grill. You will know your kebabs are cooked when the salmon turns a light pink color. 

    When they’re done, simply remove them from the grill, lay them on a plate, and serve immediately! 

    Grilled Salmon Kebabs
    Yields 8
    A light and refreshing dish that combines the mouth-watering flavors of grilled salmon and fresh lemon, and can be made in less than 30 minutes.
    Write a review
    Print
    Prep Time
    15 min
    Cook Time
    10 min
    Prep Time
    15 min
    Cook Time
    10 min
    Ingredients
    1. • 2 Tbs oregano
    2. • 1 tsp sesame seeds
    3. • 1 tsp cumin
    4. • 1/4 tsp crushed red pepper flakes
    5. • 2 large lemons, very thinly sliced
    6. • 1 pound skinless salmon fillet, cut into approx. 1 inch cubes
    7. • Olive oil cooking spray
    8. •16 bamboo skewers, soaked in water
    Instructions
    1. • Soak bamboo skewers in water for at least 15 minutes.
    2. • Combine oregano, sesame seeds, cumin, and red pepper flakes in a bowl and set aside.
    3. • With a sharp knife, cut lemon into very thin slices. (Cut the lemon slices horizontally for best result).
    4. • Remove skin from salmon fillets and cut into EQUAL 1 – 1.5 inch cubes. You want all pieces to be similar sizes so they will cook equally. (You can ask the fishmonger behind the counter at the grocery store to do this for you).
    5. • Assemble the skewers by alternating 6 pieces of salmon and 5 lemon slices on two parallel bamboo skewers. Fold lemon slices in half when placing on skewers. You should start and end each skewer with a piece of salmon.
    6. • Lay skewers side by side on dish and sprinkle oregano sesame seed mix equally on each skewer.
    7. • Turn grill to medium heat and spray with cooking spray.
    8. • Grill salmon kebabs for about 8 – 10 minutes, turning occasionally, until fish is opaque throughout.
    9. • Arrange cooked skewers on a plate, serve, and enjoy!
    Notes
    1. If using bamboo skewers soak skewers in water before placing on grill.
    God Save the Quinoa https://www.godsavethequinoa.com/

    I hope everyone enjoys these as much as my family and I did! I’d love to hear what you think! Feel free to comment or message me with any questions or comments! 

    Fabulous recipes by Mandi at godsavethequinoa.com

  • Asian Lettuce Wraps

    Asian Lettuce Wraps

    Asian Lettuce Wraps  Looking for a fresh but spicy dish? Look no further! These Asian Lettuce Wraps do not disappoint! I’ve always been a huge fan of lettuce wraps (especially from Pei Wei) and I’m so excited that I’ve {finally} perfected a lettuce wrap recipe of my very own to share with you! 

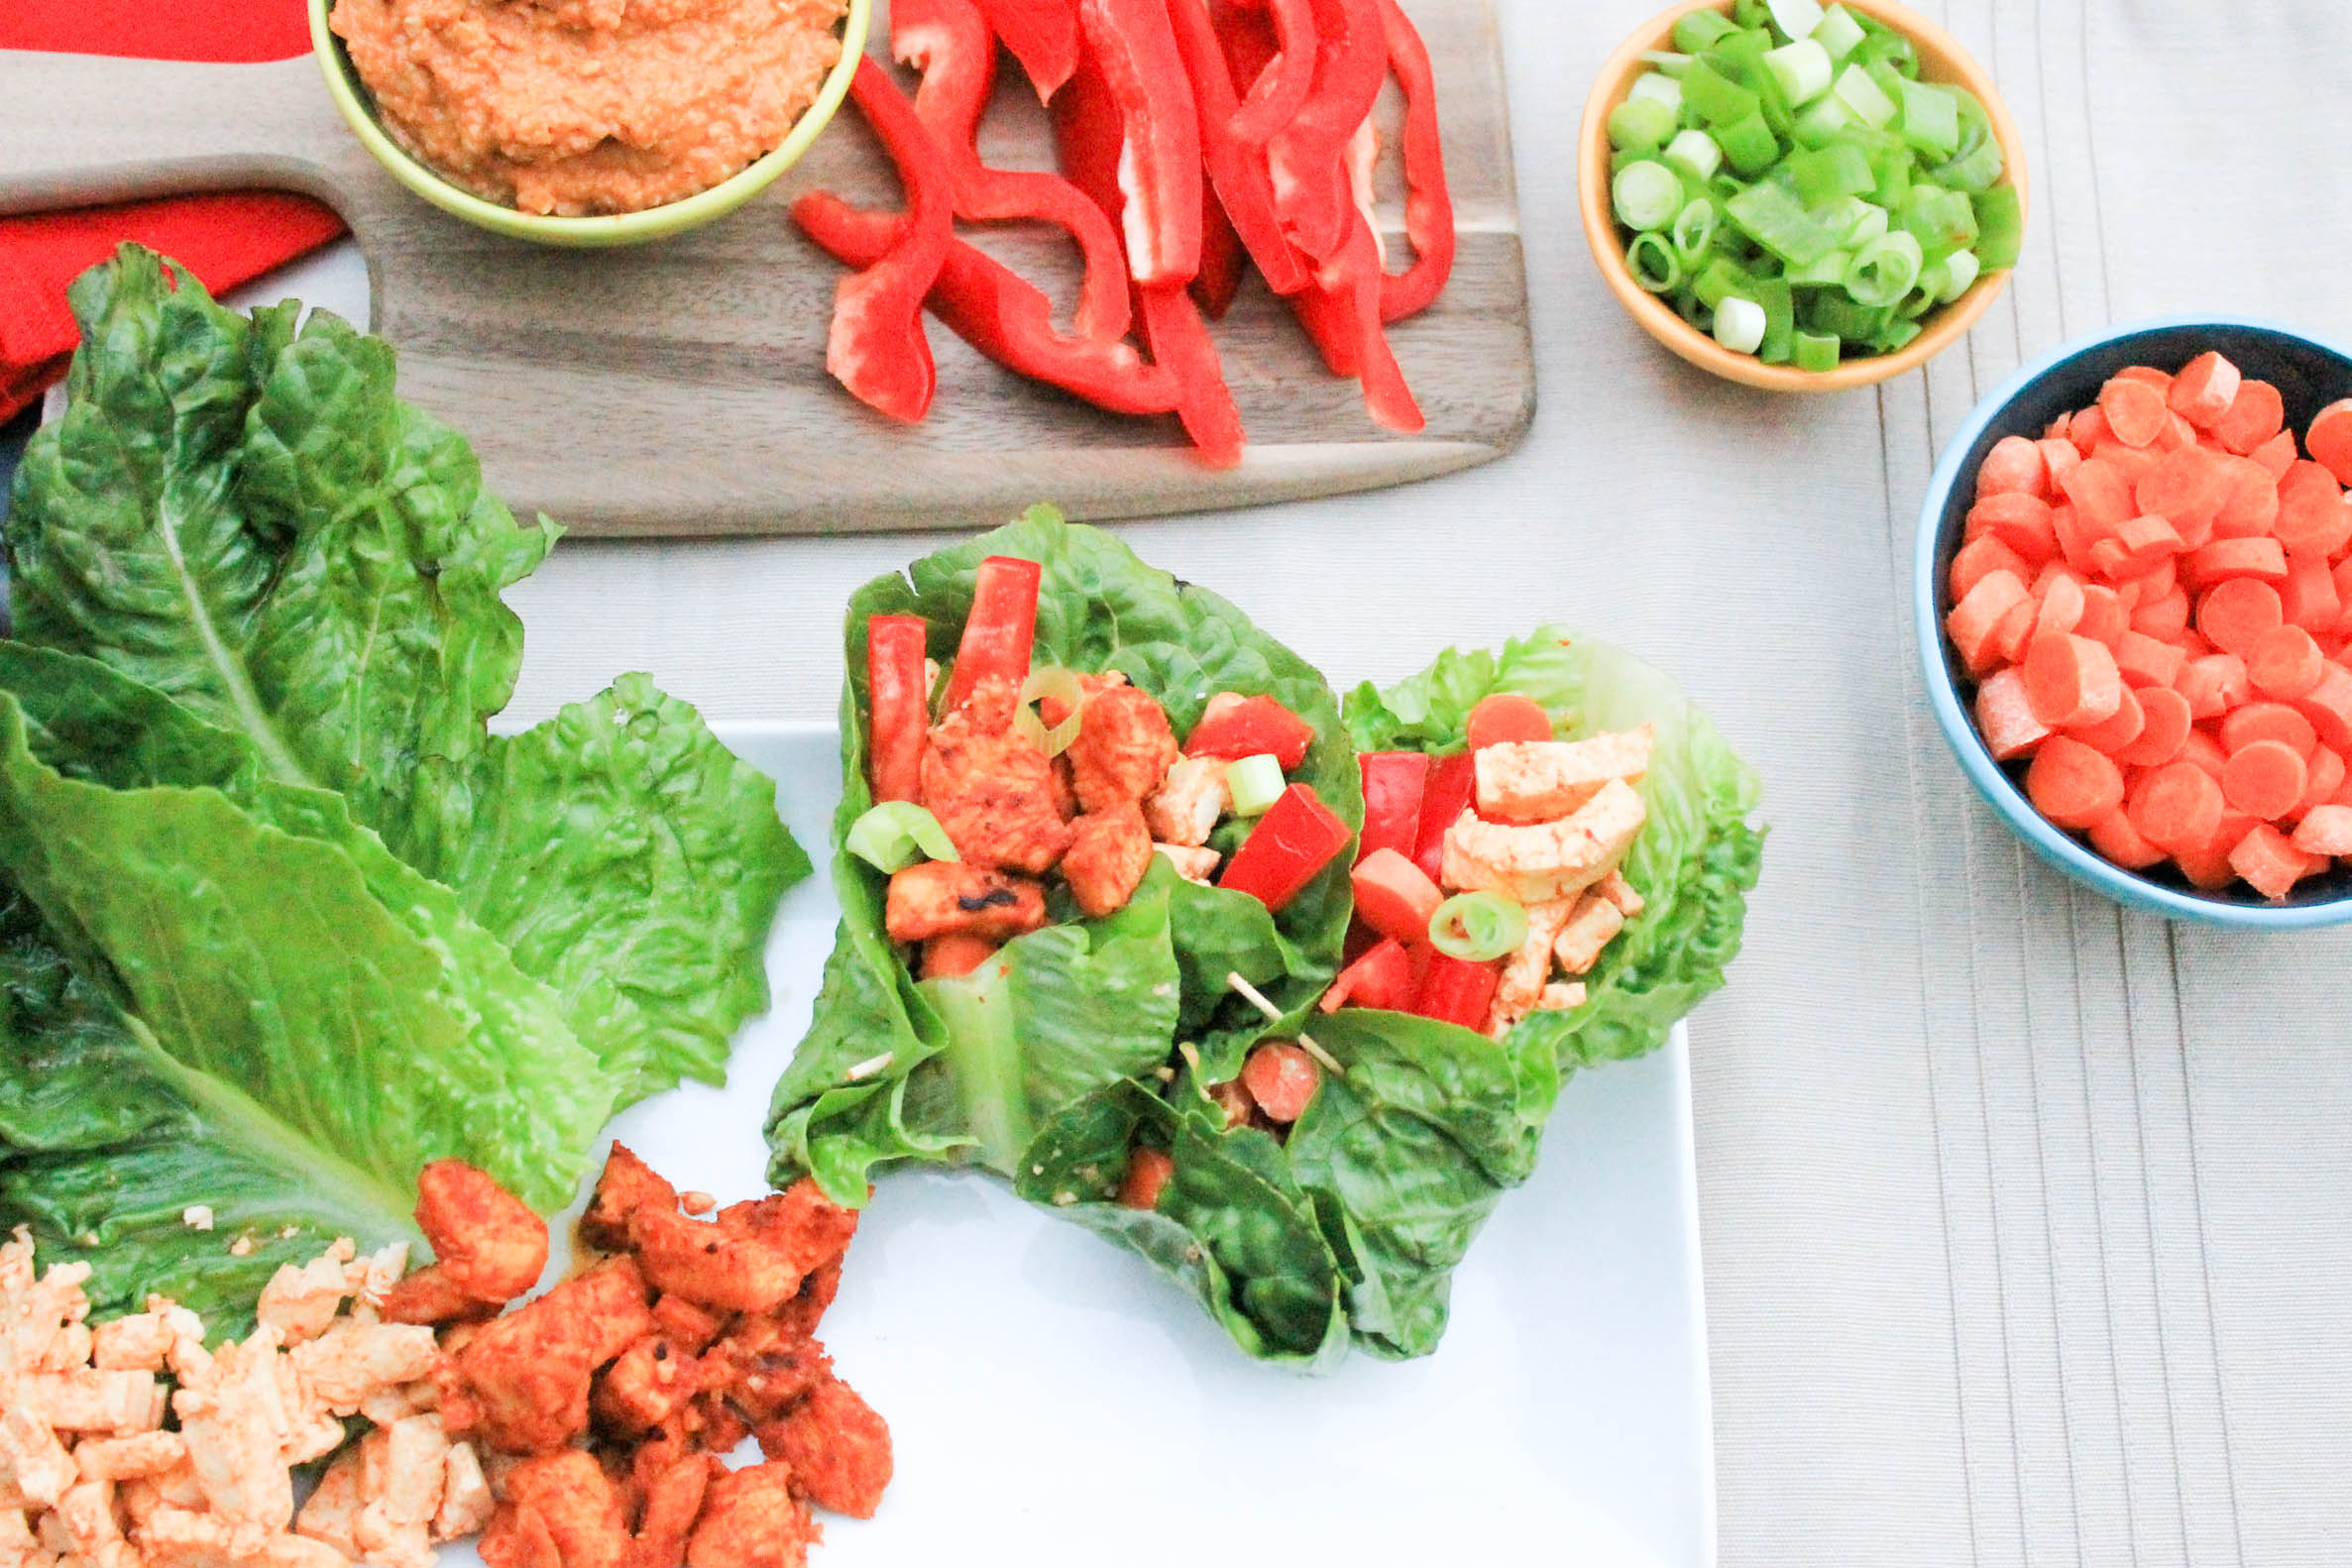
    In this recipe, you’ll have the opportunity to enjoy fresh juicy red bell pepper slices, diced carrots and green onions, spicy marinaded tofu (if you opt for the no-meat option) or chicken, cradled in a cold giant lettuce leaf, topped with creamy cashew peanut sauce. My mouth is watering already! 

    Asian Lettuce Wraps_ God Save the Quinoa (7 of 15)

    You might have noticed above I mentioned you could have tofu OR chicken. That’s right! This recipe can easily be made to satisfy vegetarians and meat eaters!

    If you’re making the vegetarian version use one container of extra firm tofu cubes (drained). This will be enough for 4 servings. (I ALWAYS eat these leftovers for snacks). Be sure to drain the tofu before you marinate it! 

    Asian Lettuce Wrap If you’re making the meat eater version, use a one pound chicken breast for every two servings. (Hence if you want to make all chicken lettuce wraps for four people, I suggest using TWO one pound chicken breasts. But feel free to adjust the serving sizes depending on how hungry you are. 

    Asian Lettuce Wraps_ God Save the Quinoa (10 of 15)

    Let the tofu and chicken marinade in a rice wine vinegar and Sriracha mix for at least 30 minutes, or up to two hours. I’ve done both before and honestly, I don’t think the timing made a huge difference. Make sure you pour enough rice wine vinegar in the marinading meat (or meat substitute) so that the contents are completely submerged. Stir in about 3 tablespoons of Sriracha for a little added kick and let sit. NOTE: If you’re cooking chicken and tofu, be sure to let these marinade in separate bowls. No one wants salmonella from raw chicken. 

    If you’re looking for things to do while the tofu/chicken is marinading, you can get started on prepping the veggies and making the {oh so good} creamy cashew peanut sauce. To prep the veggies simply slice the red bell peppers into long skinny slices, dice the carrots and green onions and set aside. Wash your lettuce leaves and carefully pull them off from the head (SLOWLY so they don’t rip…trust me I know from experience!) dry them with a paper towel and set them aside on a plate. If you’re not sure what type of lettuce to use, let me share a couple options with you. If you want something more crunchy go with iceberg lettuce. If you want something softer and easier to roll (this is what I prefer for this recipe) go with butter leaf lettuce (or Boston Bibb Lettuce). I think the name varies depending on where you live. But, if I’m wrong they look and taste extremely similar to one another! You can’t go wrong with either option! 

    After the veggies are washed and chopped, make the cashew peanut sauce. Yall, I LOVE this sauce. I can {and do} eat it with a fork! Its sooooo good and easy to make! All you have to do is mix raw (unsalted) cashews, a garlic clove, some peanut butter, water, a little bit of rice wine vinegar, and sriracha in a food processor or blender and mix! SO. SIMPLE. 

    Asian Lettuce Wraps_ God Save the Quinoa (1 of 15)

    If you store the cashew peanut sauce in an airtight container like a jar or tupperware, it will keep in the fridge for about 2 weeks! Make extra to have something fun to snack on! 

    Asian Lettuce Wraps_ God Save the Quinoa (3 of 15)

    Okay, by now your tofu/chicken should be done marinating. I’ll start with tofu instructions first! All you have to do is pour the bowl of marinated tofu (INCLUDING the marinade) into a pan on the stove and bring to a boil. When juices start to boil reduce heat and simmer for 2-3 minutes. Your marinade will start to bubble up (almost like if you were to blow bubbles into milk) and this is perfectly fine! It just means you need to give the simmering tofu a quick stir! Pour the majority of the marinade out into the sink and sauté the tofu until it turns golden brown and set aside. 

    Asian Lettuce Wraps_ God Save the Quinoa (6 of 15)

    To make the chicken, similar to the tofu (and you can use the same pan but ONLY if you cook the tofu first) pour the chicken AND marinade into the pan on high heat. Sauté chicken stirring constantly. Something cool is about to happen. The marinade will turn thick and sticky, taking on the appearance of a teriyaki like sauce. Just FYI I discovered this by accident and Greg said it was “really really good” so blame him if you don’t like it since I’ve never tasted it! If anyone knows why this happens when you cook rice wine vinegar, Sriracha, and chicken let me know! I’ve tried googling it and couldn’t find any explanations! Continue stirring the chicken on medium to high heat until all of the marinade has thickened and chicken is cooked all the way through. 

    Asian Lettuce Wraps_ God Save the Quinoa (15 of 15)

    You’re done! All you have left to do is assemble the lettuce wraps! Do this by placing the bell peppers, carrots, green onions, tofu or chicken, and cashew peanut sauce in a lettuce leaf and wrap it like a burrito (use a toothpick to keep the wraps together if they’re not cooperating) and enjoy! 

    Asian Lettuce Wraps
    Serves 4
    A refreshing combination of veggies, with your choice of chicken or tofu, topped with a healthy and creamy cashew peanut sauce.
    Write a review
    Print
    Prep Time
    40 min
    Cook Time
    10 min
    Total Time
    50 min
    Prep Time
    40 min
    Cook Time
    10 min
    Total Time
    50 min
    Ingredients
    1. • 1 container of extra firm tofu, cubed (no meat option)
    2. • 1 lb. chicken breast (2 servings of meat option)
    3. • 2 cups + 1 Tbs Rice Wine vinegar
    4. • 3 + 4 Tbs Sriracha
    5. • 6-8 large lettuce leaves (big enough for wrapping)
    6. • 1 red bell pepper
    7. • 1 cup diced carrots
    8. • 6 green onions, diced
    9. • 1 cup raw cashews
    10. • 1 Tbs creamy peanut butter
    11. • 1 garlic clove
    12. • 1/2 cup water
    Instructions
    1. • Place tofu or chicken cubes in a bowl of rice wine vinegar (enough so tofu or chicken is fully submerged) with 3 Tbs of Sriracha mixed in. Let marinade for at least 30 minutes.
    2. NOTE: If cooking tofu AND chicken, marinade separately to avoid cross contamination.
    3. • While meat is marinating, cut red bell pepper into long slices and dice carrots and green onions and set aside.
    4. • Make cashew peanut sauce by placing raw (unsalted) cashews, peanut butter, garlic clove, 1/2 cup water, 1 Tbs rice wine vinegar, and 4 Tbs Sriracha in a food processor or blender. Mix until creamy and smooth and set aside.
    5. • To cook TOFU- place tofu and marinade in sauce pan on stove and bring to a boil. When marinade starts to boil reduce heat and let simmer for 2-3 minutes, stirring occasionally. After 2-3 minutes, pour out majority of marinade and sauté on high heat. Remove when tofu starts to brown.
    6. • To cook CHICKEN- place chicken and marinade in pan on stove on high heat. When marinade starts to boil stir chicken. Continue to stir chicken until marinade becomes sticky, completely coating the chicken. Continue doing this until marinade has thickened and chicken is cooked.
    7. • Place cooked tofu or chicken in large lettuce leaf with bell peppers, carrots, green onions, and top with cashew peanut sauce. Enjoy!
    Notes
    1. • Store cashew peanut sauce in separate airtight container and place in refrigerator. Enjoy for up to two weeks.
    2. • Store lettuce wrap ingredients in airtight container in fridge for up to 5 days.
    God Save the Quinoa https://www.godsavethequinoa.com/
    Let me know what you think! 

    Fabulous recipes by Mandi at godsavethequinoa.com